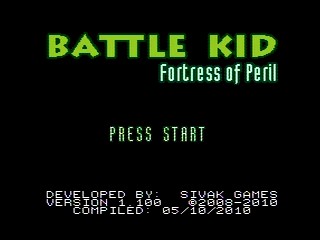
Released by Sivak Games in 2010, Battle Kid: Fortress of Peril was designed in the modern age to run on the old NES hardware. The graphics and sounds aren't the only throwbacks, however, the game also brings that classic 8-bit difficulty. Players traverse an open world in a Metroidvania style, finding power ups, fighting bosses, and dealing with obstacles that'll have you throwing your controller at the wall like it was 1985.

Best time on Unfair difficulty: Single-segment 0:45:07 by 'Airrider' on 2013-08-31.
Get Flash to see this player.
Author's comments:
Hello there. I'm Nils "Airrider" Jutblad, and this is my speedrun. If you are watching this, then thank you, I appreciate it. Also, I would like to give some special thanks to: everyone.
This run is played on Unfair mode, meaning that if you get hit once it's game over. When recording this the goal was pretty much to beat the game without dying while keeping a pace that I wouldn't be ashamed of, which I believe took me 43 tries. So if I was able to count correctly, you're watching the 43rd attempt. Except for not dying I think that it all went pretty good. There's a bunch of small mistakes here and there, and there's quite a few faster room strats. But i'm satisfied overall.
Thoughts on my run:
The beginning: The part from the beginning to the first boss was solid. I messed up two eye guy quick-kills and a few other small things, but it was good overall. The boss went very well also.
Skybase: This was good. There's no notable mistakes really, and the boss fight was fast. I'm satisfied.
From the second boss to the Colormancer Corridors:
First of, The Room of Death a.k.a the room where all you have to do is to make a little jump. It's always disrespectful to die there, and luckily I didn't. This area also went quite well, but there's a certain strat that I want to tell you about that I didn't use. In the second room efter the save, with a green goblin guy and two fire cannons, you can actually just run through without killing the green guy. It's quite precise though. Anyhow, everything here went as I planned it, but there's always time to save if you take some risks (or just play better). The reason why I go into the portal room is because doing so activates the portal which I need in order to warp back later.
The Colormancer Corridors:
This area is bad for speedrunning. I love the design of it, but the spike rooms can't really be cleared faster than they're meant to be (though TAS does skip a few safe spots). There is quite a lot of other places where you can save time in this area, but it all comes with risk of course. The boss RNG was decent. I believe that the red, yellow, and purple attacks are the best ones to get. Pink is horrible unless you're a computer and run beneath the pink orbs while shooting. Blue is decent and green can be good if you run towards her and shoot, but since I always stay close and spam shots I just run away if I get green.
The Water Temple:
This was pretty good. Not perfect, but still good. In the first frog room you can just run straight through and shoot, and in the room after that you can get over the pit slightly faster by immideately following the spike crusher and jumping on the pillar to the right before it returns etc. The strats are many.
The Subterranean Sea:
Congratulations Sivak, you made a fun water area! Not too much to complain about here. The boss fight was ok. The Seahorse Turrets are random to a certain degree, so I can't always know which one is going to shoot and when. Onto my favorite area.
The Amethyst Caves:
Beatiful, isn't it? This area went ok. I unfortunately used safe-strats in some rooms, so there's quite a lot time to save here if you're brave. The boss RNG wasn't great, but it didn't waste too much time.
The Final Area:
I didn't die. YES. I want to highlight the Infinite Oxygen-skip which is the first thing that I do after losing my inventory. If you go fast enough you can skip the Infinite Oxygen-item, but it's not easy. Jumping over the three disappearing blocks is the hardest part of the run in my opinion. When I die in this game it's very often because of things that I don't expect to kill me, but this is just plain hard. When getting the double jump back there's a room with two razor drones and a sniper snail. You actually don't have to kill the snail, but I didn't want to risk it this close to the end.
Zedd and The Supermech:
I couldn't have asked for a better Zedd fight. The RNG was very good. You want to get the attack with the two orbs going up and down, and I got it all the time. The Supermech fight went alright, but I was pretty close to dying just at the beginning of the fight. I just barely managed to escape a facepalm that could have been lethal.
And so I defeated the tyrant supermech and lived happily ever after, maybe.
And that's it!
If you have any questions you can ask them via my SDA account (Airrider) or my Youtube account (iNils1).
Have a good day/night.
-Nils "Airrider" Jutblad