![]()
![]()
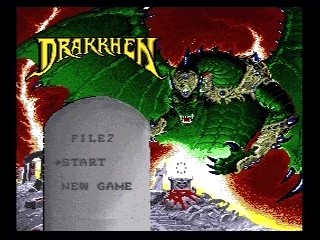
Released in 1991 by Kemco-Seika (originally developed for the Amiga in 1989 by Infogrames), Drakkhen is a 3D RPG where you take control of a party of four customisable characters as you attempt to prevent the destruction of the World of Man by a bunch of pissed off dragons, a monster made of stars and a giant black robot that shows up and breaks all your armour and leaves with battle music that sounds exactly like someone smashing frying pans together.
Best time: 0:34:32 by Damien 'Dragondarch' Moody on 2013-05-11.
Get Flash to see this player.
Author's comments:
Drakkhen. God, what is there to say about this game? It's terrible? Not worth playing? Should be set on fire instead of desecrating SNES with it? All of these would be correct. So why did I run this? Personally, I'm gonna go with brain damage. All of you, however, should just go with the fact that now no one will ever have to do a run of this. So in a way, I've done a public service by running this.
There's a number of glitches in this game, but only 2 are really of any use for a speedrun:
Infinite Experience
Some rooms in the game grant the active character experience when they enter the room. In most room this will only happen once. In some rooms it will give the Experience every time you enter the room.
In one room in Drawbridge Castle, the game forgets to check to see if it gave out the Experience, and continuously gives it out so long as you stay in the room. At a rate of 40 XP per frame. You can see where this is going.
Avoiding Damage by Standing Still
This is most useful against bosses with ranged attacks. If you stand perfectly still in certain parts of the room, the boss can't hit you, period. Not all locations are safe, but the very bottom of the room is usually safe outside of a very few spots. The best spot I've found is the bottom of the screen, and a bit to the left of the boss. I've never been hit standing there.
Now for the run itself:
Character Creation
I want high Coin on the Fighter and Scout, since I do need money early on.
I want high Agility, Knowledge, and Fortune on the Priestess. Agility (we think) affects physical accuracy/evasion. Knowledge supposedly affect spellcasting. Fortune is probably another word for Luck. It may affect drop rates, evasion, critical hit chance...or may be completely unused. Hell, there's no proof that any stat has any effect on anything really.
I want high Agility and Fortune on the Magician, since I don't care about her spellcasting.
The Run
I start off by immediately drowning both the Fighter and Scout. Neither of them are useful for a speedrun, and keeping them alive causes lag in both battles and castles.
On the way to/from East Bumfuck, I fight a number of battles. The Magician needs to hit level 2 to learn Unlock, and I need money to buy a few things from the merchant. I only bother with Spiders and Gold Dragons, since their drops are the most valuable. Spiders can drop any Ring along with Empty Phial/Key/Torch, and Gold Dragons can drop a whole slew of weapons/armor, along with any Staff along with Empty Phial/Key/Torch. Most Staves/Rings sell for at least 6,000, with some selling for as high as 12,500. I need 53,000 total by the time I reach Moat Shark Castle for the second time - 8,000 for a Bow & Arrow, 35,000 for a Thiefi's Staff, and 10,000 for a stack of MP Phials.
I get lucky on the way back, and Wandering Merchant shows up with a Bow & Arrow in stock, so I grab that off of him. I didn't sell anything off here since I know I didn't have enough money for everything else I needed.
The Merchant at the Hidden Tavern had Thiefi's Staff on the first visit, which is pretty rare. Thiefi's Staff works exactly like the Unlock spell, except that you don't waste time casting the spell itself.
At Drawbridge Castle, I need the Magician to cast Unlock since the Drawbridge is the only lock in the game that Thiefi's Staff can't unlock. Having Thiefi's Staff here also allows me to leave the Magician at the entrance instead of dragging her through the castle with me, which reduces lag a bit.
I wait in the XP glitch room for 25 seconds, which gives me enough experience to reach level 10. The Priestess needs to learn 2 important spells: Speed at level 6 and Anti-Matter at level 10.
I wait to gain the actual levels until I'm on my way to NE Ice Castle, since I want game time moving as much as possible. I use the Bow & Arrow for safety, since almost everything in this area of the game can OHKO my Priestess at her low level and terrible equipment. I control the Magician and let the priestess auto-fire the Bow since there's some pretty fantastic programming that prevents the Bow's ranged attack from hitting unless there's someone melee capable at least somewhat near the enemy. The Magician almost dies, but that's pretty common.
In Locked Doors Castle, the Thiefi's Staff saves a significant amount of time, since there's a large number of locked doors (and honestly, it seems random too...some doors don't always seem to be locked every time).
There's nothing interesting from here until the First Boss back in Moat Shark Castle. For the boss, I stand in a safe spot and cast Anti-Matter without any risk of dying. Anti-Matter is an instant death spell, that works on bosses for some reason (with a low hit rate). I also use position buffering here - I get about halfway across the boss room and switch active characters before he becomes active. By doing this, I reset the room, and allow my Priestess enough time to get into position before the fight starts. I end up using 2 MP Phials here, which is pretty good luck. This boss is actually one of the harder ones to hit.
There's a bit of backtracking after this, then the run to Dawn Castle. Dawn Castle got it's name for a reason: The front door is only open at Dawn. This is why I wanted the game time moving so much. I tried TASing this to see if it was possible to reach Dawn Castle by first dawn, but deemed it impossible for a single segment run. In this run, I still had to wait for 3 minutes for the door to open, which means I had extremely good encounter luck up to this point. Had I done all my leveling inside castles, it would have added another minute or so to the wait here. Fortunately, being stuck waiting for this door to open means that encounter luck can be awful and I still won't really lose any time.
After this point, getting into random encounters actually has a significant impact on my time. Every encounter is at least 4-5 seconds, more if it's a constellation monster ripoff, and 10+ seconds if it happens to be one of the huge Dragons. Fortunately, none of the massive time-wasting encounters happened in this run.
Back at Locked Doors Castle, I face off with the second boss. I use position buffering again to get the Priestess into the correct spot, then go to town with Anti-Matter. This boss casts a Paralysis spell, which isn't deadly, but freezes my character for a long period of time. Also note that only one projectile can be on screen at a time, so it's a matter of luck on whether the boss gets to cast or my Priestess does. This boss went down in 1 MP Phial, which is average. This one is actually the easiest to hit out of the four.
Drawbridge Castle is where the third boss is. I don't need position buffering here since the boss won't attack until after you talk to him. I stand in the same spot I do for the second boss, and once again unleash with Anti-Matter. I needed 3 MP Phials here, which is actually good luck since this boss is by far the hardest to hit.
The Final Castle is back down in the desert, in the opposite corner as Dawn Castle. I had the worst RNG-based time loss right after leaving Drawbridge Castle - 6 back to back encounters. This easily cost me at least 20 seconds. Given the luck over the rest of the run, I'm willing to overlook this one spot of bad luck. I get into one last encounter just outside Final Castle (the only encounter I get in the desert at all).
The Final Castle is a bit of a pain to navigate. It has quite a few locked doors, and one room with a Magi-Dragon in it that I have to position buffer to get past safely. This is the only boss that I don't have to worry about positioning that much, since he only has melee attacks, and will never leave his chair. Lazy Bastard. All I need to do is stay out of melee range and I'm safe. I stand directly under him so Anti-Matter will have a minimal distance to travel. I used my last MP Phial here, which is pretty good luck since this boss is pretty random on how many casts it takes to hit him. I also lucked out on when it connected, since if I'd had to cast Anti-Matter twice more, I wouldn't have had enough MP to recast Speed after killing him, which would have forced me to wait for my MP to refill on it's own.
I got into one last encounter before standing on the Rainbow Triangles of Acid Trip, which cost a few seconds. I was yelling at the game, but thankfully none of you viewers have to listen to that.
Overall, this run had the best luck I've ever gotten. There were a couple spots where it didn't cooperate, but overall it was extremely good and I'm pleased with the outcome. I think the only way this time will be improved is with absolute god luck. And no, I'm not going to try for it. I'm already sick of running this game.
I want to give shoutouts to PJ for introducing me to this game, and also having enough sense to not seriously run it himself. I think he made the smarter choice.
Also, shoutouts to the whole SDA crew for being willing to host this atrocity, along with all my other runs.
Lastly, thanks to the dedicated stream viewers who actually sat there and watched me grind out attempts on this. I have no idea how this game could even be remotely interesting to watch given that I wasn't showing off glitches or anything, and I don't think I had the best commentary. But you guys probably made this run possible since I'm pretty sure I would have gone insane if I didn't have anyone to interact with.
HAK HAK DRAKKHEN!!