![]()
![]()
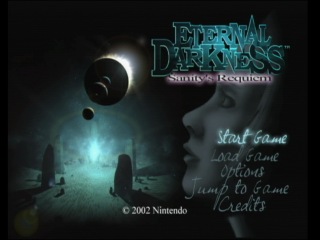
After four years in the making, this very-hyped Survival Horror game for the Gamecube was finally released in June of 2002. Take the role of Alexandra Roivas as she investigates the events surrounding the death of her grandfather, Edward Roivas. When she finds 'The Tome of Eternal Darkness', you take the role of many characters in the past. They all play a part in a 2025 year old plot by entities known as 'The Ancients' to take over the world.
Best time: 2:08:43 by Devin 'Uilnslcoap' Smither on 2011-08-31, done in 16 segments.
Get Flash to see this player.
Author's comments:
First of all, I'd like to give a shout-out to Mad Andy (whose run preceded mine on SDA) and spiralout1123211 (who had some innovative practice runs and a great first-three-chapters segment on YouTube), who both had amazing ideas that I stole from liberally. Spiralout's practice runs really inspired me to do a better job than I thought I could at first when I saw how he took the old SDA run apart without even trying very hard.
Secondly, thank you to the people who make SDA work. You are doing a great service for many of us who just love these runs. Thanks especially to nate for encoding the run and dealing with my noob questions and to Flip for helping to steer me through the verification process...and dealing with more of my noob questions, heh.
Thirdly, I'd like to say that aspects of this run are imperfect, particularly my performance in the menus could be much better (I practiced, but I am still pretty crap at the menu stuff). Hopefully someone else will pick up where I left off.
Fourthly, I'd like to apologize for the wordiness of my comments and for how much I use parentheses...but what the heck, you don't *have* to read my comments, after all. I'll "talk" all night and day if I want, and a verbose game deserves verbose commentary. :P
Fifthly, thank you to anyone who watched, encouraged, and offered criticism as I posted segments in the forum. DK28 and UCpro were especially encouraging.
Please skip to the first set of asterisks below if you don't want to read the purely personal stuff and get to more gameplay-oriented comments.
My name is Devin Smither; I'm 30 years old, I have a wife and a baby boy, and I've worked for seven years as a videogame tester (at Rockstar Games NYC and at Microsoft), many of those years devoted to being the "rabbit" who finishes the game we're working on as quickly as possible (to make sure nothing is obviously broken, particularly near the end of the development cycle). I have quite enjoyed my time in the industry. If nothing else, it has given me a lot of experience with games (though I wasn't exactly lacking in that department before I became a professional) to help work on this run.
I do not think I'm as good as many of the runners here on SDA, but there isn't a long queue lining up to do an Eternal Darkness run, perhaps because a) some aspects of running it are a pain and not really exciting and b) because the game is not nearly as popular as it should be. I'd say it's got the highest "quality level to number of fans" ratio of any game in my experience. It's not so much that I thought running it would be fun (I found the actual running pretty stressful, though I did find the research really fun) as that I NEEDED to see a very good run of this game, and that run was not out there...so I had to do it. It can still be improved (I've put a list near the end of this commentary of things I know I would change or research if I run it again), and there are (to my eye) a lot of mistakes and some occasional bad planning, but I've at least set a new bar for the next player who wants to tackle this game (even if that player turns out to be me later).
I'm a fan of the action-adventure/platformer genre of games, mainly. Flinging my character around the environment jumping like a freak while solving some puzzles is pretty much my idea of gaming nirvana...so naturally I decided to run the only game in my personal top 10 where the player character(s) can't jump. Still, at least the puzzle-solving aspect is alive and well. Sorting out how to do everything as quickly as possible given the spell system and inventory and such in this game was a great challenge.
Eternal Darkness is my third-favorite game—behind #1 Portal and #2 Banjo-Kazooie and just ahead of #4 Prince of Persia: The Sands of Time and #5 Donkey Kong Country 2...other favorites include Portal 2, the Mario series (particularly SMB3, World, and Galaxy), the Zelda series (particularly Wind Waker), the Metroid series (particularly the first Prime and Super), Mega Man 2, Conker's Bad Fur Day, the God of War series (particularly the first one), the Half-Life series, Ico, Shadow of the Colossus, the first Jak and Daxter, Sphinx and the Cursed Mummy, Contra III, MediEvil, Castlevania: Symphony of the Night, Dead Space, Super Punch-Out!!, the Rock Band/Guitar Hero series(es), and Burnout 3. ED is the only game on that list where I viewed a speed run of it on SDA and KNEW I could do better (much better, frankly).
ED is the only game I REALLY like that I'd classify as essentially an adventure game ('cause let's face it, the action in this action-adventure is a bit limited/clunky and strictly avoided if possible in this run--although I must say I still enjoy the visceral fun of chopping off those zombie body parts or blowing their unholy asses away with a 7-point enchanted shotgun).
The story and writing of ED is absolutely fantastic for a videogame (pretty damn good for a movie or a book, even if some aspects of it don't stand up to scrutiny), as is the voice-acting. What I really love is how well it slowly feeds you information on both spell-usage (without the feeling that your hand is being held the entire time) and the overall arc of the story (you have to connect the dots, it isn't all spelled out the first time through) so that you're constantly moving from helpless and clueless to powerful and enlightened (at least after chapter 4 or so). It doesn't explain itself much even through the first several chapters of reading the Tome, but as it goes on, the story comes together in a very satisfying way that is unique in my experience—this feeling of subtlety and growth in the story is UNBELIEVABLY rare, particularly in action-adventure games. The feeling that the characters' cumulative struggles and contributions add up to something...most of the characters are killed along the way and you actually CARE (mostly anyway--Ellia can suck it)...it is my favorite videogame story of all time (though Portal gives it a run for its money). Over the past couple years, though, I haven't paid attention to the story, and the gameplay alone still draws me in every time.
I wanted to do a run with fewer segments than I ended up with (16), but because longer segments require more attempts and time and I have a lot of outside commitments (wife & baby, school, job), I went with more segments than ideal (I especially disliked making the 5-point and 7-point spell creations into their own segments, but it was necessary to complete the run). I hope someday somebody will do a single-segment run of this game, as it would a) eliminate almost all loading screens (which all count on the in-game timer) and b) be totally awesome. If it doesn't happen in the meantime, maybe you can expect something in that realm from me...several years from now when my kid(s) is (are) older and my career path is settled (and when I don't want to puke at the thought of running this game further). :P I mean, it was about a seven-year wait between SDA updates on this game, so you must know patience by now if you are a fan of runs of this game.
****************Below here begins the non-personal commentary***************
Compared to the previous SDA run, the most obvious innovation is the use of the Pool spell (spell 11) with the Chattur'gha alignment to allow for infinite sprint (as long as the spell lasts). I didn't know about this till 2010 (I learned it on GameFAQs' forums, which just goes to show you can find something useful even in a big pile of waste), and I've owned the game since it came out in 2002! The spell pays immediate dividends once you collect the last non-Pargon rune ("Tier" aka "Summon") as Lindsey. Nearly every character from Chapter 6 on uses it at least once (the awesomely-conditioned Michael is the exception) and for Paul, Edward, and Alex, it's amazingly helpful. It's also great for laughing in the face of monsters that are draining your health when all your sanity is gone.
Burning zombies is a big help as well (Mad Andy didn't seem to realize you could burn the green zombies) when you need to kill them, usually to get a rune out of them fast (one of several reasons the Xel'lotath path is the best choice for a speed run).
I also think there are serious route improvements over Mad Andy's run (Chapter 6 with Lindsey might be the best example).
I hope the "The Darkness Comes..." loading screens at the start of each segment (and at the start of the game...and in segment 12 at the end of Peter's chapter...and in segment 16 during the cutscene barrage before the final fight) don't end up being counted in SDA's official time for the run, as these add up to probably about two minutes (more or less) of the time in the run. Also, hopefully time starts from initial character control and not with the initial cutscene and loading screen up till Alex's nightmare. I think given the way Mad Andy's run was timed, these things will not be counted in the run's time and it will be considered shorter than what the in-game timer would have you believe. I'm eager to find out what the official word is on this.
What is most aggravating about running Eternal Darkness (for me) is all of the pause menu interaction (inventory, magic, and saving). You have to create every spell on your own (because you'd waste time grabbing rune tablets and spell scrolls), you have to account for where in the inventory the item you need is based on what you've most recently collected, and you have to account for which menu (inventory or magic?) you most recently interacted with every time you pause so you don't accidentally start casting a spell when you want to use an item or vice-versa. It's a bit of a headache and every second spent anywhere in the pause menu counts on the timer (which gives a segmented run the added penalty of the time it takes to enter the pause menu and save for the end of a segment on top of the loading screen time at the start of a segment). This makes saving, inventory interaction, spell-creation, spell-assigning, and spell-casting pretty stressful, though I've memorized the layout of the runes and spells really well by now. I'm just not good at it, though I've had a lot of practice.
The second-most aggravating thing about running Eternal Darkness is its "Examine-Detail-Press A to choose yes" system of interaction with objects. Memorizing whether to press "B-B-A-B" or "B-A-B" or "B-B-scroll-A-B" or "B-B-A" to interact with an object is super not-fun (much more fun in a normal playthrough since all the views and descriptions of things are really cool).
I also don't like having to memorize which direction to push the thumbstick in after entering each new room/area, but that's a pretty minor inconvenience, comparatively.
Control is sometimes an issue, too. Characters don't really do a good 180 in this game (especially with camera position changes or moving from a standstill), so quick turns are sometimes annoying or impossible to pull off. I do like the camera system here...one that God of War perfected a few years later and Resident Evil sorta pioneered: give the player no control. This method can be used nicely for suspense (what's just off screen?) and alternately, a good view of the action (I enjoy the often-cinematic view of the camera in Karim's battle after collecting the Ram Dao, for instance), but oft times it is imperfect in Eternal Darkness, and makes getting around the furniture a little annoying, you know? Paul's chapter highlights (lowlights?) this issue, I think.
ED is an interesting game in that, in many cases, you won't get the same behavior or positioning from enemies every time you play. Sometimes two differently-aligned horrors fighting each other will go on doing that for a while, and sometimes one will instantly kill the other...or trappers will move around differently from playthrough to playthrough, etc. Can be annoying for trying to maintain sanity or not get trappered.
With regard to collecting objects: often when you're grabbing an item, the camera will do a slow zoom into a close-up of the item followed by a B button prompt, which you can dismiss allowing you to continue. HOWEVER, this slow camera zoom can often be turned into an instantaneous cut to the close-up of the item by positioning the player character appropriately, saving a second or two every time. I learned this from spiralout very early on, necessitating a re-do of the first chapter (which has four such "zoom or cut" objects). Some zooms are unavoidable, though.
Regarding saving: whichever slot you saved to last is the selection that will be highlighted when you jump to the save screen next time you save (no matter the save you loaded from). So I make a dummy save before actually recording runs of a segment and use that slot so I don't have to scroll over upon saving (since I don't want to save over my last good, recorded segment).
With Karim's rune-holding horror and Paul's sapphire-holding horror, it's important to get behind the horror and then attack when possible because their heads and limbs take one hack to come off (if attacked from behind) instead of two (if attacked from the front).
Where it's reasonable, I use the 3-point magic attack to kill rooms full of trappers. Where it's reasonable, I use a handgun to kill them instead. But often, I ignore and/or run around them, sometimes at great risk.
I think my choices on the quick spell list are pretty good. Only fourteen spells are cast through the spell list in the entire game (none through the first seven chapters, nine in chapters 8-11, and five in chapter 12).
I don't know if it's the game or my controller or just me, but I sometimes have trouble scrolling horizontally in the inventory menu (but never vertically), like it just won't respond on occasion—for instance, in Karim's chapter, putting the Tome on the stand made of bones.
There are no sequence breaks or large skips in this run, and so far as I know, there's no way to do that in ED. The game is VERY geared around gathering things and using skills in a certain order. As a matter of fact, this run utilizes only one small glitch that I know of—in Chapter 7 (see notes for segment 9 below if you want that extremely minor element "spoiled" for you). There's also a bit of slightly unexpected behavior in Chapter 10 at the end of the vampire's first appearance (check out the notes for segment 12), but I wouldn't call it a glitch at all, just the game handling a scenario in an unexpectedly smooth way.
I don't spell it as "magick" in these comments because I think spelling it that way is stupid and just an attempt to make all the magic stuff seem more "serious", the equivalent of a self-absorbed teenager putting on goth makeup (sorry, Eternal Darkness, I still love you—no offense to the true goths either, some of you manage to pull that look off nicely).
Movement regenerates magic in this game, but oddly it doesn't matter whether you sprint, walk, or tiptoe (sneak)...it just matters that you're pushing the thumbstick. That is, walking for 5 seconds regenerates as much magic as sprinting for 5 seconds...it's like magic regeneration is decided by "intention of movement" rather than "distance covered". Hence you will sometimes see me walking nonchalantly to regenerate magic instead of sprinting (e.g. in the Peter boss fight).
I want to repeat a slightly personal part of this: I would improve elements of this run if I had infinite time (take a look at some notes near the end of this rant for possible improvements), particularly if I did not have a baby. I really hope someone will take this run and build on it and find things I never thought of. I hope the significant improvement over the old SDA run will do for now, and maybe in time I will pick it up again when I have more time and am not sick of running it. I feel like at least another 90 seconds, maybe even as much as three minutes could be saved (in real gameplay time, not counting getting rid of the loading screens by doing fewer segments). You could say that this run is more like a really good practice run, but I think that's selling it a little short: there are some great moments, some very nice segments, and the overall quality is pretty darn good, if I do say so myself. Ideally, the next runner will be more accomplished at menus than I am.
All right: final note. If you want to be surprised (and there are some good surprises coming, I think I can promise you), don't read the more detailed segment notes below should you be reading this before watching the run (though thanks, if you've made it this far).
*********************************************************************
Segment 1:
Pious: I find setting the clock very annoying (it's really finicky about landing exactly on 3:33, even with the trick I learned from spiralout of letting the control stick go and using the d-pad for the last couple ticks). Otherwise, it's really just doing something I've done hundreds of times. I'm always worried when I access the pause menu the first time and I have to press B so many times, worried that I'll hit it one time too many. The only real time-savers are getting a good clock and getting the quick camera cut (not the slow zoom) on each of the four blocks (it's VERY difficult to get it on the green one, IMO, about one in four attempts). Other than that, pray for short loading times between rooms and on every block insert. This 4:31 features some bad loading luck (into the Pious statue room), but mostly great execution. I think doing the ice-skating slide in the prologue is hilarious (it's just spamming the B button to "reload" while moving the character around).
Lowlights: I don't dismiss the text in the Pious statue room as soon as I could and I nick a zombie heading to the teleport near the end, but this is mostly excellent; I don't think I lost even a full second.
Highlights: love the turn right before grabbing the blue block and how well the pause menu stuff went. And the perfect clock...love that perfect clock (not very common for me).
Kills: 5 (6 if you count the Pious statue, the others are all prologue zombies that I kill to keep myself and the viewer entertained, bonus: one prologue zombie taken out by another)
Weapon equips: 0 (I don't count them when it starts in the character's hand)
Spells cast: 0 (obviously)
Items collected: 5 (each of the granite blocks, and the tome for Alex)
Items used: 4 (all the blocks)
Segment time (by the in-game timer): 4:31
Segment 2:
Ellia: my least-favorite chapter for casual play...for a speedrun, it's just run, then walk, then run, then walk (I stole most of this run/walk pattern from spiralout, though I made a few changes that work better for me). I do like skipping the short "OMG, zombies all over the floor!!" cutscene and keeping a little more sanity for those last few rooms (the Mantorok zombies never get up or drain your sanity if you enter that room/hallway second). Slightly weird thing: most cutscenes give you back sprint stamina, but not the one where Ellia gets the heart put into her after first encountering Pious...instead it's collecting the staff from the statue soon after that gives sprint stamina back (it also heals health and sanity if you're not full up).
The bane of my existence on this level was grabbing the stupid blowgun...I'd often end up a little too far to one side (the camera is unfriendly here), just out of range to get the "Examine" prompt, or I'd dismiss the text before grabbing the blowgun, or...well, a lot of dumb things happened there. Sanity effects also killed a good number of runs—somewhat less than half the time when making it near the end of the level.
Lowlights: there are some zombie-negotiating shenanigans near the end of this attempt and I end up out of sprint right near the end of the level...d'oh! I should have let her rest just a bit more going through the Mantorok room—still, better to use up all of her sprint than have a reserve left at the end. This is one second off my personal best (technical difficulties kept that one from being viable for the run and I could never replicate that 6:02), so it's still really good. If only I'd gotten a little bit of loading luck on inserting the staff into the mechanism, I think it could have been a new personal best...
Highlights: my favorite bit is when those two zombies bite it in the foreground and background (on the way back to put the staff in the mechanism) at close to the same time: slice-crush! Running through all the blades in the last big trap hallway is more awesome-looking than it is difficult to execute (it's really cool that it works in both directions, though). Oh, I also like how Ellia juuuust runs out of sprint as I cross the threshold into the Ulyaoth zombie candle room.
Kills: 1 (to escape the Chattur'gha zombie candle room, bonus: two zombies killed by traps)
Weapon equips: 0 (she automatically switches to the blowgun after the sword breaks on the way down to the lower level—this is somewhat annoying since she'll sometimes needlessly use the blowgun when she's low on sanity and it has a fairly long attack animation so it's a run-killer, but still not a voluntary player equip in the game yet)
Spells cast: 0
Items collected: 3 (chapter page, blowgun, and staff)
Items used: 2 (chapter page, staff)
Segment time: 6:03 (10:34 total)
Segment 3:
Anthony: intense menu level. This is a big part of where there's a lot of room for improvement in a future run, in menus. Still, I have tried to get pretty good at it, and I do think it's entertainingly fast for the casual viewer. Stopping in the right place to put the filled urns down on the pressure plate can be tricky (too far away and you can't put them down, too close and you trigger the door-opening animation/cutscene with Anthony's weight, which wastes time since opening it with the urns the first and only time means only one cutscene instead of two), killed a surprisingly high number of runs.
This chapter contains the first of a number of inescapable sanity effects (because you can't waste time finishing creatures off to get sanity back--this one barely takes any time to get out of, anyway), but is not random at all in terms of sanity effects (unlike Ellia's level). This trick with the trapper is sort of a cross between Mad Andy's and spiralout's strategies—I couldn't pull off spiralout's more aggressive strat almost ever, so I went with this downgraded version (I lose about four seconds not doing it the faster way). I owe a large debt of gratitude to spiralout for the route in this level, especially the spell/inventory stuff near the fountain.
Lowlights: had to take an extra swing at the second Mantorok zombie in the torch room (this occurred in about half the attempts, so meh). I think that might be my only really significant complaint. I could have grabbed the red urn and gotten to the fountain a little faster—oh, and I could have exited the trapper hallway after it "went off" a little sooner than I did.
Highlights: the quick horror kill near the end (fairly tricky to get it in before the shock can hurt you) and the inventory/spell action around the fountain are the highlights of this segment for me. The broken green urn assembly is pretty fun too.
Kills: 10 (two for runes, two to get the sword from the monk, three to clear narrow hallways, the bishop to get the key to the final door, the horror to get past the force field, and one last zombie to take the inside track to the final door, bonus: two zombies killed by differently-aligned zombies)
Weapon equips: 3 (the scramasax for the first rune zombie, the torch to quickly get the sword and a rune and set that one tapestry on fire, and the sword to efficiently hack zombies and bishops and horrors, oh my)
Spells cast: 2 (two enchants to fix the urns)
Items collected: 11 (message tube/chapter page, gladius for Alex, scramasax, tome, blue urn, 3-point circle, torch, green urn—not counting each piece individually, sword, red urn, key)
Items used: 7 (chapter page, the two empty urns, the three filled urns, and the key)
Segment time: 7:49 (18:23)
Segment 4:
Karim: Karim is very prone to sanity effects in and around the first horror room (and to a lesser extent, near the end of the level), necessitating a lot of restarts. You might notice I don't go straight down the hallway after the elevator; that's because unlike pretty much every other videogame in the world, the set piece corpses in Eternal Darkness have collision, so I need to go around the one dead dude. The first horror is the only enemy in the game I finish off exclusively to get sanity back (it's a matter of health conservation at that point). I got lucky not losing more health from said horror seeing me (sometimes his sanity drain hits you and sometimes it doesn't for some reason). For the first big zombie spawn battle, I try to down all zombies, and then kill the ones I've most recently downed, so the ones that were first downed are disappearing as I clean up the most recently fallen and we meet in the middle.
Lowlights: the spell assignment screw-up is my least-favorite mistake in the whole run: really ugly and unnecessary. Rather slow use of tome on bone stand (horizontal inventory scrolling be damned). I had an early swipe and an off-target swipe at the first Xel'lotath zombie in the first slaughter-fest, but I don't think I lost much time there. Lastly, there was not finishing off that one Xel'lotath zombie in time before the final horror appears and having to use a heal because of it (so that I can run over to the stand before the Ulyaoth idol/artifact appears) after the horror hit me (this is also maybe not quite as bad as it looks since I wait till he stops generating electricity to hit him anyway). If there's one segment that has very noticeable flaws, it's this one (I think I lost like 9 or 10 seconds across the level), but this was overall a really good run on a very annoying level, and I tried to improve it to no avail.
Highlights: the first killing spree is really good even with the lowlight immediately afterward mentioned below; the second killing spree is mostly very good too despite another lowlight ending. I also like barely making it to the ladder in front of the enemy after the first rune, and the quick escape from the trappers on the elevator (it's rare to not have any of them chitter/glow as happened here, but this is not as risky as it perhaps looks, maybe a 10% failure rate). Getting around the trapper after the rune horror is not bad either—now THAT is risky, probably 50/50 or so.
Kills: 38(!) (two exclusively for runes and 36 in the two spawn-slaughter-fests— including one that has a rune)
Weapon equips: 1 (the Ram Dao via enchant because you need it to get past that one door and it's an awesome weapon anyway)
Spells cast: 3 (an enchant by Alex to fix the key, an enchant by Karim to enchant the Ram Dao, and a heal using Karim's family heirloom because I got hit by the horror after not quite killing the last Xel'lotath zombie fast enough)
Items collected: 5 (chapter page, tome, white statue, black statue, Ram Dao—not counting the final artifact/idol)
Items used: 6 (all of the above and the healing talisman)
Segment time: 9:41 (28:04)
Segment 5:
Max: for a long time, I thought I was going to have to use the sword on both horrors and hope for a lucky run...but after a lot of playing around, I found that you can get away with casting one blue enchant on the dual pistols for the whole level if you do it just before entering combat, and if you collect two stashes of bullets (both of which are easily on the path through the level). This not only shortens the time, it also eliminates a LOT of the randomness from the level. The only issue with the gun I even sort of worry about is regarding the green horror near the beginning because two of the shots are taken blind and I might make a mistake aiming for its heads/eyes. Otherwise, it's just point and shoot and I use every single bullet I collect to get the job done. Sometimes the gun stops glowing blue right after I have put the last bullet in the guardian, though that means it's not a great run (it would only take four bullets on the guardian if I enchanted the pistols red, but it's not worth casting the spell again since the guardian doesn't change location again after the fourth bullet and reloading and firing the extra bullet takes less time than another enchant would).
This chapter has another acceptable, essentially unavoidable sanity effect (as Max descends into the well). After I kill the Mantorok rune zombie and reload somewhat further down the stairs, I always sweat because there's a rare sanity effect there where Max shoots himself (though this level is seemingly otherwise safe with regard to random sanity effects, though not quite as safe as Anthony's).
Spell-creating and assigning is the other order of the day. I try to make it quick, though I do make one slight mistake in the first assigning session. The guardian teleport is so uber-lucky that any mistakes I made were outweighed by the great luck near level end. The guardian teleport makes or breaks this level, basically (annoying since it's at the very end, but at least the level's short, and the rest of the level is almost not at all random when using pistols).
Lowlights: having to take the extra step to get the kitchen door prompt to pop up is pretty embarrassing. I make a mistake assigning the second spell, and I turn too early on the way down the basement stairs, losing about two or three seconds total, I think.
Highlights: the guardian kill. I think all the kills look really fun in this level, actually. The green horror for the no-look shots and the last shot at point-blank range, the red horror for the quick approach and the finish just before his magic attack goes off, and the Mantorok rune zombie for the no-look shot and how quickly it happens so you don't ever see the zombie, just the rune popping up on screen. I also just think my route in this level is pretty damn good.
Kills: 4 (three for runes and the guardian to finish the level)
Weapon equips: 2 (Alex's gladius via enchant to access the spice jar/chapter page, the pistols via enchant because it makes the level less random and a bit faster overall compared to the sword)
Spells cast: 3 (one by Alex to enchant the sword, an enchant on the pistols, and the reveal invisible to see the basement door)
Items collected: 8 (dresser key, spice jar/chapter page, two sets of bullets, the second pistol, tome, pump handle, envelope w/key & letter)
Items used: 3 (chapter page, basement key, and the pump handle)
Segment time: 6:28 (34:32)
Segment 6:
E. Lindsey: this chapter was a bitch to practice; navigating the traps is annoying, but I think it looks fantastic thanks to all the work I put in, one of the best segments in the run. I believe wielding the green shield with the triple purpose of sanity-loss barrier, sprint-stamina rejuvenator (because you have to stop moving to cast spells) and damage absorber is a pretty good idea for this level (it might be a couple casts too many and it's possible that using sanity recovers along with a red shield might be a touch more efficient)—I use it a couple times to just barrel through traps where it's better to do that than wait for the right time to go through them. If I kill a zombie that's not carrying a rune, it's because they're going to make life difficult for me later by stepping on a trap trigger. I think my route here is a big improvement on Mad Andy's. Some things Mad Andy did that didn't make sense (besides not knowing to burn green zombies as mentioned earlier): used the kukri on the gatekeeper when Lindsey is carrying a freakin' shotgun, killed the horror in the bronze/silver necklace room (what for?), went all the way around the red zombie room on the second floor instead of making a beeline for the next hallway, collected the gold necklace before the gold bracelet thus going all the way around the floor and needlessly through the Mantorok rune hallway.
I did set off a couple of traps that I did not intend (the gas in the hallway with the gold-wearing statue, and one set of blades near the start of a hallway on the bottom floor), but it didn't make any difference to my time. The spell creation was a little slow, but I didn't make any mistakes (unlike the previous two chapters), and there's a lot of pressure on those last two spell creations and the last assign because the level is basically over once I get those done...as long as I don't hit a sanity effect. I'm very much in danger of getting a sanity effect on the bottom floor: several great runs ended that way, but the results are worth the frustration.
Lowlights: There were two worth noting: 1) getting shocked by the horror right after collecting the silver necklace (I can get out of the room about half the time before getting hurt by that, on average) and 2) in the first hallway of the second floor, I kill a Mantorok zombie who would otherwise step on a trap trigger when I come back to this hallway and instead of going to the floor obediently, he stays up while on fire flailing all over the place. Normally I run down the side of the hallway he decided he'd occupy this time, but I did okay improvising running down the other side, and it went overall great in the end.
Highlights: the one-shot gatekeeper kill with the shotgun (about a 1 in 3 occurrence) at the start of the temple, the "torch and run" where I run dangerously between the zombies after getting the first rune (got grabbed from behind a lot there, killing the run), I think a lot of the timing with traps is really awesome (the little hesitations to avoid getting hit and such), and the route is in general very good. Some of the trap-trigger evasion is fun, particularly the second hallway of the bottom floor.
Kills: 9 (the gatekeeper at level start so the bronze bracelet can be collected, three for runes, four to stop them setting off traps, one to clear the path on the way back from acid-washing the necklace since I'm letting Lindsey rest a little for sprinting purposes anyway, bonus: three zombies killed by traps)
Weapon equips: 3 (Alex's revolver for MUCH later in the game—turns out I made a mistake here as I have to re-equip it just before I plan to use it in segment 13 because using the pickaxe disarms it, the shotgun for the gatekeeper quick kill, and the torch for efficiently killing everything else)
Spells cast: 19 (Alex's reveal invisible for the drawer keyhole, 16(!) shields for the reasons mentioned above, a dispel to get the silver necklace, and a pool to regenerate sprint stamina near level's end)
Items collected: 9 (revolver, chapter page, bronze bracelet, metal bracelet, bronze necklace, silver bracelet, silver necklace, gold bracelet, gold necklace)
Items used: 10 (dresser key, chapter page, all bracelets and necklaces, and the archaeologist's brush)
Segment time: 10:37 (45:09)
Segment 7:
Paul, Part 1 of 3: I love using his meditation rod for insta-sanity (particularly right in front of the unholy shrine since it looks like Paul is praying to Xel'lotath)...it also pauses the action so you can use it with monsters nearby. This chapter is long, but it's not too complicated (unlike the last chapter, sheesh!): just a ton of running (back and forth across the level three times!), a ton of item-collecting, and a couple of slightly awkward character placements to get quick camera cuts instead of slow zooms upon collecting items. The one thing that can be a little tricky is killing Anthony as quickly as possible. After the first knockdown, you have to be positioned pretty specifically to bash him in the head so he can't attack again before you kill him (not too close to the wall either since you can't swing the mace at that point)...this one went a little better than average (two missed mace swipes). Burning the zombies in the hallways is a little faster than using magic attack on them (even though, on average, one zombie in each hallway cannot be gotten around until they start flailing).
You might notice in the mansion as Alex, as I turn the corner upstairs to head toward the stained glass window/chapter page, I stop running for a moment. This is because if I trigger the "ghost Max" scene, it stops the dispel from working on the window.
This was one of my most frustrating segments: I spent 4 hours getting two more seconds off my previous best effort...so if it looks like there are a lot of mistakes, just know this is still a really good run.
Lowlights: screwing up the orientation entering the bell tower (I end up in a much better position than usual after that to talk with the custodian but mess up the initial bell-ringing), the book of reliquaries grab is really bad, got the slow zoom (not the quick cut) on the second diary page, messed up leaving the room with Anthony after getting the ruby and sword, ran into the wall a couple times heading from the wine barrel room to the gem room, and ran into one of the zombies on my second trip through the three-zombie hallway (on the way back to the custodian)—fairly common to have this happen once in the level, but still irksome.
Highlights: I'm very pleased with how the risky trapper bits went: entering the wine barrel area the first time, it's very risky to run over to the fake barrel before the magic attack has really gone off when the trapper's that close. The run past the trappers going down to the catacombs for the second and last time is not as risky as it might look, but still pretty risky for being that late in the segment. The horror kill went perfectly (timing when to get that first hack in for the stun can be tricky). Oh, I also really like the zombie-evading in the wine barrel area the last time through there and in the three-zombie hallway the last time (I made a last-second change to the right and it worked out). I like the inventory interaction in general and the places where I arm each weapon.
Kills: 9 (Anthony for the ruby/sword, two unavoidable trappers near the wine barrels, the horror for the sapphire, one zombie for the last rune, and four to clear narrow hallways, bonus: horror killed by differently-aligned horror)
Weapon equips: 3 (the mace for Anthony and the horror, the torch for all the zombies, and the sword for the bonethieves in the next segment though I found out later this was unnecessary)
Spells cast: 8 (Alex's dispel for the page in the stained glass window, two shields—one for Anthony and one for the horror, an attack for the unavoidable trappers, and four pools for sprint stamina rejuvenation)
Items collected: 17 (*deep breath* chapter page, emerald, tome, tower key, torch, podium key, reliquaries book, mace, diary page 1, song sheet, diary page 2, ruby, sword, sapphire, diary page 3, sacrificial knife, five-point circle)
Items used: 8 (chapter page, podium key, tower key, ruby, sapphire, emerald, meditation rod, sacrificial knife)
Segment time: 12:39 (57:48)
Segment 8:
Paul, Part 2 of 3: I couldn't handle doing the five-point spells followed by a ton of action, hence the save right before this annoying bit and very soon after (I really hate the spell creation so much—the game should auto-update the spells you've created, IMO, instead of forcing you to rehash all of them plus 2 or 4 Pargons). I ended up just writing all the controller inputs down (e.g. every thumbstick move and button press) and entering it while I looked at that, rather than memorizing and putting everything in while I looked at the screen. I make sure to take care of the spells with the leftmost runes first (e.g. spells involving Protect/Bankorok first, then Summon/Tier, etc.), and work my way to the right to keep it efficient, as few moves as possible. Getting by the bonethieves as quickly as possible is not 100%, so I save by the dead custodian.
Lowlights: none.
Highlights: may not be very exciting to watch but getting all the five-point creations and assigns done in under 40 seconds is actually pretty cool, IMO. I also think I get pretty close to the damage field without hitting it before bringing up the pause menu (you can't bring up the pause menu immediately after loading a segment, have to wait a couple seconds), and run through it pretty quickly after the dispel hits the ground.
Kills: 0
Weapon equips: 0
Spells cast: 1 (the five-point dispel to get past the damage field)
Items collected: 0
Items used: 0
Segment time: 1:11 (58:59)
Segment 9:
Paul, Part 3 of 3: I found you can deke left, then run right after casting a magic attack to get past the bonethieves with no combat (works almost every time). The little that remains of Paul's chapter after that is just running and going through doors. I do one slight time-saving trick here by moving the control stick after the camera zoom on the custodian...in most cases, moving the stick during an "examine" moment breaks you out of the close-up on the item (a mistake I made while collecting the torch in the last segment, for instance) and you have to examine again if you want to interact with the item/scene properly, but for some reason, doing it here triggers the next cutscene so I don't have to scroll through or dismiss the "OMG, Paul's only friend is dead!" text. Very lucky I found this little time-saver by accident.
Roberto: I feel very in control in this level (it helps that I don't have to do any spell-creating or assigning...this is the only chapter where that is true besides the first two magic-free levels), every spell and action is planned out to give me enough magic and time and sprint to pull everything off. It's easy to get grabbed from behind by a zombie, so I'm sometimes careful to get them into their attack animation so they *can't* grab me. I used one more sanity recover than I originally planned to make sure there were no sanity effects (they were VERY common in the final part of the level if I didn't and it takes a good chunk of time to get that far). You really don't do all that much in this level...survey some rooms, get the artifact, get dead. It feels a bit filler-ish. Also, Roberto is SO...EFFING...SLOW! Luckily he is the last of the two ridiculously slow characters (Max is the other). I realize now I should have researched using a sanity pool here instead of sanity recovers...oh well, the next runner can do it. The torso explosion sanity effect after the first recover cast and the "Sanity's Redemption" teaser during the Alex portion are unavoidable, given the route.
Peter, Part 1 of 4: Just getting the seven-point circle and getting the lights on so that I can start the next segment with the extremely failure-prone *gulp* seven-point creations and assigns. Ended up having to do one more sanity recover than I wanted, but it's too near the end of the segment to risk a sanity effect (which you can easily get heading down to the basement). On the whole, this segment ended up being one of my favorites (once it was done).
Lowlights: I steer pretty dumbly into a wall after opening the first gate in Roberto's chapter (near the first blue zombie)...but that's really the only thing in this segment I'm displeased with. Most of what might be wrong with it is in the route (that is, one five-point sanity pool during Roberto's chapter might be better than all the sanity recovers...not sure if it would build up sanity fast enough to be worth using at the start of Peter's chapter to avoid a sanity effect), not the execution.
Highlights: the careful allocation of magic in Roberto's chapter is my favorite thing here. I'm also pleased with getting by the bonethieves near the end of Paul's chapter, and the navigation in the steam room/7-circle room/generator room. I think the run up to the trappers just after casting attack the second time in Roberto's level (before the "reveal invisible" room) looks really good, made it close to the trappers before the attack actually hit them. Oh, and the close call with the trapper in the gatekeeper hallway with the Mantorok zombie (in Roberto's chapter) is super-tense and cool—it's not usually that close at all.
Kills: 7 (five trappers in Roberto's chapter—the first three can sometimes be avoided on the first trip through the hallway, but not on the way back to the start—and two worms to survey the bridge room, bonus: bonethief killed by differently-aligned horror, and horror killed by differently-aligned horror)
Weapon equips: 1 (the torch to sever the rope for the bridge above the worm pit and attack the worms for Roberto)
Spells cast: 12 (Six sanity recovers: four for sanity-effect-prone Roberto—counting the one that triggers a sanity effect—and two for Peter because he'll often get sanity-effected heading into the basement right near the end of the segment, two magical attacks for trappers, a five-point reveal invisible to get the corridor key, a zombie summon to open the gate down to the idol/artifact, a pool to get Roberto back to the start as quickly as possible, and a trapper summon—the five-point invis, zombie summon, and trapper summon are the first three spells not to be cast via quick spell in this run)
Items collected: 9 (chapter page, tome, Ulyaoth artifact, corridor key, chapter page again, sealed envelope/soldier's orders, revolver, tome again, and the 7-point circle)
Items used: 5 (chapter page, corridor key, chapter page again, soldier's orders, and the lucky penny)
Segment time: 14:05 (1:13:04)
Segment 10:
Peter, Part 2: seven-point spells...yep. I do the pool spell before starting the seven-point business because 1) as I've said before, you can't immediately pause upon loading the game and 2) the three-point pool spell is getting replaced on the quick spell assignments 'cause I don't need it anymore after this (and I do need it for the next chunk of level).
Lowlights: a bit of a delay between finishing the assigns and saving.
Highlights: I was so happy when the seven-point spells were done reasonably fast. Definitely one of the most annoying things in the game.
Kills: 0
Weapon equips: 0
Spells cast: 1 (the pool to give Peter sprint stamina through the next segment)
Items collected: 0
Items used: 0
Segment time: 1:23 (1:14:27)
Segment 11:
Peter, Part 3: this segment isn't very difficult to execute, but given how short it was, I decided I had to not bump up Peter's sanity anymore (until the end when I need it for the boss) and get a lucky run without sanity effects or with sanity effects that don't waste time. It didn't take as long as I thought it might, but it was still a bit annoying to get two-thirds through it and then have Peter start sinking into the floor or shrinking or whatever...
Lowlights: nothing I'm upset about; it's a short enough segment that mistakes wouldn't be tolerable. There's a fairly long black screen going into the room with the sliding shelf and the bonethief for the first time, but it's acceptable considering how annoying it is to go through this part without hitting a sanity effect.
Highlights: I'm pretty pleased with the revolver equip and shooting the trappers...I also like the mid-zombie-hallway cast of the magic pool.
Kills: 4 (all trappers with the revolver)
Weapon equips: 1 (the revolver for Peter to shoot trappers)
Spells cast: 3 (a seven-point reveal invisible to make the door appear, a magic pool to start regenerating magic quickly for the boss in the next segment, and a sanity recover which is also for the boss fight)
Items collected: 3 (the song sheet, the door handle and the binding hall key)
Items used: 2 (door handle and binding hall key)
Segment time: 2:51 (1:17:18)
Segment 12:
Peter, Part 4: I'm very proud of the strategy in this boss fight (and really, the level leading up to it near the end of part 3 of this chapter); it took quite a lot of experimenting to make it look as effortless as it does here. I believe even seasoned ED players may still find a nice little surprise waiting for them here (it's probably the single biggest improvement I throw in over any run I've seen). You need to have the big bad boss monster throw out a few more attacks than usual on the third stage to get the quickest finish possible. If that sounds wrong, please watch and see why it's not.
Edward, Part 1: I stole the idea of enchanting the revolver for the vampire's first appearance from spiralout. But I decided to make it a 7-point enchant. I loved finding out that I could go back through the study door after dealing the last blow to the vampire on its first appearance because it cuts out a small bit of the cutscene that shows the basement (you lose the part where the monster runs away while you stand in the foyer). Using the revolver for the trappers seemed completely reasonable over magical attacks, especially when stopping to load the gun (I put three more bullets in though I only end up using two because sometimes certain trappers move in a way where I have to shoot them) on the way down to Ehn'gha gives me just enough sprint to make it inside past the horrors before casting the first 7-point Pool spell of four. I split this chapter in two to make it less aggravating when I hit a sanity effect in the Alex portion of the next segment.
Lowlights: have to dodge one more time than necessary on vampire's first appearance, run wrong way once on entering a room in Ehn'gha, run into the central machine instead of the stairs to the teleport once in the 9-point spell chamber, hesitate running back to the central chamber after the last teleport in the segment.
Highlights: the Black Guardian fight and the attack(s) on the vampire are both pretty fun.
Kills: 6 (the boss, her three cannon fodder zombies, the vampire so I can go down to Ehn'gha, and one trapper)
Weapon equips: 3 (the revolver via enchant, and the sword via enchant, I equip the revolver again for killing trappers in Ehn'gha)
Spells cast: 14 (three attacks on the boss, three reveal invisible spells to attack the vampire quickly, two shields for attacking the vampire with impunity, an enchant on the revolver, an enchant on the sword, a 3-point enchant on the key, and the three seven-point pool spells for sprint stamina)
Items collected: 11 (the lucky penny, the basement key, chapter page, two historical journals/clock hands, tome, revolver, sword, revolver ammunition, two basement key halves)
Items used: 5 (the lucky penny, the basement key, chapter page, the two clock hands, and the basement key again)
Segment time: 19:24 (1:36:42)
Segment 13:
Edward, Part 2: keep lightin' up runes, killin' trappers, and hittin' switches, bitches. Then pray for no sanity effects during the Alex part. Doing Alex here makes it much easier to deal with (most of) Michael's risky chapter in the next segment without having to go through all the Alex stuff leading up to it. The riskiest parts of this chapter are running between a wall and the five-point damage field in the first room I teleport to in the Edward portion, and shooting the trapper in the hallway right after leaving the "Max murder" room in the upstairs part of the mansion.
Michael, Part 1: running past the trappers here is not all that risky, just getting far enough into the level to be able to save and then tackle the really horrible portion that follows soon thereafter.
Lowlights: had to take an extra step to grab the pickaxe in the basement (pretty embarrassing), steered Edward too near the pit in the second room I teleport to in the segment so that he slowed down as though hugging a wall, and kinda spazzed a bit going around the first zombie in the long hallway as Michael.
Highlights: the previously mentioned run between the wall and the five-point damage field in the room I first teleport to (running in blind the first time, but even the exit can be a little tricky), getting the magic dispel to go off right as I reach the damage field in the room right after the first room I teleport to, and finally the bonethief dodge/trapper shoot in the upstairs hallway as Alex (really close to getting leapt on by the bonethief).
Kills: 2 (one trapper in Edward's section and one in Alex's)
Weapon equips: 1 (Alex's revolver to kill that one trapper and for later use as well)
Spells cast: 4 (a three-point attack for a room full of trappers, one five-point dispel to access a switch, one seven-point sprint stamina pool, and a three-point blue dispel to access the stethoscope in the Max murder room)
Items collected: 11 (Edward's letter, the shotgun, the pickaxe, the stethoscope, the Essence of Chattur'gha, the crankshaft, another Edward letter, the chapter page, the Essence of Ulyaoth, the medallion, the staff)
Items used: 2 (the pickaxe and the chapter page)
Segment time: 8:23 (1:45:05)
Segment 14:
Michael: OH MY GOD, spiralout laid down the effing gauntlet with his "practice" run. I was so blown away by the idea of not killing anything on this level (I did plan to use the magic Pool spell, though). I had to adopt this amazing plan, so I also had to just accept all the sanity effects, trapperings, and small mistakes that would end an attempt.
The most annoying part of this was how random the horror bind/kill is. If they get into a "roar-off" with each other, it can take sooooooooo long, and the run is over. This was probably about the third-fastest horror kill I saw.
Lowlights: the light puzzle's pretty bad, I get a bad horizontal inventory scroll mixing the plastic explosive and the detonator caps (must have read me as pushing the thumbstick up when I pointed it right), I run into the final door in the level (just before the ending ladder) for a second when I could have pressed B sooner, and I hesitate a little on saving.
Highlights: spell assignment is pretty fast (for once), going around the trapper in the four-trapper room just before the trapper summon/block teleport, making the two trappers in the hallway just before the horror bind room "go off" early so I don't have to worry about them on the way back, the lack of health by the end of the level (barely enough to sprint...if one more enemy had spotted me--in the zombie/horror room with the ladder going down for instance--then this run would have been toast).
Kills: 0 (pretty amazing, right?, bonus: one horror kills another under the influence of the bind spell)
Weapon equips: 0
Spells cast: 8 (magic pool to regenerate magic quickly for the whole level, a trapper summon to get past that one random object and head down to the horrors, a bind to go grab the plastic explosive past the electric horror wall, a reveal invis to see the door to the forbidden corridor, a seven-point enchant for the C4 bomb, and three shields--two to get past the yellow floor in both directions and one more to preserve health to sprint to the end)
Items collected: 2 (the plastic explosive and the detonator caps)
Items used: 2 (combined staff/medallion, enchanted C4 bomb)
Segment time: 6:07 (1:51:12)
Segment 15:
Alex: the route for this level turned out to be a pain. Trying to figure out how to use the fewest number of shields and as little sprint pool as possible was quite annoying (I hoped to use only one sprint pool, but ended up going with two). I decided along the way that getting shocked by the floor once was acceptable—and that's what happened here, right before the final entrance into the central chamber. Dang I was THIS close to not getting shocked at all. You have to end this segment with no spells active for the encounter with Pious (otherwise he'll cast a disenchant, forcing you to wait till that's complete to enchant your sword)—you can see that the pool and the shield are running down to empty as I head toward the central chamber for the last time (and hence, why I have to run the risk of getting shocked there).
Lowlights: the spell assigns and casts are worse than usual in this one, I think. I don't have the best light puzzle...the great ending (the beam being aligned so I only have to scroll vertically, which is rare) helps out the somewhat crappy beginning and middle. I don't dismiss the "You got the Heart of Mantorok" message quickly enough. Getting shocked right before the end—acceptable casualties, but still annoying.
Highlights: for me, it's really about how the route was planned and how close I come to getting shocked as the shield wears down in some places. Summoning the monsters at a point where they would appear near their teleport circles is nice (I even get to save more time with the horror as I stand in his target circle when I summon him...this makes it so the horror doesn't even have to walk to the middle of the circle to get teleported—I guess this avoids the monster clipping into Alex from the programmers' perspective). Might not look that cool, but getting by the first two zombies in the hallway outside the study is harder than I make it look (and relies a bit on luck for getting past the second one); the relatively smooth run past them here is nice.
Kills: 16 (all trappers, most of them in the invisible trapper room with a magic attack, bonus: two horrors killed via the bind spell)
Weapon equips: 0
Spells cast: 22 (a seven-point sanity recover for the upcoming Pious fight, seven seven-point shields to traverse the yellow floors, two seven-point dispels to get rid of the seven-point damage fields, a seven-point reveal invisible to fill in a gap in the floor in one area and reveal trappers in another, a creature summon of each type for the creature-imprisoning room, two seven-point binds to get past the horror-created electric wall, a three-point enchant to put the pedestal back together, a seven-point attack to get past the pillar room, two seven-point health pools to sprint without stopping, and two three-point attacks to kill a couple roomfuls of trappers)
Items collected: 4 (Essence of Mantorok, package/Essence of Ulyaoth, two broken pedestal pieces)
Items used: 4 (pedestal top, Essence of Ulyaoth, Essence of Mantorok, Essence of Chattur'gha)
Segment time: 16:15 (2:07:27)
Segment 16:
Alex vs. Pious: immediately when the last section begins (once the essence is destroyed), Pious and I cast our final spells. He will either bring out a seven-point damage field or a seven-point shield. Either way, it leads to extra time because if it's a damage field, I have to wait for him to move out of it, and if it's a shield, it takes one or two more shots from the shotgun to kill him. He goes with shield here, teleporting once before I can kill him (which is average).
I left the ending in; it's one of the most emotionally effective "goodbye" moments in videogame history IMO (though maybe that isn't saying much), and the story deserves at least some acknowledgment where I can allow it in a speed run. Plus, maybe not everyone has seen the "full ending". I also left the credits...the people who worked on this great game and didn't get the sales they deserved should get their acknowledgment too (plus I like the style of the credits...looks super-cool).
Lowlights: hitting the essence for the second time as Alex looks slow and amateur-ish, running too far past the essence as Karim (particularly, though I go a bit too far at several times), the essence teleport luck in the first two-thirds of the level was garbage, getting hit after transforming into Max (though this might have caused the incontestable highlight of the segment, in a roundabout way), running away from the essence after being hit as Max instead of continuing to run towards it, taking an extra, unnecessary swing at the essence as Max. But then...
Highlights: the four-essences-in-the-same-area bit is ridiculous. I hit the idol as Max, as Alex, as Paul, then as Alex again in a matter of seconds, all while getting ridiculous luck on top of that considering when Pious decides to cast a spell and barely evading that attack he casts. Three short-range teleports in a row is definitely a record for me. I think I'd seen two in a row maybe twice before. The other thing that's awesome is quickly killing Pious with the 7-point enchanted shotgun. Easy to do, but rad to watch anyway.
Kills: 1 (obviously, maybe 2 if you count the essence...or 3 if you count Xel'lotath herself!)
Weapon equips: 2 (the gladius via enchant to reveal and attack the Xel'lotath idol, and the shotgun via enchant to kill Pious quickly)
Spells cast: 2 (two enchants—one on the gladius to show the relic when I hit Pious and to hit the relic, and one on the shotgun to kill Mr. Augustus faster)
Items collected: 0
Items used: 0
Segment time: 3:39 (2:11:06, approx.)
FINAL TALLY:
Kills: 112 (107 of them necessary for the route since 5 were in the prologue—a total of 64 zombies, 30 trappers, 6 horrors, 3 bonethieves, 2 worms, 1 bishop, 1 guardian, 1 gatekeeper, 1 Anthony, 1 Black Guardian, 1 vampire, 1 Pious...there are also 14 bonus/indirect kills over the course of the game: 8 zombies, 5 horrors, 1 bonethief)
Weapon equips: 20 (2 of which were mistakes as it turned out)
Spells cast: 102 (51 3-point, 17 5-point, 34 7-point, for a grand total of 476 runes...170 of them "Pargon"—or about 36%...this isn't counting the three 9-point spells you cast in Edward's and Alex's chapters using the big machine)
Items collected: 98
Items used: 61
Final time: 2:11:06 (approx., using in-game timer and tacking on length of final segment—including loading screen—up to nine-point bind completion as Edward)
Final time minus start-of-segment loading screens: 2:09:14 (approx., eliminating all "The Darkness Comes..." loading screens...got under 2:10:00 which was my goal!)
Final time minus all loading screens: 2:08:44 (approx., this includes three more loading screens—one right after the initial cutscene before the Alex nightmare, one right after the Peter boss fight, and another during the cutscene barrage before the final boss fight)
Final time minus all loading screens and starting from gaining control of Alex in nightmare during prologue: 2:08:29 (approx.)
*****************************************************************
Things I would take back, improve, or research:
Two weapon equips turned out to be completely pointless—1) arming the revolver as Alex right before Lindsey's chapter (using the pickaxe seems to disarm any weapon currently equipped so you have to equip it right after that to shoot the trapper) and 2) arming the sword as Paul (I found a way to get past the bonethieves without combat in the segment two after the one where I armed the sword).
I really wish I had been able to improve Karim's chapter...that spell assign eff-up is just sooooooo disgusting and that last zombie getting up such that the horror shocks me (while not as bad as it might look) really annoys me.
Running out of sprint as Ellia near the end of her chapter—it looks worse than it is, but it's still pretty horrid.
Ugh, I *just* thought of this as I write this (after the last segment is done), maybe after doing the Chattur'gha zombie candle room and coming back to the initial chamber, Ellia could pick up the Strange Necklace (this would seal the side of the temple she just came from) and use it to cure running fatigue whenever she runs out of sprint?! Don't know if this would be faster than using the run/walk/run/walk pattern here, but definitely worth testing.
Could improve the seven-point creations and initial assigns significantly.
Research shooting the three trappers on the spire in the last chapter vs. just using another magic attack (wouldn't have to pick up bullets just before Michael's chapter).
Research using a sanity pool in Roberto's chapter (and *maybe* Peter's) instead of using sanity recovers (didn't think of this till I was on the last chapter...kicking myself!).
Use a sanity pool in Alex's chapter too (I think a 5-point sanity pool would give you all your sanity back like a 7-point recover does... ah well...).
Arm the torch in Roberto's chapter right before casting the zombie summon...avoid some inventory scrolling later when using the forgotten corridor key.
The other thing I'd try to do is improve the first part of Paul. The screw-up on the bell-ringing and the bad grab of the book of reliquaries are both pretty irksome to me.
You can actually manipulate the spell menu to be on the spell you want when you load a save...just load a save where the spell menu is accessible (i.e. not in a level before collecting the Tome), pick "Spell List" and highlight the spell you want, then load the save you want to work with and when you pause, and select the Spell List, you'll be on that spell still! I realized this some way into the run and decided to keep it consistent throughout by starting on "Enchant Item" (Spell 1) for the start of each segment, but in a future run, I would save the 15 seconds or so I think you would gain across the run by starting on the most convenient spell for each segment.
**********************************************************************
In conclusion:
The next time I play this game (which might be tomorrow, I don't know), I'm going to kill every enemy, read every piece of text, and watch every cutscene...and I'm definitely NOT picking the Xel'lotath alignment.
Finally, I would like to thank my wife for her kindness, encouragement, and understanding (this is the only game I have made my wife try playing that she finished...the woman loves a good story and recognizes quality)...and her willingness to buy me a DVD recorder for my birthday when we were scant months from needing more money for our then-unborn child. She took care of our little boy by herself on many nights and substantial portions of weekends when I wanted to practice or record a segment, knowing full well that I'd be yelling at the screen and spending hours, days, weeks, months on a silly hobby in the midst of our new parenthood. Thanks, honey!