![]()
![]()
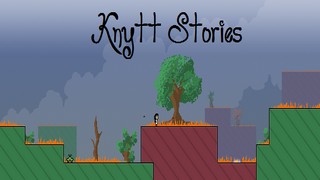
Released in August 2007, Knytt Stories is the sequel to Knytt set in the same universe. While gameplay mechanics were preserved, new ones such a double jump, an umbrella to float up/down and more were included. The base game came with a Tutorial level and a single scenario, and since then expanded to include a few more. A level editor is included to encourage players to make their own custom levels and stories.
Return to the Game List, the FAQ, or the Home Page.
Knytt Stories: Tutorial: 0:01:11 by Benjamin 'UraniumAnchor' Cutler
Get Flash to see this player.
Author's comments:
Simple enough run. There's a couple handfuls of frames here and there that could be saved to push this to a high 1:11, but I don't think I'm missing any overall strats. Maybe this will encourage more Knytt Stories submissions.
Knytt Stories: The Machine, Secret Ending: 0:14:24 by 'Gliperal'
Get Flash to see this player.
Author's comments:
SDA-timing (first frame of control to last frame of control): 14:24.1
new game timing (from pressing New Game to last frame of control): 14:27.3
*All times calculated using Yua
0:19
It saves less than a tenth of a second to change the difficult to hard now, and it makes the beginning significantly harder, so I do it after collecting the double jump powerup instead.
1:12 [Sequence Break #1]
Some precise jumps allow us to access the double jump powerup early. In order to clear the corner on the first one, we have to slide rapidly down the wall, then jump out, allowing us to jump from lower than normally possible.
1:49
Landed slightly too far to the right, but timeloss was minimal.
2:16
This enemy moves randomly and shoots fireballs with random speeds, making it easy to lose runs here.
2:20
This enemy moves randomly, but attacks on a consistent timer, making it easy to predict every time.
Interesting note about enemies in general in this game: their in-game timer only increments when you are in the same screen as them, and it only resets to 0 when you restart the game (not on deaths). Some interesting consequences of this:
As long as your timings for entering and exiting screens are consistent, the enemies' firing intervals will be consistent.
If you re-enter a screen you previously visited (even after a death), the enemy won't necessarily have the same timing as the first time.
If you re-enter the screen in a consistent manner, the enemy will be different each time, but consistent through runs.
2:47
I jump far off of this mountain to avoid entering the screen with the enemies from the left side. This gives me enough room to jump over the pink enemy before she has flown all the way across.
3:58
If the ghost in this screen chose to go right instead of left, I would jump over it on its way back from the right edge.
4:16
Slight timeloss from clipping the corner
4:48
Another enemy whose timing is consistent, but whose pattern is random.
5:06
This sequence of jumps skips having to wait out the laser cycle.
5:48
If the ghost chose to go right instead of left, I would have been able to run underneath it. If it had chosen to swoop down lower than it did, I would have jumped over it.
6:04 [Sequence Break #2]
This jump skips having to travel down a longer alternate route. As before, we have to slide down quickly to not clip the corner. Additionally, we retract the umbrella right before double jumping to gain extra height.
6:20
First major mistake of the run. Cost about 2 seconds.
6:30
The bouncers' motion are identical each time entering the screen. The flyer has an internal timer for when it fires, but it moves randomly, which is why I take the jump a bit low, and why I have to delay a bit on the way back.
7:00
Going around the top like this skips having to wait for a cycle on the floor enemy.
7:14
If the leftmost ninja decides to go to the left, this room is basically free. If he decides to go to the right, it's almost impossible to predict.
7:31
In retrospect, it would have been faster to not use the umbrella here, but it would require memorizing what patterns to expect from the ninjas. Exact timeloss uncertain.
7:41 [Sequence Break #3]
A not-too-difficult jump (especially if you use the umbrella) allows us to leave the area without travelling down the path to the Hologram powerup. The consequence of skipping the Hologram will be touched upon later.
8:33
Probably could have gotten through here without slowing down.
9:07 [Sequence Break #4]
Typically one has to climb the mountain to the right, and then float over here using the umbrella. This jump is faster.
9:14
Possible (and faster) to one-cycle these lasers without using the umbrella.
9:28
Difficulty change back to easy.
10:25 [Sequence Break #5]
Ordinarily we are supposed to use the Hologram powerup to bypass the enemy guarding the cave. But using some precise jumps, we can enter some screens that were never filled with anything, and therefore just display a purple "VOID" texture. Due to the way screens load in Knytt Stories, it's possible to enter the screen from above and end up directly in a wall, in a glitch that is known as "wallswimming." While inside a wall, pressing left propels you right, and vice-versa, and climbing up will pull you down and vice-versa. It would be easy to enter the cave containing the final boss, but we have another trick in mind. By precisely timing jumps the moment we exit the wall and enter the void, we can jump along the top of the screen.
10:50
All of the locations in the game are stored on the same map, just in different locations. If we dropped straight down right now, we would end up in the final boss room. However, we travel around the final boss room (or two rooms), and head back in another direction, towards an area of the map where the sections from after defeating the boss are stored.
11:29
Using the aforementioned wallswimming, we are able to re-enter the map in a state where the final boss has been defeated. Also the second major mistake of the run, costing another couple seconds.
12:19
Also enemies which have consistent timing, but random movement.
12:49
It's possible to clip that ledge, allowing for an extra double-jump here, which would make it decisively faster than going over the top of the mountain. Otherwise they're practically the same timing.
13:10
Climbed this wall normally instead of jumping up it, because of the enemy placement.
13:51 [Sequence Break #6]
Normally you're supposed to travel back through the area where we got the eyeball powerup, but as with many jumps, Nifflas made this one is just barely possible.
14:21
Hold left arrow, down arrow, and S, and this room will work every time. I bonk my head before the descent just to make it even more consistent.