![]()
![]()
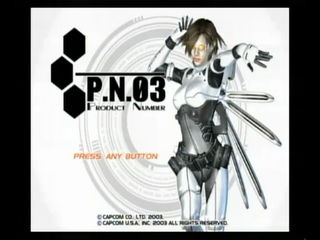
Released in March 2003 as part of the Capcom Five, P.N.03 paid homage to old school games with its emphasis on point-driven gameplay and memorization of enemy attack patterns. Critics praised the game for its originality and style, but heavily scrutinized its repetitive gameplay, clunky controls, and weak storyline. P.N.03 would eventually go on to become the only game in the Capcom Five to remain a Gamecube exclusive.
Best Easy difficulty time: 0:36:35 by Dylan McMahon on 2011-03-12, done in 11 segments.
Get Flash to see this player.
Author's comments:
The history behind this run is somewhat interesting. I was hanging out at a friend's house and casually speedrunning through Metroid Fusion. After finishing with an abysmal time of 1:05, I asked another friend what game I should speedrun next. The reply? P.N.03. It was perfect. I had played through it countless times and I practically had every square inch of every room memorized. Although at that point I only had the intention of doing a casual speedrun because I didn't have the means to record it.
That all changed when I found out that yet another friend was starting to record himself playing video games and I saw an opportunity. My original run was going to be a Blackbird suit run on normal difficulty, but I scrapped that run because its energy drives were limited in what they could achieve in a speedrun. So instead, I opted for an easy difficulty run using a completely new save file--which is infinitely more interesting in my opinion.
This is a fairly straight forward game, but there are some basic things you can do to minimize time:
Jumping: Although it might not seem like it, jumping repeatedly is a huge time saver. Jumping in the opening room alone can save six seconds right off the bat.
Harrier: This is without a doubt the best energy drive in the game. It's powerful. It ricochets off walls. And it can penetrate shields and enemies. I employ it in numerous sections and boss fights throughout the run to great effect. See the individual segment comments for details.
AAS Pilz: The most basic enemy in the game has a defense mechanism in which it self-destructs after standing next to it for about four seconds. You can use this to your advantage by activating an energy drive next to one of these while targeting other enemies in front of you. I don't use this too often in the run, but it's useful in certain instances.
Palm shots are not hitscan: Palm shots are fairly slow. And because of this, you can start moving in another direction while your palm shots are still traveling to an about to be destroyed enemy.
Individual segments
Mission One: Not even two seconds into the run and I make a small movement error that costs me about a quarter of a second. Room 5 was an absolute thorn in my side and caused many resets. Swan is good in large areas but this particular room is very cramped and forces you to use it at point blank. I'm pretty happy with how I handled it here though. In room 7 I was used to having activated two swans in room 5, so I accidentally pick up an unneeded energy power up which probably wastes about half a second. This is the last mistake in the level so I decided to keep it. The rest of the level speaks for itself so I don't have much to add.
Mission Two: This is a pretty fun mission. I use some luck manipulation in room 3 to get the first Seerose to use its charged attack and thus become easier to damage. After destroying the second Seerose I accidentally hit a section of the wall midjump which slows me down; a third of a second was lost here.
Mission Three: Easily the highlight of the entire run. I switch to Prima Blazer halfway through because Harrier instantly destroys the boss Sonnenblume. This is as close to perfection as any other segment comes, but if I had to nitpick I wish I wouldn't have hit the door so high up with my jump in room 12. Also, I should mention that Harrier can only target up to three enemies at once. In room 14, I get incredibly lucky on my second energy drive. One of the flaws of Harrier is that its shots have no tracking ability whatsoever; it is very easy to miss a target if it is simply moving. In this instance, the Walnusse on the left dodges my Harrier shot but I luck out because it ricochets off the wall behind it and still hits it. The laser dodge in room 15 was incredible. I move around in a zig-zag pattern in room 16 because the enemies will hit you if you try to run right through it. The boss fight was perfect.
Mission Four: In a game that recycles room after room, it's nice to go outside for a change. Resident Evil 4 fans will recognize this mission's music as Krauser's mercenaries theme. This mission is notable for not having a single room with an enemy lock on the door. As such, I don't fire a single palm shot. Nevertheless, I still upgrade Prima Blazer's palm shot strength by 2 levels at the beginning just to get it out of the way. In the first two rooms I get caught up on some Weibbirke's mid jump which cost about a second altogether. I glitch past the first Gardenie in room 2, but I destroy the second one because it blocks my way. Nothing else is significant about this mission and the boss fight went as well as could be expected.
Mission Five: I load from save slot four even though I was using a different save slot in the previous segment. First, I copied my game to several save slots while playing in the event that I accidentally saved over the main one. Secondly, I loaded this save file because I realized I was unhappy with a couple segments after completing them and wanted to go back and redo them. You can clearly see that the points, time, and upgrades remain exactly the same in between the fourth segment and this one. This is also why at the final clear screen, there are more saves counted than the ones that were recorded.
This is a really solid run of this level. There is no quick practical way to get past the Gardenie(You can move past them when they use a special attack. But destroying them is much faster than waiting for that to happen) in room 7 so I destroy them with Harrier. The boss fight here definitely needs some explaining. The way this boss fight works is there is an energy reactor at the very top of this room that needs to be destroyed for the fight to end. However, it is protected by a shield which will only go down if you defeat the various turrets on the floors beneath it. I use aspects inherent to Harrier to end the fight prematurely. Earlier I said Harrier can ricochet off walls and penetrate shields. So what happened here is that I skipped all the turrets and went straight to the top, using a well placed Harrier shot to ricochet and go right through the shield to hit the reactor. It's a really cool trick that I found out accidentally and it's a lot harder to replicate than it looks.
Mission Six: Pretty simple mission. Only one room with an enemy lock on the door. For the boss fight I could have positioned myself in a better location on the track so that I wouldn't have to wait so long for the boss to come back around.
Mission Seven: In room 11, I move diagonally left towards the end because the spawn for the Seerose is very odd and will spawn behind you if you run straight at it. I mess up activating an energy drive(Because of the Gamecube controller's horrible d-pad, activating energy drives first try in this game is a nightmare) and lose half a second. To defeat the boss, you normally have to destroy the three turrets, run across the room, go up the ramp, destroy the enemies on top, and then destroy the reactor. In a fashion similar to the mission five boss fight, I use Harrier to ricochet off two very conveniently angled walls, travel through the reactor's shield, and blow it up without having to move an inch.
Mission Eight: Ada's mercenaries theme. This mission is a joke. What were the developers thinking? Five rooms? Three of which were already used in other missions? Again, Harrier can't track moving enemies so in the boss fight I have to wait a little bit for Lowenzahn to get closer before I could use it.
Mission Nine: This is without a doubt the most difficult segment. You have the level itself, two difficult boss fights back to back, and then a Metroid-esque escape sequence. What's interesting about room 5 is on the second energy drive I don't actually hit the closest Pilz enemy with Harrier; it self-destructs a split second before it could get hit. I had to do a lot of luck manipulation in room 8 to get through as fast as possible. It took two ricochet Harrier shots to kill the Gardenie around the corner and another ricochet shot to kill the final Pilz. The reason I don't get a "No damage clear" bonus at the end of this room is because the first Pilz enemy self-destructs. You can only get a no damage clear if you directly kill every single last enemy in the room(This explains why I don't get a single no damage clear in Mission Ten as well). In the boss fight the train version of Orchidee II has more health than the first one, so I needed to hit either the very front or back to get an instant kill. This is a lot harder to do than it looks. As is with the first Orchidee fight, I could position myself in a better location on the track to speed things up. In Orchidee II's second form, I have some bad luck and the boss decides to jump over me in the beginning when I activate an energy drive. This doesn't matter though because I get a pretty ridiculous double Harrier shot plus ricochet on my second energy drive. During the escape sequence, numbering rooms for identification purposes is pretty much pointless now. But I have to kill the Gardenie in the second to last enemy room because I can't run or jump past it. The final enemy room has a lock on the door. And this room has the strangest spawn positions and triggers. Not to mention that these enemies are somewhat unpredictable. So I played fairly passively in this room and probably lost a couple seconds due to it. Also, there is something very wrong with this door to get into the next room. I've had problems with entering it ever since I've played it for the first time. I was clearly touching the door when I pressed the A button but apparently this wasn't good enough for the game.
Mission Ten: After exactly 74 missions of spamming Prima Blazer and Harrier, I buy a new suit. It might seem somewhat extreme using an unupgraded defensive suit over a fully upgraded Prima Blazer, but I can assure you that the Thunderbird energy drive is absolutely amazing in this level and is infinitely better than anything Harrier could ever achieve. I lose a little bit of time from an unnecessary dodge against the final Pilz in room 5. I could have activated the second energy drive in room 7 faster. And I switch to Prima Fusion for the boss fight because Harrier and Thunderbird take time to charge up when activating while Swan fires very quickly. The sound gets glitched after I skip the cut scene of the boss dying.
Mission Eleven: I tried clipping through the very last enemy in room 9 but it didn't work this time. I get an unbelievably lucky Harrier shot in room 14. Also, when you use an energy drive in this game, you gain invincibility for as long as the purple ball on Vanessa's back is still there. So you have a quick half second after you regain control of Vanessa where you are still invincible even though you can move. This is why the turret's laser doesn't hit me when I dodge through it. I have a little bit of trouble cycling through targets for Lowenzahn II's first form and lose a small amount of time. In the final boss fight, I move over to the left and adjust the camera so that Vanessa will fire off two Harrier shots at Alraune. The second and third energy drives actually hit him twice and do more damage than normal.