![]()
![]()
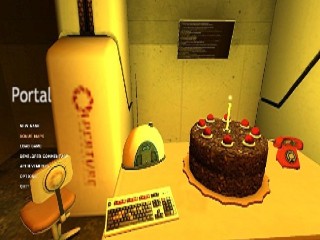
Released on October 9, 2007, as part of the critically acclaimed Orange Box, Portal is a single-player first-person action/puzzle game developed by Valve. Despite lasting only a couple of hours, reviewers never panned Portal for its short length; most simply said it was just the right length for what it was. Players use the portal gun to create portals and manipulate objects so they can delight in a delicious pastry for their hard-earned effort.
Note: The use of the large-skip glitches (out-of-bounds glitches and the seam glitch) is a separate category.
Runs on the 360 version:
Runs on the PC version:
Return to the Game List, the FAQ, or the Home Page.
Xbox 360 Single-segment 0:21:08 by Kevin Marnell.
Get Flash to see this player.
Author's comments:
This is a single segment, non-OoB run of Portal for the Xbox 360. I timed it to be 20:31, which is about 29 seconds faster than Cody's run. Overall, I think it came out very well.
General Notes: Accelerated Backwards Hoping (ABH) cannot be done on console as well as some portal bumps.
Glitches used: Portal Bumping, Peek-a-Portal, an edge bump in Chamber 18, and using the turret to knock off all of GLaDOS's cores.
Chamber 00: There isn't much that can be done here. You must wait one minute until the portal opens, and then run to the chamber lock.
Chamber 01: This is another level that you can't really save time on.
Chamber 02: You must wait for GLaDOS to speak until you can go through, so this level can't really be improved either.
Chamber 03: This is the first level that really matters, but there isn't much to it though.
Chamber 04: This level was a serious pain. If you get the portal just right, SOMETIMES, it will land the cube will land directly on the button. I had no such luck, so I lost about 3 seconds or so.
Chamber 05: In this chamber, the elevator does not move until GLaDOS finishes her speech.
Chamber 06: To skip this chamber, you just have to shoot one on the ceiling and then jump through to land at the elevator.
Chamber 07: You are also able to skip this chamber by placing one on the wall and holding right as you go through it.
Chamber 08: This chamber took me a little while to perfect. You have to get the portal placed all the way in the corner and then jump onto the protrusion to curve around to the platform. The trick is to make sure that you hold forward the whole time and time your jumps correctly.
Chamber 09: This is another chamber that is a little random. Sometimes when the door closes, it will make the portal disappear. If you get it placed just right, you can jump through on one side of the door and then jump out on the other.
Chamber 10: In this chamber, I peek-a-portal to skip one of the jumps and then I use momentum to go straight to the chamber lock.
Chamber 11: The jump to the portal device is a little more inconsistent than it looks. I would hit my head many times and have to restart here.
Chamber 12: This is one of the few test chambers in which console has an advantage to PC. PC cannot do the final portal placement allowing me to not have to use the cube.
Chamber 13: There isn't really anything special in this level. It could probably go a few seconds faster though.
Chamber 14: I barely got the skip on this level. It is much more challenging than it looks.
Chamber 15: I lost a few seconds on this level, but it wasn't too bad.
Chamber 16: I got the portal bump pretty quickly and then just used the cube to make it through the rest of the chamber.
Chamber 17: This level involves another use of the portal bump. This one is much easier than the last though.
Chamber 18: I first saw the trick to skip the door in one of Cody Miller's runs. It is pretty nifty and it makes the level a lot easier.
Chamber 19: A bunch of peek a portals and then just using portals to get to the finish quickly.
Escape: I found that you can use the chair to jump into the vent, so it usually saves some time. However, I was having trouble getting into the vent, so all of the time gained was canceled out.
Turret Ambush: I do the jump up to the bridge and leave that portal there so that I can use the turret to kill GLaDOS. After knocking all of the cores off, I just throw them in the fire as fast as possible.
It was completed on September 6, 2011. It is a single segment run of Portal: Still Alive for the Xbox 360.
It was completed by Kevin "Monopoli" Marnell.
You can contact me via email at etkmarnell@att.net
PC version with large-skip glitches: 0:09:12 by 'Sourceruns Team', done in 24 segments.
Get Flash to see this player.
Author's comments:
NOTE: This run was timed in real-time as 8:31.93 from gaining crosshairs to losing them when the final core is destroyed, which is 50 or so seconds faster than Portal done Pro. This distinction is made due to save penalties and a different timing endpoint than the portal community typically uses.
Portal done Pro-er (this run) is our improvement of the current segmented Portal speedrun, Portal done Pro (PDP). However, to be SDA legal we have done our run without using AutoHotKey scripts for any portion of the run. This run first started after the discovery of a new glitch, which snowballed into a whirlwind of discoveries of new tricks, skips, and glitches. We started running chambers in April, took a brief hiatus, and then resumed work in late June. The bulk of the run was completed in about 2 weeks time. The final result cuts roughly 50 seconds of realtime off of PDP, bringing the total time to 8:31.93. This run is the second official run of a commercial title to be released by the Sourceruns team, and the second run to be submitted to SDA. However, it is the first Sourceruns project to be done without scripts.
The runners will introduce themselves, and then the comments will run on a segment-by-segment basis. We'll include map names as well as chamber numbers for the segments so you (hopefully) don't get lost. Note that you will NOT be able to read along with the run without pausing frequently. Following segment comments is a list of tricks for those unfamiliar with portal speedrunning and its latest developments.
Alright guys, this is z1mb0bw4y. I wound up with 12 segments, most of which I'm perfectly fine with. I'm currently up to 411 hours of playtime in portal as of the conclusion of this run, and I'm happy to say that I enjoyed all of most of it. I'm super pumped that this run is finally finished, and I hope you guys enjoy it!
Inexistence here! I got 5 segments in this run, and I'm pretty happy with them all. Some were fought down to the ticks, some were just going until I got a successful run, and as soon as I got one successful I knew that it was optimal. Spent far too many hours in Portal, playing this. My Portal playtime atm in total is about 340 hours, and my jump key for this run was either space or mousewheel up.
Hello there! I'm Gocnak, and I got 6 segments in this run. I'm very happy that I ran with Z1m and Inex to set a new world record in Portal, which is one of my favorite PC games. I was gifted Portal (thank you jack5mikemotown!) almost halfway through the run, but I got right to work. From the time I was gifted Portal, I spent almost all of my 90 hours that I currently have played on the game working on this run. It was a blast! I was very pleased with my work, and I hope you are too!
Chambers 00-01 (testchmb_a_00)
-Segment 1 (z1mb0bw4y): This segment was incredibly annoying, due to the long intro cutscene. Most of the time I spent on this segment was waiting for the cutscene to end, only to mess up the first ABH out of the portal. This segment is honestly not exciting, but a few slick ABHs (like the one around the corner out of the elevator) saved the few milliseconds that we needed to shave.
Chambers 02-03 (testchmb_a_01)
-Segment 2 (z1mb0bw4y): Another cutscene, though far shorter. The major difference here is that I ABH into the portal gun rather than on top of it, which allows me to fling myself to the edge of the higher platform rather than bunnyhop to it. Finally, a quicker save in the edge glitch state shaves precious ticks off our time.
-Segment 3 (z1mb0bw4y): This segment is all about quickly moving OoB and maneuvering the portal to the final location. The main route difference here is a new re-entry method that becomes VERY important later in the run. As a side note, the sign above the small hallway to the end of the elevator is an absolute bitch, and I had to work VERY hard to try to be as close to the elevator as possible while dodging the sign. Even when you get past the sign, you can always get stuck on the elevator stairs to ruin a segment.
Chambers 04-05 (testchmb_a_02)
-Segment 4 (z1mb0bw4y): Not much to say here, this segment is very quick and straightforward. I got the seam glitch MUCH faster than demonstrate here, just due to pure dumb luck and persistence. After the seam glitch, I step out of bounds and back in to trigger the end-level cutscene.
-Segment 5 (z1mb0bw4y): Since we have to wait for Glados to rattle off her speech during this segment, we have plenty of time to mess around and get done what we need to get done. We need the camera in the next map, so I disconnect it from the wall and seam glitch again. Then, moving back to the orange portal, I move the portal OoB with some peek-a-portals until it's under the fizzler and make a segment.
-Segment 6 (Inexistence): This was a pretty simple segment. Actually getting the object preserve was really annoying. You have to fall through the portal exactly right, with the camera in the exact right position, and to be honest I had no idea what these positions were. I think I actually organized my time best by just spamming the segment until I successfully got it, as learning exactly HOW to do it may have taken much longer. Glados is on a timer during this. The elevator will not move until her speech is over, so as long as we're in the elevator before that happens, we're good. I get the object preserve, leave the camera by the elevator (hoping that it doesn't fall into the fizzler!), ABH over to the trigger to open the door, then head back into the elevator, and all is well!
Chambers 06-07 (testchmb_a_03)
-Segment 7 (z1mb0bw4y): This is the single biggest time-saver in the entire run, so I'm going to talk about it a bit. I always had a feeling that it would be possible to go OoB on this map, but was never able to find it. One night, I recruited the help of Mr Carter and we spent about 5 or so hours in a skype call just messing around in this map hoping for something to happen. While messing around, I accidentally mashed a button on my keyboard I had bound to spawning a companion cube, and decided to mess around with that a bit. From there, thinking about object flying up into an edge glitch on the ceiling was simply obvious. What actually happens here is that I jump forward to hit the trigger, dropping the camera into position and placing the portal on the ceiling in the process. I then object fly up the wall and land "on" the edge of the portal, which the game considers to be an edge glitch. Once we save and reload, we will be able to activate a save glitch state, similar to chambers 02-03.
-Segment 8 (z1mb0bw4y): Shooting a portal to free myself, I jump to the right and "catch" myself in a portal stand on the wall OoB. I then flick the camera up and to the right to shoot a portal under the fizzler. Fun fact: the flick is so fast, that even in the slowest demo replay speed the camera doesn't fully pan up to the fizzler, even though my shot still places. After landing the shot, a quick fizzler reentry puts us right next to the elevator, which I can enter right after backing up to hit the door trigger.
Chamber 08 (testchmb_a_04)
-Segment 9 (Inexistence): Ugh, this segment. Okay, so you hop twice, then on the third hop, you have to let go of crouch. At this point, Chell hits her feet on the floor again and gets a second jump from standing. ABH works from standing if you have enough speed to begin with, so this boosts the speed, and also the height. Crouch must then be held to manage to go over the railing. The majority of the attempts will end here as you fall into the sludge. Sometimes you'll bash into the platform you're aiming at, but not get on top of it. Sometimes you'll land on it and stop. DemonStrate at least had AHK to mean he always got the hop here, but for me with mousewheel, I'd basically run out of finger to slide up the scroll wheel, so I have to focus on moving my finger back down to get the next jump just in case I should happen to actually get onto the platform. If you land on the platform and achieve an ABH, you now have a crazy amount of speed. You'll now either reach the end of the level and fall into the sludge, or maybe hit the railing, or many other things. From what I could figure out, the only way to actually get on the final platform is to bash yourself off the wall, which changes direction enough to actually let you on to the platform. This happens very rarely, I got it maybe 7 or 8 times. When you actually achieve this, you then need to pretend you were expecting it, and immediately jump up and leg it into the elevator. Very, very hard segment, especially scriptless.
Chamber 09 (testchmb_a_05)
-Segment 10 (z1mb0bw4y): Though I'm the one that wound up finally nailing this segment, Inexistence and I spent roughly equal amounts of time on this one. There's not much to say here, since the route is the same as portal done pro, but the main thing to note is the portal placement under the door that allows us to skip actually solving the puzzle. A quick ABH into the final elevator ensures that the doors close as soon as possible.
Chamber 10 (testchmb_a_06)
-Segment 11 (z1mb0bw4y): Finally, portal gets a proper speed launch, but at the cost of what would have been the sickest moonjump this side of NASA. It turns out that the little "supports" of the door are not only solid, but are sloped in such a way that you can ABH (or AFH) into them and get launched very quickly upwards. Ideally, we would fling directly into the elevator, but after several people spending 7-8+ hours each on this segment we decided that this was close enough.
Chambers 11-12 (testchmb_a_07)
-Segment 12 (Gocnak): I had the honor of getting the dual portal device in this segment. As I jump out of the elevator, I AFH off of the slightly elevated platform that the button was on, jumping right to the portal gun. Most of the time I had fallen into the sludge, but with the right jump into the initial blue portal, I was making it consistent. After snagging the upgraded portal device, I quickly leap down onto the button as it rises, and get into the next part of the test quickly. Instead of completing the rest of the level, I portal bump OoB, then with my quick peek-a-portal skills, I get up to the elevator in no-time. I actually re-enter the map quicker than DemonStrate here, as I use the fizzler to destroy my portals, instead of doing a PBF. I quickly hop into the elevator and complete my first segment of the run, which is 2 seconds faster than Portal Done Pro!
Chamber 13 (testchmb_a_08)
-Segment 13 (Inexistence): Not too bad a segment. This was definitely one that I raced for the ticks. To begin with, I was placing the portals, dropping the camera, and then jumping on it. This is a reliable way to achieve the mashing through the ceiling, but not the quickest. I found this a lot in the run. There are fast, reliable ways to do things, but the fastest is usually a 1/100 chance shot that every now and then works, and you just have to spam the segment until you get it.
-Segment 14 (z1mb0bw4y): I did the same thing here than Demonstrate did in portal done pro, but somehow I hit another object between the observation room and the elevator and it accelerated me MASSIVELY directly into the elevator. Fun fact: I got this segment during the intro to the Sunday Sequence Break's portal episode.
Chamber 14 (testchmb_a_09)
-Segment 15 (Inexistence): This one was great fun! To practice this I used host_timescale 0.1, then 0.2, building it up to 0.9, then full speed. I think that really helped me practice and achieve it. The abh at the end is awful. If you're too close to the elevator, you smack into the steps and lose the segment, if you're too far away, same thing. It has to be perfect. I'm very happy with this one.
Chamber 15 (testchmb_a_10)
-Segment 16 (z1mb0bw4y): This level was run twice due to route changes later on that required being underneath the elevator at the start of the next map. I use the clipping glitch to place a portal under the elevator floor, and use PQR to get back in. I have to jump quickly to trigger the elevator movement cutscene, or the next level won't load as soon as possible.
Chamer 16 (testchmb_a_11)
-Segment 17 (Gocnak): Turrets. You remember them right? They're the pale spherical things filled with bullets. Except wait, we never even get to be introduced to them! I start the segment under the elevator, shooting the blue portal where I do in order to do a clipping glitch. And let me explain how ridiculous this was. In the measily 2 ticks (game frame) that my head pokes out of bounds, I have to shoot an orange portal under an elevator, just like Z1m did in the segment before. Although this time, I had a few more pixels than him to shoot for. After the portal places, I do a PQR to get under the elevator. I jump to hit the trigger to move the elevator, then set myself up for my next segment.
Chamber 17 (testchmb_a_13)
-Segment 18 (Gocnak): Almost like déjà vu, I mimic what I did for the last segment, though I do
something different here. Instead of aiming for the bottom of the elevator, I aim for the final hallway to PQR to. As I know you would love seeing the same thing 3 times in a row, we unfortunately have to be in-bounds for the next segment, as a clipping glitch under the elevator there doesn't work well. I would also like to note how long this took me. I spent 2 days on this segment! 2 DAYS! By far, the longest time we spent on any segment in this run. The runs I were getting: kept messing up my PQR, kept hitting the steps to the elevator, kept getting UNDER the elevator even though I didn't want to, getting stuck in OoB space, getting stuck in the geometry of the starting elevator, etc. It was purely annoying for such a simple, yet demanding segment. Though, we do save about 14 seconds on this segment compared to PDP.
Chamber 18 (testchmb_a_14)
-Segment 19 (Inexistence): This is my last segment of the run. I think I got this one while Gocnak and z1m were sleeping (I get a timezone advantage, in that when they're done running, I can wake up and put in a fair few hours before they have a chance). So clipping glitch out, the shot to the side was annoying, although I got quite consistent at it by the end. The shot underneath the chamber was VERY annoying, missed it so so many times. And you don't have time to aim and make sure in a segmented run, it's just a random shot that you hope for. The PQR isn't too bad, reasonably easy. I had about 2 or 3 runs of this speed where I activated the trigger. In the first couple, I did some messing around before getting in the elevator, and I messed it up, and lost the run. I could have spent about 6 hours less on this if I hadn't messed those up. So for this one, I didn't mess around. I didn't dare.
Chamber 19 (testchmb_a_15)
-Segment 20 (Gocnak): Take note of the elevator doors. They don't open. This is because we saved as soon as the map loaded, skipping a game-side trigger from loading, which opens the doors. Though, we are in luck! The elevator doors aren't actually solid in this level! If you want proof, just load up a new game on test chamber 19 and hold forward while it loads; you'll walk right through them when you spawn! I take advantage of this fact and stroll through the doors like Chell is a ghost or something. I then clipping glitched to shoot a portal up on a portal-able wall OoB, then peek-a-portaled to the loading trigger at the end of the map, saving around 3 seconds from PDP.
Escape (escape_00, escape_01, escape_02)
-Segment 21 (z1mb0bw4y): After seeing Demonstrate's complaints about how he had to whip his mouse at the start of this segment, we ensured that our view would be correctly oriented coming into the map by entering the portal a specific way on the last one. We then used a few peek-a-portals, as well as getting stuck in space advantageously to get to the loading zone. This level is exceptionally annoying, because if you enter the portal at the end wrong or if your portal on the ceiling is too far away, the game will dumb you in a distant location on the next map without your portal gun in hand. It is technically possible to get lower than 4 seconds on this segment, but I pity the poor soul who decides to try and accomplish it.
-Segment 22 (Gocnak): This route was the exact same as DemonStrate, with a quicker portal placement to save 11 ticks. I look opposite to the portal to set up the next segment.
-Segment 23 (Gocnak): This is it. The last map, and the most fun segment of the run (for me, at least). I get myself unstuck, and do 2, yes 2 PQRs! One to get to the hallway, and one to get the turret into the hallway. Once I set up the turret, I manipulate the poor fellow to shoot off GLaDOS' cores early, instead of using the rocket turret. After that, I kill GLaDOS 3 seconds faster than PDP, with a few skillful portal placements. Also, note: the LAST core to fall into the incinerator is the FIRST core you're supposed to destroy!
-Segment 24 (SPECIAL GUEST APPEARANCE BY MR XEBAZ!): Hey, I am Xebaz, and I got this last segment going to the "Surprise room". First what I do is the "Clipping glitch" what Gocnak explained earlier. It’s also 2 ticks. What i do next is that i "ABH" to the end of the top of the hallway, which is very weird to do since it barely gives me speed half of the time. What i do now is a "Portal bump" to get to the other side which is very annoying, since your crosshair disappears after the last core is dropped into the incinerator. When I am on the other side i shoot a portal randomly on the wall so i don't fall thru the portal again to the other side. So now i shoot a portal on the side of this box thing that is for glados chamber and yet again very annoying without the crosshair. When its properly shoot it right you go into your portal so you can do a "peek-a-portal" but it takes AGES, since it has to fly all the way to the room. When I am there I shoot a portal on the floor to get unstuck from the air, and I do a portal re-entry to the cake room and place the portals and put in the cube for a surprise.
Tricks/Glitches in order of appearance:
ABH- Accelerated Back Hopping. Similar to BLJing in Super Mario 64, the game doesn't check to limit your backwards speed like it does your forward speed, so you can bunnyhop backwards to accelerate very quickly.
edge glitch- By getting "stuck" at the very edge of a portal, the game thinks you're also at the corresponding edge of the other portal. This can allow you to shoot out of bounds.
save glitch- By saving in an edge glitch state, you perform black voodoo magic and seperate your physical body from your camera perspective, allowing you to walk through some walls and fall through floors.
OoB- Out of Bounds. This is any location that is not inside the intended play area. In the current engine, you have to have a portal nearby while OoB to move, and that's the metric we use to define the OoB area.
Portal standing- Not particularly a glitch, but the bottom edge of portals are "solid" while they're connected allowing you to stand on what is essentially nothing.
Peek-a-portal- Taking advantage of the travel time of portals, you can actually "peek" through a portal and fire another portal to another area of a map while simultaneously ducking back through to safety. This allows you to move very quickly through levels.
PQR- Portal quick reentry. All reentry methods involve destroying a portal to slice you in half, which causes the game to bump you inbounds. This method abuses portal travel time and the previous fact to allow you to reenter the level much more quickly than we did in the past.
seam glitch- Unique to a few levels, and only used in the run once, this abuses faulty geometry around the edges of walls. We use this on ch 04 to place a portal out of bounds early in the level.
object preserve- Objects can also be "sliced" in half by portals and get bumped back into the level, but it's difficult to do. We use this on ch 04-05.
object flying- By holding an object against a wall, looking down, and repeatedly grabbing the object and jumping off of it you can fly straight up.
fizzler reentry- Similar to all other reentry methods, but uses an emancipation field trigger to destroy the portals and bump us back in-bounds.
AFH- By turning around and holding down while ABHing, you can trick the game into thinking you're still accelerating backwards while moving forwards, causing you to gain massive amounts of forwards speed.
Speed launch- When you hit a slanted or curved surface with enough speed, your momentum carries you up the slope and into the air.
portal bumping- Abusing the fact that portals try to auto-correct their positioning when placed near each other, you can "bump" a portal through a wall if the surface on the other side is portalable.
object bumping- This is the trick used at the start of chamber 13. I honestly have no clue how it works, but it does, so we'll call it black magic and move on.
SPD and physics boosting- By wedging an object between yourself and a wall in a save glitch state, the object think's it's stuck inside another object and rapidly tries to free itself. Since the physics engine is
attempting to accelerate the object away from the problem area every game frame, it carries a massive amount of energy. You can use this energy by jumping on the object to get launched very vast distances.
clipping glitch- Abusing the fact that the game tries to correct your character's vertical orientation when you go through floor portals, you can briefly clip your head out of bounds and place a portal during those 2-3 game frames.
glados turret kill- Since Glados drops 1 core per time she is "hit", we can use smart portal placement and the turrets in the level to knock all of her cores off early, letting us finish the boss fight much faster than normal.
If you helped in the planning stages of the run, you are one of many that helped this project progress and in the interest of not leaving anybody out, we would like to send out a wide-sweeping thank you to the entire Sourceruns team and everyone else that participated in this enrichment center activity.
Individual-levels run of Advanced chambers in Challenge Mode: 0:02:58:
Get Flash to see this player.
| Level name | Time | Date | Player |
| Chamber 13 (Advanced) | 0:00:15 | 2010-08-19 | Carsten 'djcj' Janssen |
| Chamber 14 (Advanced) | 0:00:04 | 2012-02-01 | Carsten 'djcj' Janssen |
| Chamber 15 (Advanced) | 0:00:31 | 2010-08-22 | Carsten 'djcj' Janssen |
| Chamber 15 (Advanced) with large-skip glitches | 0:00:11 | 2010-08-20 | Carsten 'djcj' Janssen |
| Chamber 16 (Advanced) | 0:00:10 | 2010-09-13 | Carsten 'djcj' Janssen |
| Chamber 17 (Advanced) | 0:00:39 | 2012-02-05 | Carsten 'djcj' Janssen |
| Chamber 17 (Advanced) with large-skip glitches | 0:00:25 | 2012-02-21 | Carsten 'djcj' Janssen |
| Chamber 18 (Advanced) | 0:00:32 | 2012-02-05 | Nick 'z1mb0bw4y' Roth |
| Chamber 18 (Advanced) with large-skip glitches | 0:00:11 | 2012-02-05 | Carsten 'djcj' Janssen |