![]()
![]()
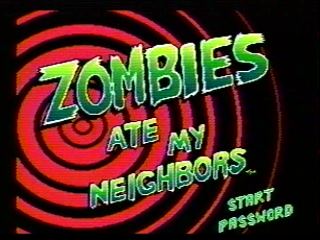
Zombies Ate My Neighbors is a sleeper hit released for the SNES and the Genesis in September 1993. As the name suggests, Zombies are terrorizing the neighborhood, and it's up to you to rescue the neighbors.
Category note: 100% in this game constitutes of all victims saved.
Best 100%, Single-segment Time: 1:28:18 by Martin 'Allbeert' M. on 2016-01-27
Get Flash to see this player.
Author's comments:
RNG gives, RNG takes away.
Zombies Ate My Neighbors. One of the best SNES games that has ever existed. Nostalgia value + great music + beating impossible game = good speedrun.
In order to get to level 1B ("Day of the Tentacle"), I need either a bazooka or a monster potion during the first level. After messing around with emulator for a while, I found a consistent way of getting it. For those who might be interested, you need to select character on frame 1332 after a reset, or ~22.16 seconds. This is why I wait a bit on player selection screen.
Another thing to note is that taking a death in this category does not really cost any time. Because due to the amount of points gathered, there will be a total of 12 extra lives. However, any extra life when the player has 6 lives already will trigger a "Perfect player bonus", which takes quite a while. I take a few deaths on purpose which will basically act as a way of saving medkits.
The routes used per level were mostly intended to minimize movement while still getting the most important pickups. A few levels have pretty bad monster spawns, which mostly always will result in the death of the victim, so in these levels I gather 6 monsters around which will fill up the monster sprite slots in this game, and thus preventing further monsters from spawning. This strat is absolutely needed in level 28 ("Mark of the Vampire"), since the last couple of tourists will transform into werewolves if there are enough sprite slots. In most levels though, there will be some "odd" movement here and there that's meant to avoid certain spanws. Also, if you see me shooting at a victim or right besides it, it is a safety measure in case there is a bad spawn. Basically, if you see me doing that, I've lost a run at some point to a bad spawn there.
Here is the victim breakdown:
480 - 48 normal levels
60 - 6 bonus levels
10 - Credits level
3 - Babies spawned by the Titanic Toddlers
Minus 1 - Victim behind a solid wall on level 22B ("Son of Dr. Tongue")
For a total of 552
All this said, here is the level overview of the run:
- Level 1 ("Zombie Panic")
Going straight for the garbage bin by only pressing up+left is what actually allowed me to test on emulator. Based devs, maybe they thought about this, maybe it's just luck.
- Level 1B ("Day of the Tentacle")
At the beginning, I move away from the victim to prevent tentacles from spawning too close to it and killing it. It would happen almost every time if going directly towards the victim. The rest of the level is pretty uneventful, I have to take a few hits because I don't have the weedcutter yet. And I clear the path after the skeleton door so I can get to the teacher as soon as possible.
- Level 2 ("Evening of the Undead")
I will try to open as many boxes throughout the run in the hopes I get a good drop. The boogie monster has a high drop change, but got a lucky ancient artifacts. This is pretty useful since it is my main mains of walking around without getting hit later in the run.
- Level 3 ("Terror in Aisle Five")
Uneventful level.
- Level 4 ("Chainsaw Hedgemaze Mayhem")
Here use the monster potion only after getting the girl on the trampoline. It uses a bit more bazooka shells, but I have enough of them.
- Level 5 ("Weird Kids on the Block")
Uneventful level.
- Level 6 ("Pyramid of Fear")
Lucky pandora's box drop. In this level I also take big detours to pickup all the pandora's boxes, which are the fastest way of killing the Titanic Toddlers.
- Level 7 ("Dr. Tongue's Castle of Terror")
First level with tourist-werewolves which forces me to use some speed shoes. Lucky bazooka drop, although I didn't really get low bazooka ammo this run. Taking a death on purpose as well. Usually I only take deaths if it is on a safe place far away from any victim that might die.
- Level 8 ("Titanic Toddler")
Horrible RNG from the pandora's boxes. They just went everywhere except where they had to. Bad RNG baby as well, took a while waiting around. I can't really get too much closer because it can kill the victims in the area. Lots of time lost. Lots of pandora's boxes wasted.
- Level 9 ("Toxic Terrors")
I didn't know until a couple of days ago that you could remove the blob thing quickly when it falls on top of you.
- Level 9B ("Mushroom Men")
Take a detour on the northern area for all the nice pickups.
- Level 10 ("No Assembly Required")
Bazooka being fired all over the place. Nothing special besides that
- Level 11 ("Weeds Gone Bad")
For whatever reason, I stopped using the weedcutter and got hit. Bad decisions.
- Level 12 ("Mars Need Cheerleaders")
After level 1B, this is the first level with really bad RNG where victims can die without me being able to do anything. The mothership can simply decide to kill a victim before I can reach it. Martians bad spawns and random movement don't help either. Luckily I made it through without much trouble.
- Level 12B ("Cheerleaders Verus the Monsters")
First level with a vampire. It likes the clowns so it doesn't cause much trouble.
- Level 13 ("Chopping Mall")
Another level with potentially bad RNG, the chainsaw guys can get to the cheerleader on the far left before I get there depending on the random movement they have after they spawn.
- Level 14 ("Seven Meals for Seven Zombies")
The fact that there are tourist-werewolves here forces me to take a bad route. Also, the 9th explorer is very badly placed so I have to use the sprite limit to ensure it doesn't die. This could potentially be done with a pandora's box, but it's very RNG heavy. And finally, I'm forced into yet another detour because I'm low on pandora's boxes because of the fight on level 8.
- Level 15 ("Dinner on Monster Island")
Skeleton Key pickup. Used 3 keys instead of taking the route on the left because sometimes food guy gets killed by squidmen.
- Level 16 ("Ants")
Pretty long level. Ants stole a bazooka pickup but nothing major besides that. I need to make sure I end the level with speed shoes for the next one.
- Level 17 ("Office of the Doomed")
Horrible level to play casually. Most victims will die before even knowing what is going on. Tourist-werewolves on 8 second timer, and just awful placement all around. The scariest part here is actually the zombie that always spawns close to the teacher when I make my way to the first tourist couple. I have to make sure I go north quick enough so that the zombie despawns and the teacher doesn't die.
- Level 17B ("Someplace Very Warm")
Use monster potion to walk around the lava without trouble.
- Level 18 ("Squidmen of the Deep")
Another level where I need to abuse the sprite limit. Here however, I actually didn't count properly, and I only have 5 around me, while the 6th can be barely seen on the top right of the screen. I got extremely lucky here, since normally it would just mean a dead victim and a dead run. As far as I know, there is no consistent way to save those two victims without abusing this.
- Level 19 ("Nightmare on Terror Street")
Speed shoes are used here to avoid RNG spawns on the zombie-heavy zone near the cheerleader and teacher.
- Level 20 ("Invasion of the Snakeoids")
Snakeoids were nice, sometimes they can disappear and take a while to come back.
- Level 21 ("The Day the Earth Ran Away")
At the beginning I ensure that I have 3 aliens "stuck" at the top. This allows me to control their movement to some extent, and ensure that the soldier and dog are not killed by random spawns.
- Level 22 ("Revenge of Dr. Tongue")
There can be some pretty ugly spawns on this level, especially on the 2nd victim. But luckily it didn't. Trapping the frankenstein monster in an alien bubble is pretty useful, and also having it and the vampire attacking clowns. On this level I also get the flamethrower which is extremely useful for the boss fights.
- Level 22B ("The Son of Dr. Tongue")
Second level with Titanic Toddler. This one is a big pain because I cannot get too close or victims will start dying. Trying to time properly pandora's boxes and bazookas can be useful. But in the end it is simply dependent on RNG, so quite a few time is wasted here as well. Also, there is the tourists trapped behind a wall which cannot be saved. However, because of the baby from the Titanic Toddler, the number of victims remains at 10.
- Level 23 ("The caves of mistery")
Like 1B, I have to start this level going away from the victim to prevent a squidman from spawning and killing it. Then I also have to take a bit of a longer route to avoid bad spawns.
- Level 24 ("Warehouse of the Evil Dolls")
Using monster potion to avoid wasting bazookas. Also, I have ensure that chainsaw follows me north to avoid it killing the cheerleader.
- Level 25 ("Look Who's Shopping")
Last Titanic Toddler. Very bad RNG again. I had to kill it with a bazooka to save at least one pandora's box which I might need in later levels. There are some awkward movements in this level to avoid spawning monsters near victims.
- Level 26 ("Where the Red Fern Growls")
Straight forward level. Nothing special.
- Level 27 ("Dances With Werewolves")
Another tricky level. Werewolves spawn depending on the position of the player. After spawning them I go away to despawn them, and then save the victim. Still, I had a close call on the cheerleader, but luckily the werewolf aggroed towards me.
- Level 28 ("Mark of the Vampire")
Another level with 8 second tourist-werewolves. For the 3rd couple of tourists, again I need to use the sprite slot limit. The werewolf didn't want to jump towards me so I lost some time. After that it is simply a matter of keeping the vampires busy with clowns. However, I have to make sure that they aggro on the clowns, since circling the player can cause an accidental victim kill.
- Level 29 ("Zombie House Party")
At the end I go close to the swimming pool and away to spawn and despawn a squidman. Not much happening besides that.
- Level 30 ("The Horror of Floor Thirteen")
There are two very badly placed victims here. For the first I need to wait until I see the spider so I can kill it with a pandora's box, then rush towards the victim. Then right after, the victim below has a spider spawn very closeby. I use some flamethrower here to make sure I kill the spider. Some time lost on the first spider spawn, but the other option is to gather 6 monsters and drag them around, which can be very time consumming on this level.
- Level 31 ("Look Who's Coming to Dinner")
Nothing out of the ordinary for this level. Even if there seem to be a few close calls, the spawns are pretty consistent so there isn't really any risk.
- Level 32 ("Giant Ant Farm")
Another pair of shoes used because of close spawns. Skipped medivac because I had enough.
- Level 33 ("Fish and Crypts")
It is another place where I use the sprit limit. I took more than necessary cause again, I can't count it seems. After this, at the end of the northern hall, I have to make sure that the mummy on the bottom right of the screen despawns. Got a lucky speed shoes, and then the squidmen spawns were nice. That is a very risky place which is basically dependent on RNG.
- Level 33B ("Curse of the Pharaos")
Use a pandora's box to kill a mummy that's on the top left of the screen, very close to a victim.
- Level 34 ("I was a Chainsaw Maniac")
Chainsaw guys were really annoying this level, it doesn't help that I forgot for a moment where I was supposed to go :)
- Level 35 ("Boardwalk of Terrors")
Here, there are two tourist couples on top of each other so it might seem as if I saved only 9 victims.
- Level 36 ("Monster Phobia")
First boss level. There can be a glitch here where the last victim simply doesn't spawn. A good way to avoid it is to make sure it is there in the first place, then keep the radar on. At least that's what a youtube video said! The fight was a bit sloppy but nothing too bad.
- Level 37 ("Labyrinth of Horrors")
The idea to use shoes here is to pickup the cheerleader before the zombie kills her. I completely missed her though, and again, RNG saved me and the run lived another level. Near the end, I do some backtracking to despawn the werewolf. And then I make sure that the vampire stops circling me before getting the last victim.
- Level 38 ("Monsters of the Blue Lagoon")
A lot of the movement in this level is just to avoid bad spawns. The last victim is very scary. It requires good timing of either the pandora's box shot, or the point at which I go into the water.
- Level 39 ("Destroy All Vampires")
Another usage of shoes to avoid bad spawns. Some shuffling around with the vampires, and a weird glitch where one simply appeard on top of me.
- Level 40 ("Pyramid of Fear Two")
I waste the soda I picked up with the bazooka so that my weapon changes don't get messed up. Near the end there is a very very close call. Again, this is really down to RNG and I was just lucky (again).
- Level 41 ("Martians Go Home!")
Last level with the worst monsters in this game. There are very few dangerous places here, so with proper routing, saving all victims is basically guaranteed.
- Level 42 ("Spikes")
One last relaxing level before the real pain begins. There could be some issue with the werewolves, but killing them solves it.
- Level 43 ("Super Fund Cleanup Site")
One of the worst levels in the whole game. I don't think there is a route that works consistently every single time, so it is basically a gamble level. I went for the safest route I knew. Spent a lot of time trying to get the 6 squidmen in the north part, but they wouldn't spawn, and almost got the victim killed when I got too close to the right. Luckily it didn't happen, and the next spawns after the ghost potion weren't too bad.
- Level 44 ("The Curse of Dr. Tongue")
Straight forward level. Using last potions to avoid as much water as possible. Then make sure that vampire finds a place to settle down so that it doesn't follow me towards the teacher. However, it teleported towards it! Pretty nerve wracking, since it actually shot the victim but missed it somehow. The luck never ends.
- Level 45 ("Danger in Picnic Park")
The last really scary level. The spiders here can kill a few victims before I even know what is happening. Again, the routing here helps a lot, but it doesn't guarantee safety.
- Level 46 ("Day of the Chainsaw")
This level is usually safe. Chainsaw guys near the end were annoying; I actually got stucked to it for a while. In an ideal world, the timing is such that monster potion expires right in front of the skeleton door. Of course it didn't happen this time. Lots of destruction in the level.
- Level 47 ("Gridiron Terror")
Calm level before the last one. There is no real danger to the victims here. After killing snakeoids, the fields get filled with football players, but it is only a minor inconvenience. I go away from the cheerleader to make sure the snakeoid doesn't kill her.
- Level 48 ("Curse of the Tongue")
WAHAHAHA. Spawning the Dr. near the beginning of the level makes his laugh present until I get close enough to trigger his potion drinking. All remaining shoes are used here. At least two are needed. One for tourist-werewolves, and one for the cheerleader and baby which have bad spawns nearby. This level was a bit sloppy. I went back to kill the vampire but he wasn't there anymore, so I hoped for the best, that he wouldn't spawn on top of me and start circling. I chose to kill him as a safe strat, since I wouldn't want a victim to be dying to him at this point in the run, and anyways the last fight would be extremely annoying with the vampire alive. The fight itself went ok, I might have gone a bit overboard with removing the webs, but it couldn't hurt. Head fight went poorly, but its movement makes it really hard to expect for a good fight.
- Level 48B ("Monsters Among Us")
Sloppy play here with the bazooka, and the fact that I didn't have enough keys. Developers are annoying, but nothing to do about it.
So yeah, that's it. Fun ride. Fun game. Fun life.
Thanks to rdrunner, lurk, and gaia for the strats I stole from them.
Thanks to Thanwe and monker321 for their level rips that helped a lot during the routing of this game.
Thanks to Hammerite Heretic for his walkthrough guide which helped during the routing as well.
Thanks to Sui for being Sui <3
And shoutouts to all the kewl keeds (in alphabetical order) accelerator-kun, aki-kun, baka-kun, fakker-kun, nrg-kun, ruizu-kun, and paul-kun