![]()
![]()
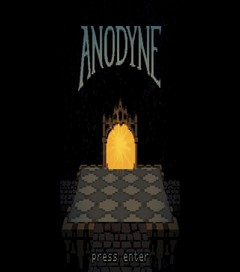
Anodyne is a 2013 PC action adventure taking place in a dream world. Just like with real dreams, walls in this game are merely a suggestion and not something that really stops a dedicated player from going places he shouldn't be.
Return to the Game List, the FAQ, or the Home Page.
With Large-skip glitches: 0:04:51 by 'lifning'
Get Flash to see this player.
Author's comments:
Some notes (which I paraphrase on audio track 2):
0:03 - Japanese text, as usual, saves time due to shorter dialog boxes: about 15 seconds in any%.
0:12 - I hold X for most of the run to make text boxes go faster. They don't get dismissed unless you press C. It's not the best strategy to haphazardly mash C, though, because while holding C, Young doesn't move.
0:33 - In the Nexus, I jump into the portal gate to the street level on the right edge; you don't have to be completely in front of it.
0:36 - The first thing I do in the street area is pause and Return to Entrance, which brings me to the middle of the next screen - the game considers that the "entrance" of this level. This avoids the lecture about how to use a save point, and it's just generally faster.
0:40 - This is the wiggle glitch, wherein you hold up or down while on the left or right side of the screen and move back and forth to move one pixel at a time into a wall.
0:53 - If the screen transitions upward and Young would be overlapping a solid tile at the bottom of the screen, he's pushed upward an additional tile. This only happens when moving north.
0:58 - Young doesn't collide with the tile he's considered to be standing on, so if you walk into a solid tile from another screen, you can walk off of it toward an empty tile or into a screen border.
1:16 - You can skip an additional cutscene where Mitra rides her bike away by not going far enough north to touch the trigger for it.
1:35 - This glitched out effect happens when you actually go off the entire map. If you go too far off the map to the left or right, there's another copy of the map on each side, each shifted down and up one tile, and with no objects loaded. You'll see this in the bridge area.
2:18 - This is the pit skip without jump shoes, which killed a lot of runs before I came up with a more repeatable pattern to get across. If you hold right or left and mash up or down, you can simply walk through the bottomless pits. Down is more reliable when moving left, and up is more reliable when moving right, though I do both up and down while moving left in this run.
2:28 - Avoid going too far north here to skip the Sage cutscene where he talks about the 36 card gate, just like with Mitra earlier.
2:40 - This is where we go to the duplicate copy of the map to cross the bridge, without the 36-card gate and the boss fight in the way.
2:54 - I use that upward-transitioning tile boost twice here to gain a little extra motion on this bridge.
3:25 - This is the endurance part of the run, a series of consecutive wiggle glitches to bypass the swap puzzle and the boss room. Each wiggle takes 6 screen transitions, then move to the next tile, and repeat.
4:12 - This aqueduct you see here is the exception to this rule. When you're standing on it, it takes 7 screen transitions to wiggle off of it. This results in needing another odd number of horizontal screen transitions to get back to the ending screen, the upshot of which is that you get one "safety net" where you can use 7 transitions instead of 6 in a normal wiggle in case you think you might have started it too early. I don't use it in this run, though.
4:37 - We stay on the right on this screen so Young doesn't swim right *and* left when he learns to swim.
4:57 - The timing we've been using in the Anodyne thread starts when pressing C to start the game and stops when I lose control of the character here.
5:53 - The game timer is a bit different; I believe it starts after the "Press C to start" screen fades out, and ends at some hard to determine point after the sunset screen fades out, which results in 5:14 for this run.
Shoutouts to the SDAers that worked on routing and running this game: Kulthavy, ProfessorBroman, Saefer, Judgy, and especially Hazdogga, who trades best any% times with me from time to time.
Shoutouts to Sean Hogan and Jon Kittaka for making a fantastic game.
Shoutouts to my friends TopKnot, DefectiveNu, CrookedNixon, TheAlmightyMoo, Nebs, and last but not least my girlfriend Amanda for the encouragement they've given me.
Thanks for watching!
All Bosses with Large-skip glitches: 0:24:43 by 'The Barrel'
Get Flash to see this player.
Author's comments:
This run was a nightmare.
Planning for this run started about June going into July of 2013 (before I had an SDA account) and the route has seen drastic changes in the short time between planning and attempts for this run. My mentality was that finding useful OoB (out of bounds) was one of the biggest priorities. Think about; you're walking in a straight line most of the time and can skip objects and enemies that slow down progression. Obvious time saver if you can manage it.
I also wanted to get through without picking up any health bugs. You lose about seven seconds per bug if you're at full health and even more if you've taken damage and the bug has to refil your health. This would mean fighting every boss with a maximum of six HP and needing to use save points whenever possible to refill health.
It was a huge priority to the planning to make my life miserable basically.
I'm going to just be commenting on the run chronilogically.
- The 1st pass/Swap Grab
The first pass includes, picking up the broom and the Swap and completing the game as fast as possible to unlock the Swap for full use. It's a simple path but there is a lot to talk about. The path had changed very recently to this recording, in that I now choose to save while in the Woods so that I can conveniently come back after unlocking the Swap without having to go through the Street area again.
I use a dialogue box glitch (which I refer to as the "Broom Box Glitch") to shorten the save point's initial dialogue. By going into the menu and returning to entrance at the exact same time as opening the chest containing the broom, it'll freeze the dialogue box and you can use it to esentially skip another, much longer dialogue box as I do here.
Shoutouts to Hazdogga for the Fields strat (at least he's the only one I've seen doing it, I'll credit whoever did it first). Putting the Fields' teleport point on screen to activate it later is a huge deal for later in the run. This way of getting out of bounds is not only fast, but it uses only one wiggle segment to get out of bounds.
The Terminal is no big deal, just what you do for Any%. Wiggle out of bounds and use the "Shattered Dimension", as I'll call it, to cross the bridge and skip the Sage fight (we'll be coming back for him later).
I should mention that the version I run is version 1.505, which is the first "finalized" build of the game released. There aren't many differences in this version compared to most later versions, but one that helps this run is that after getting the Swap in the "Go" area, in later builds you're required to put the coloured blocks on specific tiles before these gates in your way will drop down. In this build there are no gates so I can Swap right through without a problem. From then on it's just standard wiggles to complete the game, credits, and unlock the Swap.
- Coming Back and Seer
After the credits the game allows you to save from your last previously saved point during the Swap grab. If you don't save at all, you're warpped to the Dimensional Rift where the tutorial took place but the save in the Woods allows me to warp straight there after the credits. There are two paths you can take to get to Seer: Front door or back door. The front will have Sage there who'll ramble on for awhile about your weapon. But the back is a simple, dialogue-free trip that, as a balance, involves a lot of tile swapping. I take the back path for a reason I'll get into in a second.
Once you get to Seer he isn't really that hard - he's the first boss normally after all. Entering from the OoB area in the back makes things way easier because you can get three easy hits on him before he moves. He moves in an up and down "V" pattern, so the main trick is just proper placement. I do take some damage, but since I have to damage boost before the next boss I plan to save to refill my health anyway. Not too much to this fight really.
- Youngtown and Watcher
Youngtown has a simple premise: Get out of bounds - I'm just using Youngtown as a bridge to Watcher, so there's no need to deal with any of it. The OoB is optimal in this case (and by optimal, I mean maybe 1 second faster if you do the swaps right. Spoilers: I don't).
On a minor note, I notice that this version is more prone to lagging coming out of Youngtown (or anywhere with the grainy video effect). Sometimes it doesn't lag; most times it does. Not a big time loss but it's something to note and probably an upside to running later builds of the game, really.
I somehow managed to not take damage to Watcher - rendering the save somewhat pointless - but that's mostly because he for once gave me a good pattern. The ideal pattern is any pattern in which he goes into his first fire phase twice, and doesn't go into the phase where he dashes horizontally across the screen. That attack is not only slower overall, it's harder to dodge. Thankfully this fight went really well.
- Fields and Forest
For the Fields, I found out that Goldman's house on the map is two screens over to the left of where the actual entrance is. So my strat was to instantly go out of bounds, get into his house and walk out of the entrance - effectively warping me two screens to the right. Getting to the Forest entrance this way is about 5-6 seconds quicker than Swapping through the rocks/trees. Too, this is much easier to pull off once you memorize how many screens down you have to travel during the OoB section.
The Forest is somewhat straight forward. This is pretty much the path with the most holding a certain direction rather than having to walk around and weave around objects. I also choose this path because it allows me to trigger the dust ball's dialogue now. The next time I'll have to pick up dust is before the Manager fight, and the dialogue can sometimes throw off my timing and positioning. So it's best to trigger the dialogue now.
- Cliffs and The Wall
The Cliffs strat shown here is a huge improvement over my old method - about 4 seconds saved. By entering the cave with the Extend upgrade (that I don't pick up) and Swapping immediately to the left you're warped into the front of the main cliffs dungeon and can get to the Jump Shoes cutscene much quicker. Reaching the Jump Shoes cutscene this way you're able to start the cutscene as soon as possible, and leave without Mitra telling you that she'll see you later.
After getting the Jump Shoes you'll notice that I start jumping whenever possible. Guess what, after examining it in YUA - measuring the amount of frames v.s. distance - you gain a grand total of two pixels per jump in comparison to walking (two!). Jumping onto ladders you gain a bit more since you're in most cases half way up said ladder with a single jump.
This was an odd Wall fight.
If you notice Young disappears twice during the fight. That isn't a visual hiccup, Young clipped into the Wall's hitbox and was behind him momentarily. The fact that this happens twice is startling for me considering it's not exactly easy to do when you're actually trying to do it intentionally for a bit of a larf. It pretty much requires a jump from just the perfect spot. Unfortunately it's hard to hit him from this position, but on the plus side you are invulnerable during that time. So that's... something. I didn't lose any time from it though because it happened at times when I wouldn't have been able to attack him anyway. Regardless of that, the fight is simply stay up in his face and hit 'em when his teeth show.
I then exit the boss arena and the Sage room so I can warp to entrance and proceed to the next boss.
One note: While trying to warp back I accidentally equiped the broom, so there was a bit of a time loss by going into the menu again once I realized it. Not too bad though.
- Space and The Manager (My new band name, called it!)
Space... so, ladders huh?
Once I get to the Hotel it's basically a race to the elevator so I can go to the first floor. One tiny time saver is that I lower the gates once I swap past them, making the trip easier when I have to go through that area again.
Manager in-and-of-itself is a somewhat easy fight. The first form is more a matter of placement, and since you get the 3-health gem after defeating the first form there isn't really a risk of dying any time soon. The second form can be summed up as: "sitting in the corner and hitting it" with the footnote: "until it dies". Manager decided to be funny and try to dodge the last hit, but I still got him.
*I think I accidentally hit the spikes during the explosion animation. I just can't have nice things, can I?*
- Off to the Beach, and Rogue
I figure since the Terminal is already over to the left of the Fields, it's best to warp there and go out of bounds to reach the Beach quickly.
*No Young! Stop reading signs!*
Cutting ahead to the actual Rogue fight. Rogue usually has a pretty predictable pattern but it decided to mess with me today. The tenticles are supposed to come out over to the left of Rogue first and then get in between me and Rogue, but they decided to skip the first step and make this fight improv-tastic. It still went relatively well all things considered.
Now it's off to the run killer!
- The Cell and the Circus (My band's first single)
Most of The Cell is a matter of counting the OoB screens (8 to be precise) and ducking in when necessary. Nothin' big.
The Circus is where my runs are usually killed by one of two things: The lion I pass on the way to the boss or the boss itself, the servants. The lion in question has a few different patterns. If he decides to start shooting fire as soon as you walk in, you're done for. Either through the time loss or by Young being sent to the "Fiddy Zone". Thankfully he was tame in this run - pun more than intended.
By the way: No, I don't know why I hit the flame thrower either. Just a dumb mistake.
The servants are jerks! They are manipluable though. I figured out that Young has to stand in just the right place and attack at just the right time in order for them to jump back like they do - setting up the first three hits easily. I fall down the pit on purpose so that I can warp right in front of where the servants will run to towards the entrance. Even after manipulating their pattern so that I take as little damage as possible, you see I'm still down to my last hit point by the end. I could've probably gotten out of this fight with two health, but the fight is still somewhat dangerous without any extra health pickups.
My heart was pounding after this fight, but thankfully that's pretty much the most dangerous part of the run.
- Sage and the Rest
Like I said, the rest is pretty much a breather after the servants. Sage's pattern is somewhat scripted, so like Seer it's a matter of positioning and attacking at the right times. (So basically like every boss fight ever?... yes.)
Anyway, moving into the "Go" area (the garden) I make use of a much better Mitra/Sage cutscene skip than a couple previous attempts.
The Briar fight is pretty easy, especially when you've practiced it as much as I have. Even though I get down to my last two hit points I'm not at all worried. At one point I was tempted to take one more hit to finish with one hit point left to show off but I decided against it - no need for a run to end due to cockiness. To put it simply, I was nowhere near as close to death as it looks. I didn't even lose time taking the damage I did since Briar has a set time for when he becomes vulnerable anyway. I did lose time on the second fire round not hitting the dust ball immediately though.
I was able to end the fight by jumping into Briar's hit box which propelled me forward for the cutscene right after - very, very minor time saver. For some reason the screen doesn't do its wavy effect after you walk into the sunset. So I stopped the timer based on intuition, really. Once you've played it enough you know the timing.
And with that it's time for some sammitches.
_
Final Thoughts
I'm really happy with how this run turned out all things considered. I still think some kinks could be worked out, a lot in fact, but I'm at least happy that there were no major mistakes in the run - or at least nothing I'll lose sleep over.
Shoutouts to all of the Anodyne runners who've helped developed various strats for this game. Thank you to SDA for hosting this run. And thank you to Sean Hogan and Jon Kittaka for making a great game to run.