![]()
![]()
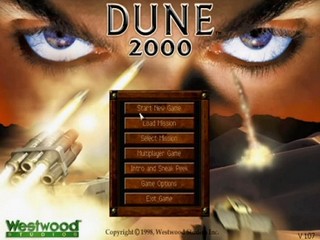
Released on August 1998, Dune 2000 is the second in the series between Dune II and Emperor: Battle for Dune. Emperor Frederick Corrino IV challenged the three Houses: Atreides, Harkonnen and Ordos, to gather the most spice from the desert planet Dune, with the winner controlling the planet. Take control as the Commander of any of the three Houses and battle to overthrow the rest from what is rightfully yours. Be careful for there are additional four non-playable factions: House Corrino, the Fremen, the Mercenaries and the Smugglers. Depending on your chosen House, some will help your cause but the others will be against you.
The concepts of the map types Left/Right/Bottom/top are described here.
Return to the Game List, the FAQ, or the Home Page.
Individual-levels run for Atreides Easy in: 1:32:50.
Get Flash to see this player.
| Level name | Time | Date | Player |
| Atreides Mission 1 (Top) | 0:00:58 | 2012-04-01 | 'Shaokhan' |
| Atreides Mission 1 (Bottom) | 0:00:58 | 2012-04-01 | 'Shaokhan' |
| Atreides Mission 2 (Top) | 0:01:42 | 2012-04-01 | 'Shaokhan' |
| Atreides Mission 2 (Bottom) | 0:02:42 | 2012-04-01 | 'Shaokhan' |
| Atreides Mission 3 (Top) | 0:02:05 | 2012-04-01 | 'Shaokhan' |
| Atreides Mission 3 (Bottom) | 0:02:16 | 2012-04-01 | 'Shaokhan' |
| Atreides Mission 4 | 0:01:57 | 2012-04-01 | 'Shaokhan' |
| Atreides Mission 5 | 0:01:26 | 2012-04-01 | 'Shaokhan' |
| Atreides Mission 6 (Left) | 0:08:46 | 2012-04-01 | 'Shaokhan' |
| Atreides Mission 6 (Right) | 0:09:13 | 2012-04-01 | 'Shaokhan' |
| Atreides Mission 7 | 0:12:56 | 2012-04-01 | 'Shaokhan' |
| Atreides Mission 8 | 0:13:10 | 2012-04-01 | 'Shaokhan' |
| Atreides Mission 9 (Left) | 0:21:21 | 2012-04-01 | 'Shaokhan' |
| Atreides Mission 9 (Right) | 0:13:20 | 2012-04-01 | 'Shaokhan' |
Author's comments:
For most later missions it is important to get good map control - for easy enemy attack ambushing and for dealing with worms and ensuring the harvesters are safe to have a steady economy. When having superior army - attack harvesters in spice, it might lure out more units from enemy base and will have easier to defeat defense.
Most of the time, concrete is not neccessary as not building it saves time and allows to get other buildings faster. Concrete can help against airstrikes, but it might as well be better to restart the game until the key airstrike hits nearly nothing. However, windtrap concrete is a must as otherwise it would give half the power and would need to build 2 of them or annoyingly repair them all the time.
Generally, it is good to let tanks die rather than harvesters, even as far as worm eating units goes. If the worm eats 3 units, it disappears for couple minutes, it is much better to lose 3 tanks than 3 harvesters. This description is aimed at the hard difficulty, but largely applies to the easy difficulty as well.
First 5 missions for Atreides are possible to finish very quickly even on hard difficulty due to exploiting how the missions were set up. Since mission 6 it becomes complicated so there is a need for good macro / micro.
Pretty straightforward mission objective. Get 2500 credits. The trick here is to sell the Construction yard that yiealds a lot of cash. Selling Wind trap helps also, but not so much. Selling the Refinery will not help as it works like silo, therefor it would release the cash.
They key here is to attack as soon as possible while not losing all units in the attack and simultaneously pumping production from barracks. Getting light factory units or refinery is too much of a delay.
The goal here is to mine 5000 credits. So selling the yard applies here as well. There needs to be enough silos to store 5000, it can be done with either 2 refineries or refinery and silo.
In map version 1 the main key is to defend the attacks and also to deal damage to the worm so it stops eating units and be a threat to the harvester, which would make a huge delay if the worms eats it. If this is all successfull, then there is a tiny window to finish emptying the harvester. The remaining units can be used as bait to take damage for the refinery to survive. This way no units need to be built and therefor no cash spent.
On map version 2 the worm is not so much of a threat and the reinforcements are not so deadly, so the mission is much simpler to manage.
This mission was a bit poorly designed imho, because you can wipe enemy base with start units even on hard difficulty. It is also good to not forget the units that are put on the map at the start and do not move until all structures are destroyed (i.e. the trike at top left)
This mission can take enormly long time if normal units are built. However the start units for this mission are enough to bait attention so the engineers can pass to capture barracks, which is the only victory condition.
In these missions I find it key to get fast economy advantage to get a constant unit production and attacking at the right time, which means to get enough units so you can trade the units effectively and to also have enough to rush in the base. It can be very dangerous, because the AI can easily overwhelm you and you need to reset the game, considering the use of full game speed. A lot of luck can also make difference, i.e. worm going to enemy bases and eating enemy harvs instead of own. Units will inevitably die, so constant production is more important than trying to get perfect unit exchanges.
See Atr mission 6
In this mission player gets quite some units to start with, so technically even on hard difficulty one of the smaller bases can be taken out. Key structures to kill are the production ones as they will not get rebuilt and the rest of the buildings can be cleaned up later. Keeping that start sonic is good, because it does a lot of damage, especially to infantry. Then it is good to ensure economic production and proceed into 3 heavy and light factory production (max). At that point, it is good to kill the easier red base and prepare as many units possible in a good spot to kill efficiently the nearly infinite flow of Ordos units from the last base. Once that is cleaned up, proceed in the base before units are rebuilt again.
Version 1 got split spots, which makes it very difficult to manage, map control is the key - fast units(tanks) are required. I found it good to mine some spice from the top base first and then get some additional from bottom. Starting straight up from bottom with harvestering spice is safer, but might require very early need for caryalls, which are not really viable so early. The key is to get some harvs at the start and then proceed into 3 factory production and keeping the refinery production for additional harvesters and to add caryalls later on. When the AI attacks they go typically for refineries, way to maintain map control is to squish the infantry and when the armies are inside eachother, just press guard. As the AI has typically less units, it will be very efficient trade. Enough army for attack can be determined by having efficient trades as the AI sends units out of the base. The ideal time for attack is after an attack of AI as their base will be more empty.
Version 2 has 2 advantages - one is own bases are much closer and the other is the possibility of wiping first base with the start units which helps with dealing of the attacks and reduces enemy production.
Individual-levels run for Harkonnen Easy in: 1:30:28.
Get Flash to see this player.
| Level name | Time | Date | Player |
| Harkonnen Mission 1 (Left) | 0:00:57 | 2012-04-01 | 'Shaokhan' |
| Harkonnen Mission 1 (Right) | 0:00:58 | 2012-04-01 | 'Shaokhan' |
| Harkonnen Mission 2 (Left) | 0:03:04 | 2012-04-01 | 'Shaokhan' |
| Harkonnen Mission 2 (Right) | 0:02:35 | 2012-04-01 | 'Shaokhan' |
| Harkonnen Mission 3 (Top) | 0:03:24 | 2012-04-01 | 'Shaokhan' |
| Harkonnen Mission 3 (Bottom) | 0:04:14 | 2012-04-01 | 'Shaokhan' |
| Harkonnen Mission 4 | 0:06:22 | 2012-04-01 | 'Shaokhan' |
| Harkonnen Mission 5 | 0:09:14 | 2012-04-01 | 'Shaokhan' |
| Harkonnen Mission 6 (Left) | 0:00:59 | 2012-04-01 | 'Shaokhan' |
| Harkonnen Mission 6 (Right) | 0:00:48 | 2012-04-01 | 'Shaokhan' |
| Harkonnen Mission 7 | 0:12:37 | 2012-04-01 | 'Shaokhan' |
| Harkonnen Mission 8 | 0:09:45 | 2012-04-01 | 'Shaokhan' |
| Harkonnen Mission 9 (Top) | 0:21:04 | 2012-04-01 | 'Shaokhan' |
| Harkonnen Mission 9 (Bottom) | 0:14:27 | 2012-04-01 | 'Shaokhan' |
Author's comments:
For most later missions it is important to get good map control - for easy enemy attack ambushing and for dealing with worms and ensuring the harvesters are safe to have a steady economy. When having superior army - attack harvesters in spice, it might lure out more units from enemy base and will have easier to defeat defense.
Most of the time, concrete is not neccessary as not building it saves time and allows to get other buildings faster. Concrete can help against airstrikes, but it might as well be better to restart the game until the key airstrike hits nearly nothing. However, windtrap concrete is a must as otherwise it would give half the power and would need to build 2 of them or annoyingly repair them all the time.
Generally, it is good to let tanks die rather than harvesters, even as far as worm eating units goes. If the worm eats 3 units, it disappears for couple minutes, it is much better to lose 3 tanks than 3 harvesters. This description is aimed at the hard difficulty, but largely applies to the easy difficulty as well.
See Atr. mission 1.
The harvester has quite some hit points, so he can be used as bait to take hits while own units hit enemy units.
If going for refinery then it is key to protect harvester from worms at start(Version 2). If going for barracks (Version 1), then very early attack has to be made, making it potentially fastest win possible, but the army is very fragile to harvesters.
Decent harvester amount is key along with defending vs enemy and the most difficult - defending against worms. Once sufficient army is made, attack and keep production. It is good to kill the turret and the fremen hideout very early on, because there is nothing else happening and the tanks take almost no damage.
It is important to multitask here at the start and plan and set up base perfectly so heavy factories as well as many refineries can be placed efficiently on the small building area.
Both of these missions can be done by rushing with the start units due to poor design of the mission. There is a lot of luck that is involved, so it is mostly not to be expected to succeed on first attempt. The mission with the starport on the edge of the map is especially harder to execute.
It is key to cut the left base production as soon as possible. However, the sonic reinforcements will never stop. A group of engineers will slow down production of own, but can help achieve the fast destruction of the smaller base on the left. Also making sure that a siege tank guards the backdoor of the base. Later on it is key to have a good position against large attacking force and an attack should be made after a successfull defending of enemy attack where AI will have rather low defences. Who wants to feel lucky can send engineer to the enemy base on the right, targetting the Yard first else the buildings will get rebuilt.
Took me awhile to realize I can just rush the mercenary base early on to get rid of ton of units coming from left side. This makes the Harkonnen weaker for early defense though, so some restarts might be needed. Enemy constantly sends engineers, so it is good to spread infantry to detect it. Here it is also about getting lucky with the annoying airstrikes as losing 2-3 refineries to one air strike is not very optimal. Other benefit to do is to get a repair paid and keep repairing units until an army sufficient enough to break through 5 turrets is made. That attack should come again after enemy just attacked. It is only needed to kill Ordos in the middle.
Version one is hardest of all the missions. Key turret positioning is vital. This was the only Hard mission I was unable to do without turrets. There is a lot of variety how to build up the base. It is good to memorize early couple attacks as they are always the same. It is also possible to utilize the walls, but sometimes it can be too late to defend after spending time building walls, but if successfull they can help a lot making enemy come with units one by one. Keeping some sieges behind the turrets is also important as turrets can't do much against infantry. An important thing to note is that there is a limited time to get caryalls, as when the initial spice is mined out, the caryalls are a must. As enemy has many units, mass Devastators seem to be the perfect choice here. Other spots can be captured with MCV to continue with refinery placement and some additional production facilities.
Map version 2 is a bit easier than the other lvl 9 Hark, but still intense. First couple drops are good to get a hold of to efficiently kill them without being surprised, ideally pick them off when they are being dropped one by one. It is good to get some Combat tanks first for some mobility and map control and then transition into devastators.
Individual-levels run for Ordos Easy in: 1:52:27.
Get Flash to see this player.
| Level name | Time | Date | Player |
| Ordos Mission 1 (Left) | 0:00:58 | 2012-04-01 | 'Shaokhan' |
| Ordos Mission 1 (Right) | 0:00:56 | 2012-04-01 | 'Shaokhan' |
| Ordos Mission 2 (Left) | 0:01:56 | 2012-04-01 | 'Shaokhan' |
| Ordos Mission 2 (Right) | 0:02:23 | 2012-04-01 | 'Shaokhan' |
| Ordos Mission 3 (Left) | 0:03:05 | 2012-04-01 | 'Shaokhan' |
| Ordos Mission 3 (Right) | 0:04:18 | 2012-04-01 | 'Shaokhan' |
| Ordos Mission 4 | 0:02:36 | 2012-04-01 | 'Shaokhan' |
| Ordos Mission 5 | 0:03:40 | 2012-04-01 | 'Shaokhan' |
| Ordos Mission 6 (Left) | 0:11:56 | 2012-04-01 | 'Shaokhan' |
| Ordos Mission 6 (Right) | 0:11:14 | 2012-04-01 | 'Shaokhan' |
| Ordos Mission 7 | 0:11:05 | 2012-04-01 | 'Shaokhan' |
| Ordos Mission 8 | 0:14:44 | 2012-04-01 | 'Shaokhan' |
| Ordos Mission 9 (Left) | 0:13:44 | 2012-04-01 | 'Shaokhan' |
| Ordos Mission 9 (Right) | 0:29:52 | 2012-04-01 | 'Shaokhan' |
Author's comments:
For most later missions it is important to get good map control - for easy enemy attack ambushing and for dealing with worms and ensuring the harvesters are safe to have a steady economy. When having superior army - attack harvesters in spice, it might lure out more units from enemy base and will have easier to defeat defense.
Most of the time, concrete is not neccessary as not building it saves time and allows to get other buildings faster. Concrete can help against airstrikes, but it might as well be better to restart the game until the key airstrike hits nearly nothing. However, windtrap concrete is a must as otherwise it would give half the power and would need to build 2 of them or annoyingly repair them all the time.
Generally, it is good to let tanks die rather than harvesters, even as far as worm eating units goes. If the worm eats 3 units, it disappears for couple minutes, it is much better to lose 3 tanks than 3 harvesters. This description is aimed at the hard difficulty, but largely applies to the easy difficulty as well.
See Atr. mission 1.
Map version 1 has very close starting spots so it can be rushed very early on. On map version 2 sold Yard to get Cash advantage to rush in early.
Map version 1 - Attempted to destroy the worm to avoid eating the harvester. With sufficient army - attack.
Map version 2 - Used tripe rax to pump out infantry as they are cost effective. Only weak against enemy harvesters.
The problem here is the units need to be sent not only as distraction, but also to destroy the wall, so engineer can pass through.
Found 4 refineries to be optimal amount to fit in 15 000 cash that needs to be mined. Using the starport trick to free silos by ordering and cancelling the starport units - it is most efficent to do with the most expensive unit - mostly the MCV. There is no power needed for the spice delivery or maintenance, so those can be sold along with the MCV for faster cash gain. The starport doesn't sell for all that much and it provides the so needed free silos.
In version 1 sold walls to have more building space that is still insufficient in this mission. Here it is also key to get early economy while keeping the harvesters and base alive and avoiding worms. If not units, then at least harvs have to be protected from worms. Multitasking is needed for the constant attacks on main base as well as the starport that must not die.
In version 2 i want to get early harvesters mining to have more cash later on while trying to limit their deaths by blue attacks. It is good to impair red's production as soon as possible and to get 3-4 caryalls before the spice next to the base runs out.
I like to cut off the mercenary part with the Windtraps to avoid them stepping on my building area and me being unable to place the buildings without interruption. Again it is also good to set up a steady economy before moving on to the attack.
This one can take quite some restarts before getting it right. I used to do that in 30 min before I managed to get a good tempo of getting cash / units without dying. First couple attacks are the same and can be learned to deal with effectively. After that it is key to protect harvesters both from attacks and from worms. After many restarts player can get lucky in sense that the worm will not come player's direction or the worm can be killed. It can become problematic if there is a worm and an attack at the same time. It can be good to use starport before getting more heavy factories as the starport units cost typically less than classic production and it can be better maneged (make order depending on cash). It is key to poke the enemy and have him attack before attacking them as that will make them fight in less favorable conditions (i.e. not in their base).
In version 1 I used the safest spice to harvest at start to not get economy impaired. Also tried to help out the ally to clean up the attacks where possible. The key part in the attack is to kill production buildings so even if the attack doesn't kill off everything, there will be less reinforcements for the AI to defend later on.
In version 2 it is important to maintain map control in order to protect the harvs. It can be done a bit later as there is some spice close to the base, but once caryalls are used, map control is needed to protect the harvs and efficiently kill the enemy attacks in general. Having tanks die is less of a problem than harvesters dying, so it is ok to lose some units while keeping the harvesters alive.
Individual-levels run for Atreides Hard in: 2:48:23.
Get Flash to see this player.
| Level name | Time | Date | Player |
| Atreides Mission 1 (Top) | 0:01:33 | 2012-04-01 | 'Shaokhan' |
| Atreides Mission 1 (Bottom) | 0:01:29 | 2012-04-01 | 'Shaokhan' |
| Atreides Mission 2 (Top) | 0:01:29 | 2012-04-01 | 'Shaokhan' |
| Atreides Mission 2 (Bottom) | 0:02:12 | 2012-04-01 | 'Shaokhan' |
| Atreides Mission 3 (Top) | 0:03:05 | 2012-04-01 | 'Shaokhan' |
| Atreides Mission 3 (Bottom) | 0:03:11 | 2012-04-01 | 'Shaokhan' |
| Atreides Mission 4 | 0:01:57 | 2012-04-01 | 'Shaokhan' |
| Atreides Mission 5 | 0:01:07 | 2012-04-01 | 'Shaokhan' |
| Atreides Mission 6 (Left) | 0:16:08 | 2012-04-01 | 'Shaokhan' |
| Atreides Mission 6 (Right) | 0:23:27 | 2012-04-01 | 'Shaokhan' |
| Atreides Mission 7 | 0:21:44 | 2012-04-01 | 'Shaokhan' |
| Atreides Mission 8 | 0:23:53 | 2012-04-01 | 'Shaokhan' |
| Atreides Mission 9 (Left) | 0:35:34 | 2012-04-01 | 'Shaokhan' |
| Atreides Mission 9 (Right) | 0:31:34 | 2012-04-01 | 'Shaokhan' |
Author's comments:
For most later missions it is important to get good map control - for easy enemy attack ambushing and for dealing with worms and ensuring the harvesters are safe to have a steady economy. When having superior army - attack harvesters in spice, it might lure out more units from enemy base and will have easier to defeat defense.
Most of the time, concrete is not neccessary as not building it saves time and allows to get other buildings faster. Concrete can help against airstrikes, but it might as well be better to restart the game until the key airstrike hits nearly nothing. However, windtrap concrete is a must as otherwise it would give half the power and would need to build 2 of them or annoyingly repair them all the time.
Generally, it is good to let tanks die rather than harvesters, even as far as worm eating units goes. If the worm eats 3 units, it disappears for couple minutes, it is much better to lose 3 tanks than 3 harvesters. This description is aimed at the hard difficulty, but largely applies to the easy difficulty as well.
First 5 missions for Atreides are possible to finish very quickly even on hard difficulty due to exploiting how the missions were set up. Since mission 6 it becomes complicated so there is a need for good macro / micro.
Pretty straightforward mission objective. Get 2500 credits. The trick here is to sell the Construction yard that yiealds a lot of cash. Selling Wind trap helps also, but not so much. Selling the Refinery will not help as it works like silo, therefor it would release the cash.
They key here is to attack as soon as possible while not losing all units in the attack and simultaneously pumping production from barracks. Getting light factory units or refinery is too much of a delay.
The goal here is to mine 5000 credits. So selling the yard applies here as well. There needs to be enough silos to store 5000, it can be done with either 2 refineries or refinery and silo.
In map version 1 the main key is to defend the attacks and also to deal damage to the worm so it stops eating units and be a threat to the harvester, which would make a huge delay if the worms eats it. If this is all successfull, then there is a tiny window to finish emptying the harvester. The remaining units can be used as bait to take damage for the refinery to survive. This way no units need to be built and therefor no cash spent.
On map version 2 the worm is not so much of a threat and the reinforcements are not so deadly, so the mission is much simpler to manage.
This mission was a bit poorly designed imho, because you can wipe enemy base with start units even on hard difficulty. It is also good to not forget the units that are put on the map at the start and do not move until all structures are destroyed (i.e. the trike at top left)
This mission can take enormly long time if normal units are built. However the start units for this mission are enough to bait attention so the engineers can pass to capture barracks, which is the only victory condition.
In these missions I find it key to get fast economy advantage to get a constant unit production and attacking at the right time, which means to get enough units so you can trade the units effectively and to also have enough to rush in the base. It can be very dangerous, because the AI can easily overwhelm you and you need to reset the game, considering the use of full game speed. A lot of luck can also make difference, i.e. worm going to enemy bases and eating enemy harvs instead of own. Units will inevitably die, so constant production is more important than trying to get perfect unit exchanges.
See Atr mission 6
In this mission player gets quite some units to start with, so technically even on hard difficulty one of the smaller bases can be taken out. Key structures to kill are the production ones as they will not get rebuilt and the rest of the buildings can be cleaned up later. Keeping that start sonic is good, because it does a lot of damage, especially to infantry. Then it is good to ensure economic production and proceed into 3 heavy and light factory production (max). At that point, it is good to kill the easier red base and prepare as many units possible in a good spot to kill efficiently the nearly infinite flow of Ordos units from the last base. Once that is cleaned up, proceed in the base before units are rebuilt again.
Version 1 got split spots, which makes it very difficult to manage, map control is the key - fast units(tanks) are required. I found it good to mine some spice from the top base first and then get some additional from bottom. Starting straight up from bottom with harvestering spice is safer, but might require very early need for caryalls, which are not really viable so early. The key is to get some harvs at the start and then proceed into 3 factory production and keeping the refinery production for additional harvesters and to add caryalls later on. When the AI attacks they go typically for refineries, way to maintain map control is to squish the infantry and when the armies are inside eachother, just press guard. As the AI has typically less units, it will be very efficient trade. Enough army for attack can be determined by having efficient trades as the AI sends units out of the base. The ideal time for attack is after an attack of AI as their base will be more empty.
Version 2 has 2 advantages - one is own bases are much closer and the other is the possibility of wiping first base with the start units which helps with dealing of the attacks and reduces enemy production.
Individual-levels run for Harkonnen Hard in: 2:54:03.
Get Flash to see this player.
| Level name | Time | Date | Player |
| Harkonnen Mission 1 (Left) | 0:01:28 | 2012-04-01 | 'Shaokhan' |
| Harkonnen Mission 1 (Right) | 0:01:27 | 2012-04-01 | 'Shaokhan' |
| Harkonnen Mission 2 (Left) | 0:03:10 | 2012-04-01 | 'Shaokhan' |
| Harkonnen Mission 2 (Right) | 0:03:43 | 2012-04-01 | 'Shaokhan' |
| Harkonnen Mission 3 (Top) | 0:05:33 | 2012-04-01 | 'Shaokhan' |
| Harkonnen Mission 3 (Bottom) | 0:07:54 | 2012-04-01 | 'Shaokhan' |
| Harkonnen Mission 4 | 0:09:37 | 2012-04-01 | 'Shaokhan' |
| Harkonnen Mission 5 | 0:14:20 | 2012-04-01 | 'Shaokhan' |
| Harkonnen Mission 6 (Left) | 0:00:56 | 2012-04-01 | 'Shaokhan' |
| Harkonnen Mission 6 (Right) | 0:00:50 | 2012-04-01 | 'Shaokhan' |
| Harkonnen Mission 7 | 0:22:46 | 2012-04-01 | 'Shaokhan' |
| Harkonnen Mission 8 | 0:19:51 | 2012-04-01 | 'Shaokhan' |
| Harkonnen Mission 9 (Top) | 0:45:00 | 2012-04-01 | 'Shaokhan' |
| Harkonnen Mission 9 (Bottom) | 0:37:28 | 2012-04-01 | 'Shaokhan' |
Author's comments:
For most later missions it is important to get good map control - for easy enemy attack ambushing and for dealing with worms and ensuring the harvesters are safe to have a steady economy. When having superior army - attack harvesters in spice, it might lure out more units from enemy base and will have easier to defeat defense.
Most of the time, concrete is not neccessary as not building it saves time and allows to get other buildings faster. Concrete can help against airstrikes, but it might as well be better to restart the game until the key airstrike hits nearly nothing. However, windtrap concrete is a must as otherwise it would give half the power and would need to build 2 of them or annoyingly repair them all the time.
Generally, it is good to let tanks die rather than harvesters, even as far as worm eating units goes. If the worm eats 3 units, it disappears for couple minutes, it is much better to lose 3 tanks than 3 harvesters. This description is aimed at the hard difficulty, but largely applies to the easy difficulty as well.
See Atr. mission 1.
The harvester has quite some hit points, so he can be used as bait to take hits while own units hit enemy units.
If going for refinery then it is key to protect harvester from worms at start(Version 2). If going for barracks (Version 1), then very early attack has to be made, making it potentially fastest win possible, but the army is very fragile to harvesters.
Decent harvester amount is key along with defending vs enemy and the most difficult - defending against worms. Once sufficient army is made, attack and keep production. It is good to kill the turret and the fremen hideout very early on, because there is nothing else happening and the tanks take almost no damage.
It is important to multitask here at the start and plan and set up base perfectly so heavy factories as well as many refineries can be placed efficiently on the small building area.
Both of these missions can be done by rushing with the start units due to poor design of the mission. There is a lot of luck that is involved, so it is mostly not to be expected to succeed on first attempt. The mission with the starport on the edge of the map is especially harder to execute.
It is key to cut the left base production as soon as possible. However, the sonic reinforcements will never stop. A group of engineers will slow down production of own, but can help achieve the fast destruction of the smaller base on the left. Also making sure that a siege tank guards the backdoor of the base. Later on it is key to have a good position against large attacking force and an attack should be made after a successfull defending of enemy attack where AI will have rather low defences. Who wants to feel lucky can send engineer to the enemy base on the right, targetting the Yard first else the buildings will get rebuilt.
Took me awhile to realize I can just rush the mercenary base early on to get rid of ton of units coming from left side. This makes the Harkonnen weaker for early defense though, so some restarts might be needed. Enemy constantly sends engineers, so it is good to spread infantry to detect it. Here it is also about getting lucky with the annoying airstrikes as losing 2-3 refineries to one air strike is not very optimal. Other benefit to do is to get a repair paid and keep repairing units until an army sufficient enough to break through 5 turrets is made. That attack should come again after enemy just attacked. It is only needed to kill Ordos in the middle.
Version one is hardest of all the missions. Key turret positioning is vital. This was the only Hard mission I was unable to do without turrets. There is a lot of variety how to build up the base. It is good to memorize early couple attacks as they are always the same. It is also possible to utilize the walls, but sometimes it can be too late to defend after spending time building walls, but if successfull they can help a lot making enemy come with units one by one. Keeping some sieges behind the turrets is also important as turrets can't do much against infantry. An important thing to note is that there is a limited time to get caryalls, as when the initial spice is mined out, the caryalls are a must. As enemy has many units, mass Devastators seem to be the perfect choice here. Other spots can be captured with MCV to continue with refinery placement and some additional production facilities.
Map version 2 is a bit easier than the other lvl 9 Hark, but still intense. First couple drops are good to get a hold of to efficiently kill them without being surprised, ideally pick them off when they are being dropped one by one. It is good to get some Combat tanks first for some mobility and map control and then transition into devastators.
Individual-levels run for Ordos Hard in: 2:54:57.
Get Flash to see this player.
| Level name | Time | Date | Player |
| Ordos Mission 1 (Left) | 0:01:32 | 2012-04-01 | 'Shaokhan' |
| Ordos Mission 1 (Right) | 0:01:28 | 2012-04-01 | 'Shaokhan' |
| Ordos Mission 2 (Left) | 0:02:21 | 2012-04-01 | 'Shaokhan' |
| Ordos Mission 2 (Right) | 0:03:04 | 2012-04-01 | 'Shaokhan' |
| Ordos Mission 3 (Left) | 0:04:45 | 2012-04-01 | 'Shaokhan' |
| Ordos Mission 3 (Right) | 0:04:25 | 2012-04-01 | 'Shaokhan' |
| Ordos Mission 4 | 0:02:49 | 2012-04-01 | 'Shaokhan' |
| Ordos Mission 5 | 0:04:27 | 2012-04-01 | 'Shaokhan' |
| Ordos Mission 6 (Left) | 0:19:54 | 2012-04-01 | 'Shaokhan' |
| Ordos Mission 6 (Right) | 0:17:22 | 2012-04-01 | 'Shaokhan' |
| Ordos Mission 7 | 0:18:20 | 2012-04-01 | 'Shaokhan' |
| Ordos Mission 8 | 0:24:35 | 2012-04-01 | 'Shaokhan' |
| Ordos Mission 9 (Left) | 0:38:10 | 2012-04-01 | 'Shaokhan' |
| Ordos Mission 9 (Right) | 0:31:45 | 2012-04-01 | 'Shaokhan' |
Author's comments:
For most later missions it is important to get good map control - for easy enemy attack ambushing and for dealing with worms and ensuring the harvesters are safe to have a steady economy. When having superior army - attack harvesters in spice, it might lure out more units from enemy base and will have easier to defeat defense.
Most of the time, concrete is not neccessary as not building it saves time and allows to get other buildings faster. Concrete can help against airstrikes, but it might as well be better to restart the game until the key airstrike hits nearly nothing. However, windtrap concrete is a must as otherwise it would give half the power and would need to build 2 of them or annoyingly repair them all the time.
Generally, it is good to let tanks die rather than harvesters, even as far as worm eating units goes. If the worm eats 3 units, it disappears for couple minutes, it is much better to lose 3 tanks than 3 harvesters. This description is aimed at the hard difficulty, but largely applies to the easy difficulty as well.
See Atr. mission 1.
Map version 1 has very close starting spots so it can be rushed very early on. On map version 2 sold Yard to get Cash advantage to rush in early.
Map version 1 - Attempted to destroy the worm to avoid eating the harvester. With sufficient army - attack.
Map version 2 - Used tripe rax to pump out infantry as they are cost effective. Only weak against enemy harvesters.
The problem here is the units need to be sent not only as distraction, but also to destroy the wall, so engineer can pass through.
Found 4 refineries to be optimal amount to fit in 15 000 cash that needs to be mined. Using the starport trick to free silos by ordering and cancelling the starport units - it is most efficent to do with the most expensive unit - mostly the MCV. There is no power needed for the spice delivery or maintenance, so those can be sold along with the MCV for faster cash gain. The starport doesn't sell for all that much and it provides the so needed free silos.
In version 1 sold walls to have more building space that is still insufficient in this mission. Here it is also key to get early economy while keeping the harvesters and base alive and avoiding worms. If not units, then at least harvs have to be protected from worms. Multitasking is needed for the constant attacks on main base as well as the starport that must not die.
In version 2 i want to get early harvesters mining to have more cash later on while trying to limit their deaths by blue attacks. It is good to impair red's production as soon as possible and to get 3-4 caryalls before the spice next to the base runs out.
I like to cut off the mercenary part with the Windtraps to avoid them stepping on my building area and me being unable to place the buildings without interruption. Again it is also good to set up a steady economy before moving on to the attack.
This one can take quite some restarts before getting it right. I used to do that in 30 min before I managed to get a good tempo of getting cash / units without dying. First couple attacks are the same and can be learned to deal with effectively. After that it is key to protect harvesters both from attacks and from worms. After many restarts player can get lucky in sense that the worm will not come player's direction or the worm can be killed. It can become problematic if there is a worm and an attack at the same time. It can be good to use starport before getting more heavy factories as the starport units cost typically less than classic production and it can be better maneged (make order depending on cash). It is key to poke the enemy and have him attack before attacking them as that will make them fight in less favorable conditions (i.e. not in their base).
In version 1 I used the safest spice to harvest at start to not get economy impaired. Also tried to help out the ally to clean up the attacks where possible. The key part in the attack is to kill production buildings so even if the attack doesn't kill off everything, there will be less reinforcements for the AI to defend later on.
In version 2 it is important to maintain map control in order to protect the harvs. It can be done a bit later as there is some spice close to the base, but once caryalls are used, map control is needed to protect the harvs and efficiently kill the enemy attacks in general. Having tanks die is less of a problem than harvesters dying, so it is ok to lose some units while keeping the harvesters alive.