![]()
![]()
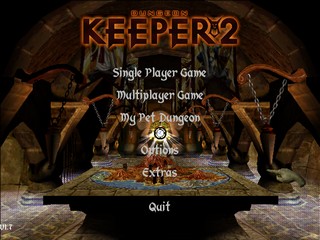
Released in 1999 by Bullfrog Productions, Dungeon Keeper 2 is the sequel to Dungeon Keeper in which you take control of an unnamed floating hand called the Keeper (okay you're not the hand shut up) and your task is to escape the underworld by gathering the portal gems from the goodly heroes who hold them and escape to the surface using a variety of devious tricks, foul monsters and some interesting simcity type dungeon creation.
Best time: 2:14:03 by Anthony Malmgren on 2013-06-22, done in 20 segments.
Get Flash to see this player.
Author's comments:
Dungeon Keeper 2 Speedrun in 2:14:03
Played on version 1.7 from GOG.com. This is due to stability issues and graphic issues that occur on other versions.
Level 1: Smilesville
This level is a simple tutorial level. I take the portal as quickly as possible to start recruiting goblins. I'm required to build a 3x5 lair and 3x3 hatchery and am stuck waiting until the 2 minute mark to engage the dwarves. When the rocks become digable, I simply put my goblins in position and engage them and Lord Antonius.
Level 2: Sing Song
For this level, there are three waves of dwarves that have to be dealt with. I start to engage them with the minimum force possible, which seems to be three minions. Due to the distance the dwarves have to travel, I dig to them with two minions and get a third by the time they get to my dungeon heart. The dwarf waves are allowed to come to my dungeon heart to make my imps to join in the fight and to prevent morale issues that my creatures would otherwise have. The single tile of library ensures that I only get one warlock for his heal spell. Goblins are more damaging and are thus preferred.
At 2:18 it becomes necessary to separate the two dwarf groups in the second wave to avoid being overrun. It also ensures the Lord Darius appears quicker as the death of all of the dwarves in the first group triggers his appearance. At 4:07 I do lose a goblin because I was expecting my warlock to heal, so there is a small loss of time here. Overall, though, the battle with the Darius goes smoothly and a dwarf manages to go the wrong way, saving the trouble of killing him.
Level 3: Ramshackle
Raising an army in this level to defeat of Lord Avaricious would take way to long, so I rely on the traps that the game introduces to kill him. Mining all of Lord Avaricious's gold will cause him to rush straight into these traps.
When I get a workshop running, I build eight sentry traps and then sell off my treasury so that I'm close to the 16000 gold limit. There's a slight mistake here in that I should've hit the 16000 mark without having to pick up an imp at 1:23. When I reach the limit, it forces the imps to dig through gold normally because they can't store it. I mine the bottom seam of gold first to buy time for my trolls to get out a sentry trap. This allows me to deal with the two dwarfs that come from mining the middle gold seam. When Lord Avaricious attacks, its simply a matter of separating him from his fellow heroes.
Level 4: Shadygrove
This level makes you dig all the way to the way to the north to find Lord Ludwig, so that becomes my primary task. While you're supposed to use possession to kill Ludwig, that requires getting a warlock and waiting for it to research. There are two side entrances to Ludwig's keep that make possession unnecessary. I choose the left side because the timing works out to where Ludwig is patrolling on that side of his keep when I reach him.
Only a small lair and hatchery are built to get a small number of creatures to kill Ludwig with. My forces are augmented by the increase level specials found at 2:49 and 5:23. The same gold trick I used previously is used in this level to get through the large gold seam at 3:10. At 4:13 I make sure to dig around the cannon so I can put my creatures closer to Ludwig without having to destroy the cannon. When Lord Ludwig comes, I use lightning to stun lock him and my minions do the rest.
Level 5: Elmshadow
This level requires a skeleton to get past some fear traps and engage Lord Constantine. Just like in the third level, Constantine can be lured into attacking my dungeon, and thus can be lured into a bunch of sentry traps.
I focus on digging south first to get to the prison as quickly as possible. I use a bridge at 1:20 because going over water is faster than claiming land. I make sure to sell the bridge at 1:22 and 1:35 to avoid a wizard spawn that would occur. This is the first level I get to use possession on, and I use it to kill the dwarf and wizard with a dark elf. Lord Constantine does a good job at separating himself from his group, so I concentrate on using my dark elf for additional damage during the fight.
Level 6A: Sweetwater
I believe that the developers made a bit of a mistake on this level. I attack Lord Ironhelm immediately, before he can retreat back into his keep. My wooden bridge fails to build twice, costing me a couple seconds on my way to Ironhelm. During the fight, however, Ironhelm rushes into the middle of my forces and dies much faster than usual.
Level 7: Emberglow
Normally, this level is a slow crawl through a hero fortress with groups of high level heroes to deal with. The game does offer me a chance to avoid this, and I take it. There is a level 5 salamander to the south of my dungeon that can navigate the fortress and kill Lord Sigmund. Note that I drop 4 imps on the first gold block because the imp's AI would have the last imp try to claim land if I dropped him next to the other gold block. Surprisingly, you don't actually have to see an area to build a bridge on a tile. Navigating through the keep is pretty self explanatory except for 1:37 where the guard opens the door. When I get to Lord Sigmund, I draw out the giants guarding him and lead them to the back of the keep. This leaves Lord Sigmund exposed, and I abuse his inability to walk through lava to kill him.
Level 8: Snapdragon
This level is a rather simple one. I make my way to the lord of the land through the fastest route I know. I pick up some gold and at 2:05 I drop my creatures in the casino to keep them from starting a fight and getting killed. I use Horny and all my forces to engage Lord Titus and manage to lure him into fighting Horny.
Level 9: Silverstream
Sadly, there is no real way to speedrun this level. I'm stuck waiting the full 20 minutes no matter what. All I can do is make sure that Lord Voss dies quickly when the 20 minutes are up. To that end, I make sure I have my lightning spell upgraded, maximum mana, and a bridge near the hero gate when the 20 minutes are up. The rest of the time is spent getting all of the specials and taking over the garrisons.
Level 10: Woodsong
My general strategy for this level is to rush Asmodeus while trying to acquire some creatures to assist in the assault. Also, because there are two portals, it is possible to recruit enough warlocks to research tremor. Five warlocks seems to be the right number to research tremor when my imps reach Asmodeus's walls. This means you need a 3x3 library with 3 sides reinforced (if you want to be cheap about it and/or don't want to waste time with your imps digging). There's a make safe special that will reinforce walls at 0:54 that makes this possible. When the mana special is used at 1:10 I leave 40,000 mana so I can cast call to arms and tremor once. 1:55 has my first warlock come in. I drop him in the library without slapping because it would send him back to the lair. Also, the mistresses and dark elf are put near the second portal to defend against the elvenarchers that will invade the dungeon.
At 2:09 the patrol finally clears. The patrols seem to take a random amount of time because of a tendency for the heroes to get stuck on each other. It is definitely possible to get past here a bit faster, but it is rare and not helpful anyway because of having to wait for tremor. 2:42 you see that I have to sell the bridge. This is because when I breach Asmodeus's dungeon, two massive waves of heroes are released. One can reach his dungeon before I kill him if I don't sell the bridge. The other goes for my dungeon heart but won't be able to kill it in time.
When breaching Asmodeus's dungeon, the general mentality is to remove any distractions and then focus the dungeon heart. In this case, all of his minions go to the dungeon heart immediately, making my job easier. At 4:09 you can see an issue with a mistress not attacking. This is common and you'll see it again in the next level. I have to move minions that do this up to the dungeon heart manually.
One final note, there's a message about having to be quick if you play this mission for more than eight minutes. I guess I was a little too quick for it...
Level 11: Sparklydell
There are a couple different ways you can start off on this level. I choose the third option, level 11C, because of the high level starting minions and easy access to a level 10 salamander. While it requires me to kill all four keepers, instead of three, I would've had to spend much more time raising an army in 11A or 11B.
I go for the Morgana, the yellow keeper, right away before she can acquire any sort of fighting force. While my minions attack her heart, I work on acquiring the level 10 salamander and mana special to the northeast of her dungeon. I also work on creating some rooms and on reaching Belial, the blue keeper, before he can reinforce the wall to his dungeon. I also start breaking down the walls around the Raksha's dungeon heart to avoid some bolder traps and gas traps I would otherwise have to deal with.
To conserve mana, I lead my minions to Belial's heart using possession. At 2:52 I lead a salamander off to quarantine Belial's portal. This allows my imps to start taking over the dungeon and stops my creatures from being dragged away from the dungeon heart. Oddly enough, there's an issue where my minions stop attacking the dungeon heart that occurs again in this level. You can see this starting at 2:57. It is much more extreme than in the previous level.
At 4:37 Horny is sent in first against Raksha to absorb damage and attract defenders. Then, its just a matter of letting my imps make their way towards Kronos, the green keeper, while waiting for Raksha to die. Raksha's death gives me enough mana to cast tremor a couple of times to break the walls of Kronos's dungeon.
Level 12: Goldenglade
Another pretty straightforward level. I get as many skeletons as I can before confronting the dwarf group in the graveyard. While they are fighting, I have my imps grab enough gold to build a wooden bridge to the areas I need to get to. The imp ignores some of my orders at 1:33, wasting a second or two. When making the wooden bridge, I make sure to leave a space at 2:09 so I don't claim land as I dig. I have my imps dig into the dungeon, grab the increase level special to the left of the blue dungeon, and grab the skeletons to the right of the dungeon.
There are a few more skeletons in the level, but they are too far away to bother with for this run. During the siege on Malachai , I have a skeleton remove the spike trap, which would've killed a lot of my skeletons, and as many other minions as I can. I also try to use the vampire as a distraction while my skeletons are attacking the dungeon heart.
Level 13: Cherish
Sadly, there is no real trick to beating this level quickly. I reduce the time this level takes by taking the path at the top of the map, giving me access to a portal to some specials, and to some bile demons. The main annoyance in this level is the monks, as their healing can significantly lengthen battles.
Taking the portal goes well as two monks stay behind. The number that come away from the portal is random, so a lot of my runs end here as usually three stay at the portal. I direct the other two monks away from my goblins with my imps. The next obstacle is a hero patrol that goes for the portal. Originally, I thought I would have to wait for them. I found out, however, that the patrol can be pulled away from the portal, leaving my imps free to claim it. You can see this happening at 1:37 and 1:48. This level gets a bit chaotic as I have to deal with the leftover monks and this hero patrol.
I dig through the gold by using the same 16000 gold limit trick as usual. Taking the room at 5:00 is the slowest part of the level. There's no way that I know of to avoid it. All I can do is claim my way through and use water when its available.
I grab the bile demons and the increase level specials to get a bile demon to level 10. This enables me to deal with the fear traps guarding Malleus's dungeon heart. Sadly, my imp goes the wrong way at 7:38 and I'm slow to correct him as I'm concentrated on dropping my army. There is some weird "jumping" that occurs in the game at 8:37 due to collision issues.
The assault on Malleus's dungeon heart goes rather well, though I would've preferred if the goblins didn't activate the spike trap at 9:18 and waste time killing it.
Level 14: Peachtree
I start this level by building a very basic dungeon to attract in the few creatures I need. When I dig through the gold block at 1:12 I start a timer for a wave of heroes to spawn. I have to get past the heroes gate in approximately three and a half minutes or else I'll have to wait for the patrol to pass. Another patrol is also sent towards my dungeon heart, but stop and turn back when they destroy a room. My imps are used to keep this patrol distracted and away for my dungeon heart.
I break out of the hallway at 5:04 to grab two increase level specials and travel over Lord Tiberius's keep. For some reason, the heroes don't follow my mistress.
Level 15A: Fluttershine
Level 15A is chosen for the high level black knights I can acquire. I dig towards the prisons that hold the black knights and towards the two hidden mana vaults in the level. The two mana vaults give me access to a level 7 black knight which I will use to kill Lord Volstag. The prisons provide me with the gold to build a bridge to the hero's keep. There is a small side entrance at 3:47 that I take to get in.
Level 16: Stonekeep
This level turned out to be easier than it looks. I decided to try and assassinate Lord Pureheart using the strongest creature I could quickly find. As luck has it, that creature is a level 4 black knight. The black knight is guarded but also the patrols are either missed by my imp or choose to ignore my imp like at 0:29. At 1:30 my imps break through the wall off-screen and the black knight joins my cause. Strangely, the bile demon that is held captive with him never joins. Lord Pureheart himself is easy to bait and kite around the outside of his keep.
Level 17: Moonshrine
I rush the two portals and mana special to start creating a small force that will allow me to assault the hero fortress in the center of the map. I need 20 kills from this fortress to summon the dark angels, which can be used to crush the other two keepers easily. Acquiring some of the salamanders in the center of the map, the skeletons to the north east of the eastern portal, the increase level special in the bottom right of the map, and the increase level special hidden in the gold are all crucial to creating this force. All my creatures are used in the first engagement at 3:12, but I only need the level 10 skeleton to clear out the rest of the fortress.
I move my forces up at 5:01 to catch the patrol as it spawns from the hero gate. At 6:34 I see that the green keeper, Carrion, left himself wide open on the left side of his dungeon and try to position my forces to attack from both sides. I forget to actually dig through to the portal, so this never happens but the dark angels do get through.
If I started digging a bit sooner, I could've had my dark angels drop in a bit closer to the green keeper's heart. The time loss from this is hard to quantify because the dark angels don't seem intent on attacking the dungeon heart when they get there anyway. So long as there is a dark angel at Carrion's dungeon heart when I return from killing Harkan's dungeon heart, the time loss is small.
Level 18: Cherry Blossom
This level requires me to kill the blue keeper Nemesis. His sons (other keepers) can be ignored. There is, again, no trick to beating this level. I have to build a regular dungeon to attract a force to kill Nemesis. I prioritize the mana special once again for more imps. The two portals are the next important thing, which a quick stop for some neutral creatures. I also need the neutral salamanders to the right of the map. I choose to set up to the left of Nemesis's dungeon because it avoids the training rooms and thus most of his creatures initially.
The elven archer patrol at 4:17 can be converted in a short time so I capture them and torture them. The bridge is sold at 5:32 to slow other groups of heroes that will come and attack my dungeon. Luckily, when I breach Nemesis's dungeon, he wastes his incinerate on an imp and not my army. I use a mistress at 7:30 to block some of Nemesis's reinforcements, which usually come from his training room. At 8:48 the shadows on the creatures bug out for some reason, but it hardly matters and Nemesis dies soon after.
Level 19: Butterscotch
This level requires me to capture all three princes, who will try to flee when attacked. The earliest that I can catch all three in positions that they can't escape from is around the four minute mark. These first four minutes are spend preparing for this moment. I make sure not to build anything other than a lair or hatchery to recruit more mistresses. Acquiring the second portal and five increase level specials ensures my force is as strong as possible when facing the princes.
At 4:00 I find Balder arriving sooner than normal and isolate him. I don't sent any forces after Balder at this point because he will still convert before the other princes do when I capture them. The fight versus the other two princes goes very well this time around. At 5:12 I have to move my black knight over to deal with the forces that remain for Balder's patrol. They still manage to distract my imps a tiny bit and at 5:23 my imp decides that an elf is more important. This costs me around five seconds altogether. Balder is then dealt with and the level is basically over. I just have to wait for the princes to convert. There is no way that I know of to speed up the process.
Sub 14 minutes is probably possible if the prince patrols and imp AI are extremely cooperative. I don't show the time at the end of the level because the game crashed before it could be displayed.
Level 20: Heartland
This level requires the use of the secret level 10 dark angel to get anywhere near an acceptable time. In order to do this, a 5x5 temple has to be build near him and a warlock, black knight, and firefly must be sacrificed. This causes a bit of an issue, in that black knights can't be recruited in this version due to a bug. You can sacrifice for a black knight, however, by using a mistress and a guard. Mana is also an issue in this level, because you need enough to summon Horny, cast tremor (twice if unlucky), maintain enough imps to dig gold, and sustain possession of a dark angel. This issue is solved by having my creatures pray at the temple that I have to build anyway. You'll see later on that I spend some down time "encouraging" them to do so.
I choose to start the level by digging to the right. The guards on the right side of the map are the least defended and are right next to a lot of gold that can be used to build a temple. After capturing the guard at 2:22, I have until he finishes being converted to set up for invading King Reginald's keep. The left side of his keep is the easiest to summon Horny from, so that is where I strike. As noted before, I need the firefly at 5:39 for a sacrifice. When the guard joins my side, the sacrifices are made and the fun begins. I use my dark angel to break through to the wall I tagged. Leaving the one crippled guard at 8:23 is crucial, because it draws Horny towards the stone knights. King Reginald has to die quickly to open the way to the stone knights, and the rest of his group has to be pulled down to avoid interfering with Horny. Afterwards, there's nothing to do but watch the carnage.