![]()
![]()
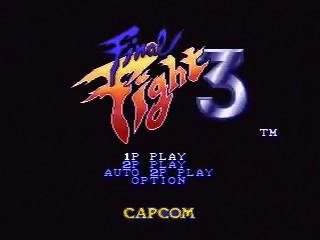
Released in December 1995 in Japan and January 1996 in North America by Capcom, Final Fight 3 is the sequel to Final Fight 2, in which you take control of one of four characters; Dean, Guy, Haggar and Lucia, and attempt to save Metro City from the menacing Skull Cross Gang. Like the previous titles in the series, the game features side-scrolling beat'em up action and lots of piledriving, assuming you're playing as the Mayor.
Return to the Game List, the FAQ, or the Home Page.
Single-segment Expert Haggar: 0:24:52 by Sean Murphy.
Get Flash to see this player.
Author's comments:
Haggar is a mixed bag in this game. On one hand, Haggar has powerful throws, a fast and damaging special attack, and a really useful super. On the other, all of these things knock enemies down, which often costs a ton of time. So, instead of using his actually useful tools, I have to abuse the buffer kill to hit enemies with his standing punches until they are in range of killing them with violent axe. While Haggar's punches have fantastic speed and range, when he does need to get close to enemies, he doesn't really have a good method. He is the only character without a jumping down attack that leaves enemies standing, so a running jump isn't an option, and his dash attack has extremely limited range. The biggest strength he has in this setting is that he has very strong options for clearing enemies off of him when things go poorly, which is good since things will generally go poorly for him more often than Guy or Lucia (which should be indicated as Haggar took nearly the same amount of attempts as those two characters combined)
One very important engine mechanic that I abuse a lot in all the characters run is a buffer kill on strings. Normally, doing several punches in a row will result in a knockdown on enemies, but any time spent on the ground is time I can't attack. So, in between attacks, I run for a few frames. This kills the buffer the game uses to determine how far in a string of attacks you are. Normally, this buffer lasts a really long time, possibly a full second. Instead, it ends instantly. For a good example of this in the Haggar run, watch the Dave fight, and notice how there are a few frames of running and I move towards him slightly in between attacks. Haggar's slow running speed actually makes this easier for him than it is for Dean.
So the stage-by-stage
Round 1: This is a very difficult stage for Haggar. The small number of enemies mean not getting accidental knockdowns is more important than later on. In addition, since everyone dies to simple strings, catching the enemies you want in a string is critical. The Dave fight went ok; I did very well on my buffer kills but got smacked twice. Still, getting knocked down twice costs less time than if I knock down Dave once and he jumps, so a solid stage.
Round 2: I really start abusing the buffer kill here to put enemies in range of death from violent axe. The second screen here went fairly poorly, I spent a long time struggling to get clean hits on Billys and one of the Dirks, but the other enemies cooperated very well. The method I use to fight Callman is a bit unusual, I could use the buffer kill and just attempt to combo him, but he tends to just throw you out of it. So, instead, I just use this throw loop, which allows me to attack him continuously while still controlling what his lackeys do during the fight. Using this method probably costs 10 seconds compared to a perfect fight, but that number is pretty deceptive since a perfect Callman fight with the buffer kill strats is essentially impossible.
Round 3: Nothing much to say here, the stage is really short and I get good stacking.
Round 4: Starts off pretty rough, but the enemies generally cooperate and even stack themselves pretty well. I do have to resort to throwing Mays more than I'd like because of their positioning, but throwing them does not cost too much time compared to if I try to punch and some of them throw me. Drake fight goes pretty well, he can pretty much escape the setup I use any time he wants, but he chooses not to here for the most part. I can't use the buffer kill against him or any later boss because bosses after Callman suffer from less hitstun than other enemies.
Haggar is the only character who has a jumping down attack that hits the bulldozer. The result is that he absolutely demolishes it.
Round 5: Really solid stage. I had to take the May fight conservatively because they weren't positioning themselves properly. But otherwise there's not much that really went wrong. Breaking all the computers skips half the stage, including the boss.
Round 6: The elevator went terribly, but everything else went really well. This stage is a real nightmare for Haggar because its where enemies HP starts reaching a point where you can reliably do a long enough combo to kill a target without another enemy approaching you from a bad angle. Entering and leaving the doors skips some nasty fights for Haggar. Black gives really odd, luck, but he gets setup for the loop quickly enough.
This run is extremely satisfying for me. Haggar's problems in this game are extremely non-trivial to work around in a speedrun setting, and while a few of those issues do show in this run, I minimized it very well throughout.
Single-segment Expert Dean: 0:28:18 by Sean Murphy.
Get Flash to see this player.
Author's comments:
Dean is terrible. From a basic beatemup design standpoint, Dean is lacking some very fundamental tools when compared with the rest of the cast. He has by far the slowest standing punch, his average damage on his useful moves is rather low, and his ability to control space is extremely limited because of his slow super joy (which is the only one in the game you can't make slide by running) and his poor throw hitboxes. The result of this is that the enemy AI stacking itself for you is extremely important for Dean, and that is the main reason that I left this run where it is. The only saving graces he has are that his throw chain is fairly damaging, especially if you end with a super, and that his electric uppercut is one of the only moves in the game that does any real amount of damage and also isn't dodge-able by Joes and Marys.
One very important engine mechanic that I abuse a lot in all the characters run is a buffer kill on strings. Normally, doing several punches in a row will result in a knockdown on enemies, but any time spent on the ground is time I can't attack. So, in between attacks, I run for a few frames. This kills the buffer the game uses to determine how far in a string of attacks you are. Normally, this buffer lasts a really long time, possibly a full second. Instead, it ends instantly. For a good example of this in the Dean run, watch the Dave fight, and notice how there are a few frames of running and I move towards him in between attacks.
So stage by stage breakdown
Round 1: Really strong stage. The enemies stack themselves about as well as I've ever seen, and none of the Billys decide to just run away from me. A minor mistake at the end of the second screen, but considering that it again led to good stacking it's hardly a problem. I even got a hammer drop, the only useful weapon for most characters. Dave only suffered one knockdown, and it was due to finishing off one of his lackeys, which is really important to do as Dean. I even got to finish him off with the super, which saves a non-trivial amount of time.
Round 2: The enemies aren't quite as nice to me here as they were in stage 1, but they still stack themselves really well overall. I had few excess knockdowns and a very fast door entry. About the Callman fight, I do not attempt to use the buffer kill here because Callman will often just throw you for attempting it. I try to focus on damaging Callman, but I do take a little time to get rid of his lackeys when they are nearby because they really can slow down the fight.
Round 3: This was an amazing round 3 for Dean. The sign can actually be rather difficult to break because Dean doesn't have a throw that really does a good job of hitting it, but here it's not an issue.
Round 4: Not a lot to say about the stage itself, I counted health wrong a few times, but the enemies generally stacked themselves favorably. Drake is the only really bad part of the run, the pattern he gave me is pretty much untouchable for Dean. I can't use the buffer kill strats on him because the bosses after Callman suffer from less hitstun than other enemies, so instead I try to trap him in the corner and confuse his AI into not doing his wakeup attack. I lost something like 20 seconds compared to a perfect fight where Dave sets himself up for the corner loop instantly, but even with that time loss, this was by best split to this point by about 20 seconds. I did a few more attempts afterwards, and Drake kept giving me even worse patterns, I actually lost a full minute to him during one of them. Ultimately, the Drake fight with Dean is one of the most RNG heavy fights in this game with how I approach it, so I decided to let this slide.
I missed one attack during the bonus stage because I like to showboat and cancel the running jump attack into the down attack to make the animation look weird. Oh well.
Round 5: Again, nothing too interesting to say. Nothing really interesting happens, and I generally get very favorable patterns. I have to start using super joys a lot more just because the enemy types start being more aggressive, but it's the only way to get Dean out of bad situations because his basic punch is so slow. I also start miscounting enemy health slightly more often here, but because of how Dean's damage works it doesn't cost as much time as it would for other characters. Breaking the computers in the side room skips like half this stage, including the boss, so I have to be careful to make sure they are all destroyed since I have to use enemies bodies to break them (or my own, but it's not possibly to get knocked into them that way if the enemies are all dead)
Round 6: A few instances of bad health counting again, but nothing too bad. A few times it was on purpose because I knew I was going to get hit shortly after, and rather than spend a long time retreating I just did the biggest damage move I could and took the hit. Entering and exiting the doors here skips some rather long fights. The elevator is the main place that went somewhat poorly, perfect luck here could save 10-15 seconds, but good luck getting 10 Joes' AI to cooperate when you can't use throws to group them. Black goes fairly well, ideally he would have set himself up for the loop sooner, but considering how random he is this is easily acceptable. I'm not completely sure exactly why it works, but after he has done lariat, if you hit him immediately after, you can generally just do this loop on him until he reaches critical health.
Anyways, this is undoubtedly the least optimized of the runs I did for this game. Dean is extremely not fun to play as, but I felt like I needed to finish a run for all the characters, so here it is. It's still a very solid run, but it's one that I for one will not be coming back to.
Single-segment Expert Guy: 0:22:51 by Sean Murphy.
Get Flash to see this player.
Author's comments:
Guy is a very well-rounded character in this game. Guy's basic jabs are extremely fast and reach a very long distance, although their damage is low. His dash attack does good damage, and it actually has such a low profile that you can sometimes attack under enemies punches. His throws can generally control space pretty well, and alternatively his back throws do fairly good damage to single targets. His fireball reaches for a long distance and does great damage, making it perfect for finishing off enemies off-screen. His super does a solid 50 damage to one target, and can potentially hit with the ending fireball on other enemies. Guy's only real 'weaknesses' are that his standing string does poor damage, and he doesn't do damage quite as quickly as Lucia with his dash string, but considering he lacks the strange weaknesses she has, he is a much better designed character overall.
One very important engine mechanic that I abuse a lot in all the characters run is a buffer kill on strings. Normally, doing several punches in a row, including the multiple hits of Guy's running attack, will result in a knockdown on enemies, but any time spent on the ground is time I can't attack. So, in between attacks, I run for a few frames. This kills the buffer the game uses to determine how far in a string of attacks you are. Normally, this buffer lasts a really long time, possibly a full second. Instead, it ends instantly. In Guy's case, I cancel the 3rd hit of his running series into a run, and can immediately attack again with the first hit of his running string without having to use any other tricks to prevent a knockdown.
Anyways, onto stage breakdowns
Round 1: This is a fairly average stage 1 for what I would consider acceptable. A few enemies stack themselves poorly, but usually Billys will stall for time or do something idiotic. I unfortunately had to knock Dave down once, but it was still a quick fight. This might not be perfect, but there's not a ton of time to gain either, and there is much more luck stacked later in the game.
Round 2: A loose knockdown here and there, but all caused by poor enemy movements. Callman is extremely random for Guy. I absolutely have to use the running infinite on him, and Callman can dodge absolutely any hit if he is in his defensive mode. Fortunately he didn't do that here, so I was able to combo him across the screen. The super at the end was slight overkill, but if I hadn't used it I would have had to wait for him to stand because I had accidentally gotten the throw. Also, I can't combo Callman into the corner because the Mays will throw me, and also Guy's running string has some weird hitbox issues if you are too close to the enemy.
Round 3: Solid stage, I did have to stall a bit at the end since I hadn't broken the sign yet.
Round 4: I get pretty mediocre luck here. Lots of situations occurred where I couldn't stack enemies effectively or had to super joy my way out of a situation. I actually learned a few tricks since doing this run that could have saved a second or two in a couple places in this section, most notably the triple side switch throw to get enemies who were off-screen back on, but it doesn't cost much time for Guy since he can attack off-screen enemies fairly effectively. Drake gets crushed, essentially a perfect fight for Guy.
Perfect bonus stage. I actually beat the TAS here by 4 seconds on the in-game clock due it apparently not knowing that running jump attacks are a thing.
Round 5: Very strong stage 5. Joes and Marys only get hit when they decide they want to, so the fact that they not only took most of the hits, but also actually stacked themselves to some extent is fantastic. Breaking all the computers at the end skips about half the stage and a boss. I had a lot of minor bad luck in this stage, but nothing drastically bad.
Round 6: The Joes really didn't want to play nice here, but they generally didn't stop me from attacking. I had to resort to using supers against a lot of the early Joes just because of the patterns they were giving me, but it ultimately doesn't cost time as long as they let me throw them quickly. Entering and exiting the doors skips some moderately long fights. The elevator goes almost perfectly for the strat I've chosen. It's possible to hit them with the dash infinite, but getting all 4 Joes to take the hit and not counter throw you is essentially impossible. The May fight after the elevator goes extremely well. Normally the Mays either just run away from you, or throw you the moment you try to attack, but instead they take most of the hits and even stack themselves pretty nicely. The setup on Black goes oddly, but he puts himself where I need him quickly enough. I pause at the very end because if I kill Black before he scrolls the screen, the game will softlock when I kill him instead of showing the ending. While I would have met all the conditions to beat the game, when I got the unintended throw I had to make a split second decision and that's what I went with, and I feel like it was the right call.
This run got really above average luck in most segments, with only a few minor mishaps. This game is EXTREMELY random, almost any enemy can cost 5-10 seconds if they decide to give me bad luck, so I am very satisfied with it. I would have liked to implement a few things I had learned later when doing attempts for the other characters, so this suffers a bit as a result of being the first character I did, but I would imagine those differences would not amount to much in the face of the luck involved.
Single-segment Expert Lucia: 0:22:45 by Sean Murphy.
Get Flash to see this player.
Author's comments:
Lucia is an odd character. On one hand, she is lacking some fundamental things that would be extremely useful. Her standing attacks do poor damage and have poor hitboxes, one of her specials does mediocre damage and the other leaves her completely vulnerable, and her throws mostly do poor damage. Her super is absolutely the most useless in the game, while the damage is good and it can potentially hit all the enemies on screen, it is the only one not done out of a throw, and the input is absolutely ridiculous. Plus, if you do it too near the edge of the screen, it'll just stop hitting. On the other hand, her dash string does huge damage and can be used for a buffer kill, she's the only character with two useful weapons, her jumping attacks do relatively high damage, and her throws control huge amounts of space (especially the knee from behind, which hits like 2/3rds of the screen in front of you). The end result is that Lucia is an extremely powerful character, but with a limited set of useful tools when compared to Guy.
One very important engine mechanic that I abuse a lot in all the characters run is a buffer kill on strings. Normally, doing several punches in a row, including the multiple hits of Guy's running attack, will result in a knockdown on enemies, but any time spent on the ground is time I can't attack. So, in between attacks, I run for a few frames. This kills the buffer the game uses to determine how far in a string of attacks you are. Normally, this buffer lasts a really long time, possibly a full second. Instead, it ends instantly. In Lucia's case, I cancel the 2rd hit of her running series into a run, and can immediately attack again with the first hit of his running string without having to use any other tricks to prevent a knockdown. It is important to know that unlike Guy, this isn't a true combo on many enemies, so a few very fast bosses have the opportunity to escape.
Stages
Round 1: Lucia's dash string does almost the exact correct amount of damage to kill many enemies on this stage. It's generally not even worth stacking enemies here because of their extremely low health values. One odd thing about Lucia is that while her flame kick does only 3 more damage than the first two hits of her dash string, it for some reason hits Dirk (and only Dirk) twice. This is great since Dirks are the only enemies in stage 1 who have much health. Dave goes great, I could tell he was going to jump kick but slightly failed at baiting it, but otherwise this is exactly how I want the fight to go for Lucia.
Round 2: Lucia's ability to buffer kill really starts to shine early, and the damage glitch against Dirks comes into great effect again. They become less common after stage 2, but for now it's perfect. Flame kick also gets used to finish off enemies who are in range of death but too far off screen to get hit by another dash string. Callman wastes a lot of time before getting setup for the infinite, but considering that I downed the Mays quickly, who normally interrupt Lucia during this combo, it works out to not too much time lost compared to catching him immediately.
Round 3: Not much interesting to say, the enemies stack themselves well and not many enemies dodge me.
Round 4: Again not much to say about the stage itself. I got a hammer which I would have like to use on Mays, but I had thought I was far enough off-axis from it when I wasn't and threw it at a Fat Jack. The Mays generally didn't dodge me or throw me much at all here, so it didn't matter. Drake goes perfectly until an input error at the end. Considering that Drake is the first boss I fight who can just escape Lucia's infinite whenever he wants, I still gained significant time compared to if he had given me bad luck.
Perfect bonus stage, no missed jump attacks.
Round 5: The Mays and Joes are ridiculously cooperative with me here. Not getting thrown at all, and barely getting dodged in the 6 May fight is extremely rare. Most of the other fights are clean, and I break the computers to skip the 2nd half of the stage as well as the boss and a bonus stage.
Round 6: The enemies start having enough health for Lucia's buffer kill to show its real strength. I manage to stack most enemies pretty well, get clean door entries to skip fights, and generally don't get thrown or back attacked too often. The 8 May fight after the elevator starts out terribly, but all the high health Mays at the end of the fight cooperate and stack amazingly, so it works out ok. The strategy I use on Black depends completely on him deciding it's going to work. If he decides to walk out of the string, there is absolutely nothing I can do about it. Generally he escapes 2-4 times, and here he only escaped once, and I managed to set him up for it again almost immediately. While I have had better fights, I can't imagine getting any better of a fight at the end of a good run.
This might be the most polished of the characters I submitted. While it has a couple of rough patches, all of the critical sections went extremely well, so I can't imagine any improvement without a whole lot of attempts going into it.