![]()
![]()
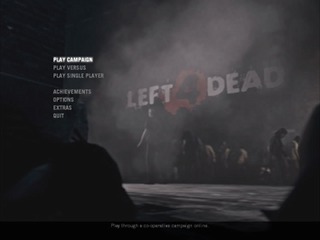
Released on November 13, 2008, Left 4 Dead received critical acclaim for its unique slant on zombie horror and first-person shooters. Four characters: a hot college girl, a biker, a veteran and a system analyst fight their way through a zombie-infested city, and your task is to guide them safely through. The game placed an emphasis on coop, but a single player mode is also available.
Category note: There are not enough differences between difficulties to count them as separate categories.
Return to the Game List, the FAQ, or the Home Page.
Individual-levels run on the PC version in 0:38:15:
Get Flash to see this player.
| Campaign - Level | Time | Date | Player |
| No Mercy - The Apartments | 0:00:27 | 2013-01-15 | 'Freezard' |
| No Mercy - The Subways | 0:01:24 | 2012-08-12 | 'Freezard' |
| No Mercy - The Sewer | 0:01:32 | 2012-08-13 | 'Freezard' |
| No Mercy - The Hospital | 0:02:40 | 2012-08-14 | 'Freezard' |
| No Mercy - Rooftop Finale | 0:04:02 | 2012-10-21 | 'Freezard' |
| Death Toll - The Turnpike | 0:01:13 | 2012-08-17 | 'Freezard' |
| Death Toll - The Drains | 0:01:13 | 2012-11-20 | 'Freezard' |
| Death Toll - The Church | 0:01:25 | 2012-08-29 | 'Freezard' |
| Death Toll - The Town | 0:01:18 | 2012-08-21 | 'Freezard' |
| Death Toll - Boathouse Finale | 0:04:37 | 2012-08-22 | 'Freezard' |
| Dead Air - Greenhouse | 0:00:43 | 2012-10-15 | 'Freezard' |
| Dead Air - The Crane | 0:01:01 | 2012-10-16 | 'Freezard' |
| Dead Air - The Construction Site | 0:01:44 | 2012-10-18 | 'Freezard' |
| Dead Air - The Terminal | 0:01:28 | 2012-10-19 | 'Freezard' |
| Dead Air - Runway Finale | 0:04:01 | 2012-10-20 | 'Freezard' |
| Blood Harvest - The Woods | 0:01:06 | 2012-10-23 | 'Freezard' |
| Blood Harvest - The Tunnel | 0:01:05 | 2012-10-23 | 'Freezard' |
| Blood Harvest - The Bridge | 0:01:27 | 2012-11-17 | 'Freezard' |
| Blood Harvest - The Train Station | 0:01:03 | 2012-10-31 | 'Freezard' |
| Blood Harvest - Farmhouse Finale | 0:04:46 | 2012-10-31 | 'Freezard' |
Freezard's comments:
No Mercy - The Apartments [-9s]
Originally I just improved this level by a couple seconds. Much later, coolkid showed me that it was possible to bunny hop in this game and so I was curious to try it out myself. Unfortunately the jump timing is very strict, down to a few frames, and you can't spam jump because there's a max input limit that will prevent you from jumping at all. Anyway, bunny hopping is doable in this level since it's just one open space with minimum RNG, and it saves 4 seconds which is a ton in a short level like this. I'm also using a glitch in the unpatched version that makes all bots spawn in the same place so I can kill them in two shots, and as a bonus it makes you able to move during the opening cutscene. If it wasn't for that cutscene skip I would have lost my sanity a long time ago, since I've done around 1000 attempts to get this time.
No Mercy - The Subways [-12s]
Taking six shots go kill two of the bots is crappy, but I blame their spawns. I leave the last bot behind to clear the way of Infected. The real timesaver comes from skipping the crescendo, and while Serial Gamer also did that, I'm doing it through a Tank boost which is much faster. This trick took forever to pull off; a Tank spawn in the generator room isn't actually that uncommon, but he needs to spawn in the right place as well. Both the spawn and the boost was perfect in this run.
No Mercy - The Sewer [-26s]
I knew you could skip the crescendo by smashing through the metal door with melee attacks on the unpatched version, but it took something like a minute to do alone. Then I read that a Tank can smash it down as well, and if you're positioned correctly, the door will break down in one punch even on the latest version. This run also took forever; even if I forced a Tank/Witch to spawn in the area by suiciding after every attempt, the Tank still needed to spawn in a good position and go after me and not the bots. Then he needs to kill the rest of the bots after switching to Expert, while I make it through the rest of the level, hoping for no second Tank or any Special Infected. Usually you will be forced to crouch after dropping down the manhole, but you can avoid it.
No Mercy - The Hospital [-12s]
Normally I would force a spawn next to the door here and skip the auto shotgun, but getting through the elevator crescendo on Expert with only a pistol is just a nightmare (although it does result in some funny situations).I'm doing a Common Infected hop here to save 4-5 seconds, and with the auto shotgun in my possession the rest of the level is pretty easy - you just need to kill the bots before the elevator arrives. The crescendo here is actually the only one in the game that you can't skip.
No Mercy - Rooftop Finale [-14s]
This finale isn't as bad as I first thought it was. If you manage to locate the Infected in time you can mow them down real fast since they'll be climbing up in groups. There will always be a few groups coming from the opposite side of the level, but it's not a biggie. The first Tank was a bit sloppy, I expected it to die earlier but my fellow teammates wouldn't fire at it, very appreciated. The second Tank however went down in a record time, and the Common Infected spawns were great. By the way, you may wonder why I'm staring at the tier 2 weapons just before the finale is starting... well, the bots are idiots and won't pick them up unless I tell them there are weapons right in front of their eyes. And oh, that Smoker in the end almost destroyed the whole run if it weren't for that one lucky shot. I didn't lose any time jumping into the helicopter because the ending doesn't trigger any earlier anyway.
Death Toll - The Turnpike [-9s]
Normally this level is pretty difficult to move through due to the Common Infected, but I was lucky this time as the horde spawned and went for the incapacitated bot.
Death Toll - The Drains [-44s]
There is an invisible platform in the crescendo area that helps me skip the event by hopping on Common Infected. Getting the bots killed by the AI is unfortunately really hard on this level due to them teleporting to you once you're about to exit the building.
Death Toll - The Church [-94s]
This huge save comes from an exploit in version 1.00 that made it possible to trigger the crescendo with a vocalization command. You still have to kill off the two waves of Common Infected before you can enter the safe room though, a job I leave to the bots, who also conveniently die.
Death Toll - The Town [-26s]
You can actually jump right over the fence with a bunny hop which would save 3 seconds or so, you will be down to 41 HP though and it's really hard to not take damage on this level. Once again the biggest improvement comes from skipping the crescendo by jumping over a truck. Actually you can run past the crescendo after 5 seconds or so when activating it normally, jumping over the truck just happens to result in a serious shortcut. This is done by a double Common Infected hop and it's dreadfully hard to do quickly. I got it on the second try here which is good enough, only losing a couple seconds. You're definitely not safe after the truck though, the ending of this level is always full of Special Infected.
Death Toll - Boathouse Finale [-56s]
Serial Gamer used the infinite grenade glitch to beat this level, while actually a few well placed molotovs is much more effective. After playing this finale for a while I noticed that most of the Common Infected spawned on the left side of the boathouse, so by throwing a molotov there for each wave you will kill most of the enemies before you even see them. The rest is taken care of by the Machine Gun which is seriously overpowered on this level. The Tanks also spawn on the left side most of the time, so I'm taking cover behind the walls to get to them quickly.
Dead Air - Greenhouse [-5s]
This is probably the easiest level in the game to speedrun solo. Until bunny hops came into the picture, that is. So the good thing is that you start with a molotov here, saving you the trouble of killing the bots with weapons. Then all you need to do is get through the first room filled with Common Infected, and the rest is a cakewalk. It is frustratingly difficult to do without using a pipe bomb though, so actually getting to the bunny hop spots in this level is a nightmare. I still got a pretty good run in the end, but unfortunately the time was the same as my non-bunny hop time because of a late ending trigger. Oh well, at least it looks cooler.
Dead Air - The Crane [-5s]
This campaign was really broken originally. You could easily skip both the crescendo and the big office in this level. On the latest version you would have to do some serious bunny hopping to skip the crane, and drop down on some pipes plus use pills to skip the office.
Dead Air - The Construction Site [-15s]
I'm taking a little shortcut in the beginning of the level, hopping on a Common Infected to get on top of the construction site. I've forgotten how much it saves but it's around 5 seconds. Again I'm running this level on version 1.00, since the fire crescendo is unskippable on the latest one. The new shortcut plus getting the bots killed by the enemy makes this level a pain to run. I was blocked shortly after the crescendo but otherwise it went perfect. Unfortunately I have not found a way to skip the last building, in co-op you can just do a super-jump.
Dead Air - The Terminal [-4s]
A joke. It's what this level is. Unfortunately you still have to pray to the RNG gods that the bots die. Say what, you're starting to see a pattern here? Yep, half of the challenge running solo is getting rid of the bots efficiently. The truck that triggers the crescendo will push you forward if it gets close to you, so you can bunny hop off of that, but it's just a couple jumps before you're forced to crouch through the hole anyway.
Dead Air - Runway Finale [-36s]
The most annoying finale in the game. You can get some good bunny hops while jumping down the first platform, but I didn't really know of bunny hops at the time. The Common Infected are really spread out on this level, making it really hard to finish quickly. The spot I'm camping is pretty good though, as there sometimes spawns a bunch of enemies behind the escape airplane and the green truck. Really now, they can spawn behind any solid object, but you have to stand somewhere don't you?
Blood Harvest - The Woods [-12s]
Ah... Blood Harvest. As if this campaign isn't hard enough getting through playing normally. Not getting hit on this level is ridiculously hard. The first area is literally crawling with enemies, usually the Common Infected limit of 30 is reached already here, and you pretty much have to force an early pipe bomb spawn as well to clear the next batch of enemies after the bridge. This is a really nice level for bunny hopping, and I hope to see such an improvement one day. Personally, I've already suffered enough to get this time.
Blood Harvest - The Tunnel [-9s]
An easy level. For some reason you never get to see the horde when going through the alarmed door, which triggers the crescendo. Not sure why, but it's nice and empty from then on. I do pull off some non-risky bunny hops that saves a few seconds.
Blood Harvest - The Bridge [-26s]
Ugh... ugly, ugly start. This is another difficult level, seeing as there are trees everywhere where enemies are lurking. It took me a while to find a skip for the bridge crescendo, but in the end I figured out a Tank boost that isn't entirely reliable. You might not think it saves much time since the crescendo is basically just running back to the broken bridge and up to the safe room, but that's actually a lot of running time. Getting the Tank to chase you without throwing rocks or freaking out is hard, but the path I'm using in this run is pretty solid.
Blood Harvest - The Train Station [-2s]
This is another level that would be fabulous for bunny hopping, although you can't jump down the cliff or you'll lose too much health. I've just optimized Serial Gamer's run however, because there isn't much else to it. Skipping the train cart is really easy, and why that shortcut still is in the game is quite a mystery to me.
Blood Harvest - Farmhouse Finale [-15s]
No, I'm not doing the part up to the farmhouse with pistol only, because it drives me insane. When you drop down the cliff to the corn fields, a horde will spawn. This is not good because it prevents enemies from the first wave of the finale to spawn, so you want to get rid of those as fast as possible. As for the actual finale... well, it's probably the worst one when playing solo. I got a few decent spawns in this run though.
Best multiplayer Crash Course: 0:06:21 by 'Freezard', Adam Kuczynski, Max Ylitalo, Lee Reeves.
Get Flash to see this player.
Author's comments:
For information about glitches and speedrunning L4D in general, visit the SDA Strategy Wiki.
Technical Details
Rendered at 1920x1080 @ 60 FPS
Graphical settings at max
Scaled down with a hardware scaler for the capture card (720p60)
This is one of the very few multiplayer speedruns on SDA, and quite possibly the first featuring four player online co-op. We're proud to be pioneers in this field, and hope to have some more runs to present in the future.
Here's a short breakdown of what happens in our run.
The Alleys
This level is relatively short and straight-forward. Unfortunately, Tanks can be extremely dangerous here because of how narrow the passages are. oasiz stays behind to lower the amount of Common Infected spawning on the way, while the rest of us move on. Trdef tried to fulfill this role once, but failed miserably every time, so we had to 'get rid of him' at one point. We are slowed down a bit when entering the building where the tier two weapons can be found, and when exiting through the window Flicky heroically sacrifices himself, in an act of altruism, to get rid of the Tank.
Normally you would then continue up to the bridge and fire the Howitzer to start a Crescendo Event, and then wait for a fire to burn out. However, we eventually found out that you can use pills to run straight through the fire, which saved us a whole minute. This was going to be part of our original route, but then we came up with an even better idea. We now skip the entire event by doing a pipe-bomb-super-duper-jump straight onto the bridge. This saves another 10-15 seconds and a lot of hassle, since we don't have to walk that much or risk running into Tanks or Common Infected when trying to fire the Howitzer.
Adam is our glorious omniscient, incredibly professional pipe bomb thrower so he always picks up a pipe bomb/molotov on the way (getting one is pretty much guaranteed, though they can spawn in somewhat clumsy locations). The pipe-bomb-super-duper-jump requires at least two players: the guy who jumps and the guy who throws a grenade. If you perform the throw correctly in sync with the jump, the game gets glitchy with the collision and the person who got hit with the grenade gets propelled upwards. The throw angle and timing have to be just right and the jumping has to be precise for it to work. Our success rate is around 80%, even with tons of practice due to the fact that there is some latency and the game tries to compensate for it. It took quite a few hours of practice to figure out how to make the throw and when precisely to jump. Coordinating the trick was quite difficult, but we managed to get a good feeling for it after numerous attempts. After a successful jump, Adam, the handsome thrower then waits until the one and only Freezard has almost reached the safe room, which helps keeping the ending area clear from Infected. At this point all the players are to be dead in order to trigger the transition to the loading screen. The completion time is 1:43, just approximately three seconds shy of our personal best, which featured some amazing luck.
The Truck Depot Finale
We reach this level roughly every fifth attempt, and this is where things start getting more difficult. Luckily, getting to the finale is usually pretty easy as there isn't all that much that can go wrong throughout the level. The starting area can be a pain, a horde is triggered by jumping on the car with the alarm, and we run into a random Tank, but neither parts caused any trouble in this run. However, the finale is the most difficult part of this campaign. The generator, which triggers the finale, can only be started when all players are within the finale area. This part went perfect since no players lagged behind, and so Freezard could start the generator with no delay.
The finale is like any standard finale, where in this case you wait for a certain time for the escape vehicle to lower itself after starting the generator. The lift has two different speeds: normally you barely notice the lift going down, but when you kill the second Tank, the game forcibly speeds up the descend to a matter of seconds. The main problem is that the generator tends to break down after a while, halting the lift and forcing a player to restart it, and one of the first things we did was to decompile the map to find out when this occurs. As it turns out, we had exactly 195 seconds to complete the finale before the generator would go nuts, counting from the instant the lights turn on. This means that our number one priority is to reach and kill the second Tank as fast as possible. Due to the luck needed in this part, only about 20% of the finale attempts were fast enough without the generator breaking down. To kill the hordes quickly you need to be lucky with the item spawns, which ranges from no items at all to seven pipe bombs plus a few gas cans. We were pretty lucky as we got three pipe bombs, two molotovs, and two gas cans, which is considerably better than what we usually got.
We spread out as much as possible to force the Infected to spawn quicker and to limit the places where Tanks may spawn. AdamAK is positioned at the entrance near the fence where he can get a fairly clear view of the street and can block Tank spawns; Flicky positions himself inside the building; Freezard and oasiz are just chilling around the bus. The first Tank actually got stuck in a window and de-spawned. It's not a perfect way of disposing of this Tank, but it is still far quicker than the average spawn. We got an incredibly lucky spawn for the second Tank, though, and destroyed it in a matter of seconds. At the very end, Adam was caught by a sneaky Smoker, something which had only happened us once before during a very successful run. It did not end up costing more than one and a half second this time though, and given the luck and good execution of the remainder of the run, this was certainly no reason to reset. We completed the level in 4:36 which is also our personal best.
We timed the run to around 6:20 (excluding the loading screen between levels). The recording is made based on the demo files we made while doing our attempts, hence the loading screens are automatically omitted.
People we'd like to thank for their support
Hope you guys have enjoyed the run!
Love and kisses,
Freezard | AdamAK | oasiz | Flicky | <<Team Perkele>>
Best multiplayer The Sacrifice: 0:05:38 by 'Freezard', Adam Kuczynski, Max Ylitalo, Lee Reeves.
Get Flash to see this player.
Author's comments:
!!! THIS SUMMER !!!
THE SACRIFICE - It's your [everyone's] (except Bill's cause he's the ~wind~!) funeral..
Level 1 - The Docks
Start of the map usually goes pretty smoothly, everyone grabs a weapon and tries to keep the zombies from getting too close. The first run killer isn't far away though, since we all have to grab an auto-shotgun in order to quickly kill an upcoming tank. There are four possible spots for the tier 2 weapons to spawn but we can only use three of those spots without having to make a detour. In total our chances of getting tier 2 weapons are about 85% but we still have to manipulate that auto-shotgun. This caused us to restart about a third of the runs that reached this far due to terrible weapon luck.
There is a static tank spawn in this map which is really great for speedrunning as you can predict the AI and finish him off before he gets to do any serious damage to anybody.
We decompiled the map to find out that the whole tank battlefield area is covered inside a trigger that checks if the tank is still there, if he is then the container door remains locked.
This means that we had to be very quick in finishing him off, as well as to manipulate him to stand on an even surface where the death animation finishes quicker. In this run the tank managed to die inside the container, blocking our path, but luckily it doesn't matter as the check is valid only after the tank becomes non-solid, so although it might look sloppy, we didn't actually lose any time there. We immediately reach and open up the door after this happens, and since we have already been running this level multiple times before, we timed this door opening to be one of the faster openings.
After the tank, we want Adam to be the front runner and oasiz to be closely behind as they will be performing a super jump. Adam should find a molotov in this section since he is the thrower, but also because it will help out with suiciding. He had to settle for a pipe bomb at first, but thanks to ~Bill's~ luck there was a molotov at the last possible spawn, so Adam took that one instead. Not getting a molotov would not necessarily have forced us to reset, since the remaining three players can kill themselves using explosive barrels and pistols. Killing oneself with a molotov is simply the most reliable and the quickest way.
For this campaign we have been coming up with an improved method of the super jump glitch compared to our Crash Course run. The new method requires less space and is much more consistent (our success rate is around 80%). Go to the Strategy Wiki for details about how exactly it works. Anyways, we use the super jump 2.0 in this section of the level to save about 7 seconds. At first we didn't bother with it since the success rate was terrible and everyone but oasiz needs to suicide before he reaches the safe room, which just caused us a lot of trouble. As our time got lower and lower though we really had to give it a go, and then a "brilliant" mind realized we could use the fire from the molotov to quickly burn ourselves to death, as it causes over 400 damage on Expert. Needless to say, Bill doesn't really give a shit about how the rest of us die, as long as we do it, and I don't think it was with sorrow that he moved along to the exit, hearing our screams of anguish as we burned to ashes.
A second voting round commences to change the skill back easy mode as we will want to continue as before for the next level.
Level 2 - The Barge
This is mostly straightforward running from here on. At the start we try to shoot as many zombies as possible and prepare for an early tank that can spawn. The early tank spawn is preferable to a later one, since at this point one player can simply grab the tank's attention and sacrifice himself. In this case, Adam decided to be the hero, since he was playing as Louise and running a bit behind anyway.
There is a tilted boat in the water roughly around the halfway of the level where you can land on the water and bunnyhop towards the land without the game applying any friction. This is a pretty precise trick that we attempt to perform each time. Freezard managed to pull it off but lost slightly some time later on, which oasiz compensated for losing some time as well. Around 2-3 seconds are potentially lost by not doing the bunnyhop correctly on the water and on the hill. Naturally, the issue with these bunnyhops is that multiple players would have to perform them successfully for there not to be a time loss, so this isn't very realistic in such a luck based 4-player co-op run without any scripts. The otherwise good luck around the map compensates for this as the tank usually appears on the boat or on the bottom of the hill, forcing us to reset.
The remainder of the level is a luck based section where you just have to wish for no tanks and no common infected near the end. One of the players jumps off the tilted truck to hang on to the boat. This allows the player behind to lift the jumper right on top of the boat, saving around half a minute overall. The lift trick relies on the fact that the game never stores where you fall down, it just checks the ledge that is closest to the player, so all you need to do is to jump towards the boat ledge and the game automatically thinks that you fell down from the boat. The only thing that is left is a survivor to lift the other player to the upper level.
The usual route would be to go up the hill and to trigger the crescendo, but this would very likely slow us down substantially. The other alternative Freezard and Adam tested extensively would be to perform a super jump onto the boat. The time needed for such a super jump might be a fraction of a second shorter, but it's far less reliable, since Adam would have to find a throwable item and make it safely to the boat area. The super jump is much much harder to perform if the jumper doesn't bump against a wall as well.
After the split-up, the rest can jump into the water and manipulate zombies to stay busy in order to reduce the chances of having zombies spawn at the end, by using the very amusing water-hopping glitch. This glitch is particularly fun when there's a tank around, as he jumps straight into the water to attack the hopping players.
Level 3 - Port Finale
The finale requires a lot of tight coordination and planning - a small error can easily ruin everything. The starting section usually has a pipe bomb so we throw that in order to get rid of the zombies, then we try to bunnyhop down the road to get to the finale area faster.
Immediately we decided that the conclusion on The Sacrifice comic sucks; we like Bill and want him to survive, because (apart from Louis) he's the coolest character, so we went back to the drawing board and found that the necessary conditions are:
1. One needs to be on top of the bridge to flip the switch.
2. One has to start the generator.
3. One has to restart the generator later on.
1. Firstly we switch to expert, then Adam helps oasiz near the bridge so that oasiz can super jump 2.0 on top of the bridge. oasiz needs to stay put for a while until Freezard is starting the generator, otherwise it will refuse to start as the game wants everybody to be inside the "real" finale area.
2. The generator starts up, and we vote to switch back to the easy difficulty level. oasiz has to flip the switch, but this can only be done when all the other survivors are downed. This is where the expert skill is required since they both shoot each other. The available time for Freezard and Adam to bring each other down is tiny; it has to happen after the generator is started, but before flicky respawns in the closet.
3. Since this all happens before the finale has started for real, the game thinks that oasiz is the last hope, but then flicky respawns due to an automatic "start-finale-auto-rescue-survivors" feature, so at this point we should have switched back to easy so that flicky will have an easier time restarting the generator, which brings the bridge back up again.
All three survivors die and Bill survives. History rewritten. Bill takes "care" of his own.
People we'd like to thank for their support
Coat Hanger
Casco
Michael Jackson
Eduardo Khil
The George Foreman Grill
Billy Mays
Whitney Houston
Mike Tyson
Tupac
But not Elvis, because he's still alive!
flicky's comments: I would like to apologise for the above comments. They're just awful. Can you believe European people? Ridiculous. I mean the George Foreman Grill isn't even dead and it isn't a person. Either way, this run is good. It may appear like I'm doing very little but I'm actually a key component of the run. Freezard and I are the true champions here. The other two just sorta... well I don't know. I hope you enjoy the run.